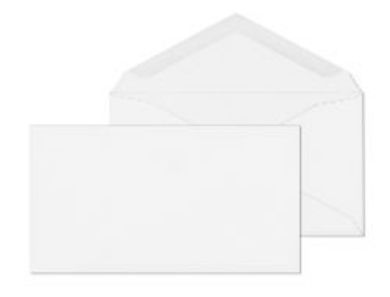

A standard white business envelope is fine for most outgoing mail. But not all mail is the same. A payroll check, a medical statement, a client invoice showing account details, a legal notice, or a financial disclosure packet all contain information that should not be readable to anyone who handles the envelope before it reaches the intended recipient. That is the job a security envelope does that a plain white envelope cannot.
Security envelopes for business are not a specialty item for unusual situations. They are the operational standard for accounts payable teams, payroll departments, healthcare billing offices, law firms, financial institutions, and any organization that processes outgoing mail containing personally identifiable or financially sensitive information. Business Envelopes has supplied every format covered in this guide to US businesses since 1997. This guide covers exactly how they work, the available formats and sizes, how to choose between them, and which closure type keeps confidential content safe for every volume and workflow.
What Is a Security Envelope?
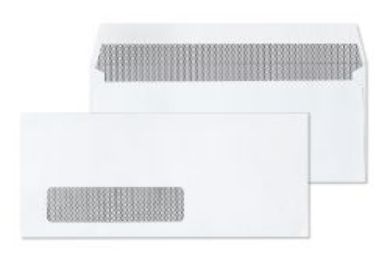
A security envelope is any mailing envelope designed to protect the contents' privacy during transit. The most common form is the security-tinted envelope, which has a patterned interior that blocks document text from being read through the paper when the sealed piece is held to light. The exterior looks identical to a standard white envelope. The protection is entirely internal.
Beyond tinting, security envelopes include formats with opaque paper stock for flat-document mailers. Tamper-evident closures show visible signs if someone attempts to open and reseal the piece. Durable material options such as Tyvek combine privacy with tear resistance for high-value or long-route document transit.
The critical distinction: a security envelope protects the privacy of contents in transit. It is one layer of a broader mail privacy program. For regulated industries, the envelope type is part of a larger compliance posture that includes document formatting, handling procedures, and staff training. The envelope itself reduces transit risk, but it does not replace the process.
How Security Tinting Works and How to Verify It
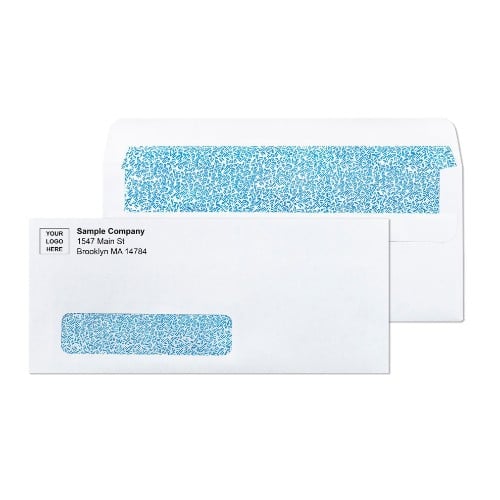
Security tinting is a printed interior pattern applied to the inside of the envelope during manufacturing. The pattern, typically a blue or gray geometric design, creates visual interference that makes text printed on the enclosed document unreadable through the envelope body when the sealed piece is held to light. The window opening, if the envelope has one, remains fully transparent, so the address block shows through normally. Only the paper body carries the tinting.
The tinting covers the front panel of the envelope interior at a minimum. Some lower-cost security envelopes apply tinting to the back panel only. Back-panel-only tinting provides limited practical protection because a sealed envelope is typically examined from the front face when held to light. Every security-tinted envelope at Business Envelopes carries full interior tinting coverage that blocks read-through from the front face, which is where the protection actually needs to be.
The light test: how to verify your security tinting is adequate
Before committing to a large security envelope order from any supplier, run this test on a sample. Insert a document with clear, black printed text into the sealed envelope. Hold the front face toward a bright overhead light or a window in direct daylight. No text should be readable through the envelope body. Individual letters, numbers, or shapes should not be distinguishable even in outline form.
If any text is readable, the tinting is insufficient for documents containing account numbers, balances, routing numbers, Social Security numbers, patient data, or compensation information. Upgrade to a heavier paper stock, a denser tinting pattern, or a Tyvek format before ordering in volume.
★★★★★
"The quality of the paper feels much more substantial than envelopes I have ordered from sites like Office Depot. The tinting is solid, and you cannot see through it at all. Definitely will be re-ordering."
Anonymous | Verified buyer, Double Window Check Envelopes Security Tinted
★★★★★
"I have now ordered from businessenvelopes.com four times. Every time, my order is perfect and always looks exactly as ordered."
Verified buyer | Double Window Security Check Envelopes Peel and Seal
The Three Types of Security Envelopes
Security envelopes for business fall into three distinct categories. Each addresses a different privacy and protection need. Understanding the differences determines which type is correct for a given mailing program.
Type 1: Security tinted envelopes
Security-tinted envelopes are the standard for everyday business mail containing sensitive information. The interior tinting pattern prevents the document contents from showing through the paper. The exterior is standard white wove. They are available in plain format, single window, and double window configurations, and in the full range of commercial sizes from #9 reply envelopes through #10 standard business correspondence.
This is the correct format for monthly billing statements, financial account statements, payroll notices, and insurance correspondence. The format flows through standard mailing equipment, laser printers, and inserter machines without modification.
Type 2: Opaque paper flat mailers
Large-format flat document mailers, typically 9x12 and larger, use heavyweight paper stock that provides opacity without interior tinting. The paper weight, 28 lb or heavier, combined with the larger format, makes content visibility through the envelope body a non-issue in most cases. These formats are used when documents cannot be folded, such as multi-page contracts, tax document packets, medical records, legal filings, and financial disclosure packets.
The postage classification for 9x12 and larger envelopes is First-Class flat rate, starting at $1.63 for the first ounce in 2026. Each additional ounce adds $0.20. A typical multi-page document packet in a 9x12 envelope falls in the $1.63 to $2.43 range, depending on weight. See the complete range of large-format options in all sizes of envelopes.
Type 3: Tyvek envelopes for maximum protection
Tyvek envelopes are made from DuPont spunbonded polyethylene fibre, not paper. They do not tear under lateral force, do not delaminate when wet, and do not fail at seams when heavy content shifts during postal sorting. For documents whose contents are sensitive and whose physical condition on arrival is critical, such as legal filings, medical records, and original signed contracts, Tyvek provides both privacy and physical integrity that paper formats cannot match.
Tyvek is the correct choice when the document's replacement cost, legal significance, or physical irreplaceability justifies the upgrade from standard paper. See all available formats at Tyvek envelopes.
| Type | Privacy Method | Best For | Available Sizes |
|---|---|---|---|
| Security tinted | Interior tinting pattern blocks read-through | Checks, statements, payroll, billing, and insurance notices | #9, #10, 8-7/8 x 3-7/8 check format |
| Opaque flat mailer | Heavy paper stock prevents visibility | Contracts, tax packets, medical records, legal filings | 9x12, 10x13, 10x15 |
| Tyvek | Opacity + tear resistance + moisture resistance | High-value originals, medical records, legal documents, long-route transit | 9x12, 10x13, 10x15 |
Security Envelope Sizes and Formats
Choosing the right size for a security mailing comes down to what the document is, how it is folded or presented, and which postage class it needs to qualify for.
Check envelope sizes: the double window standard
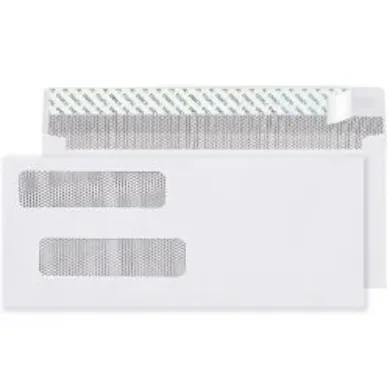
The standard check envelope measures 8-7/8 inches by 3-7/8 inches. This is the format specifically designed for the standard US business check, which measures 8.5 by 3.5 inches, leaving approximately a quarter inch of clearance on each side. Every check envelope at Business Envelopes uses a double window configuration and security-tinted interior.
The double window is not optional for check programs. The upper window shows the payer's return address. The lower window shows the payee's delivery address. Both come directly from the printed check inside, so no addressing is ever required on the envelope face. The security tinting keeps routing numbers, account numbers, authorized signatures, and check amounts invisible until the envelope is opened. This format is compatible with all QuickBooks versions, Sage, ADP, and all standard US payroll platforms. See the full check envelope range at check envelopes.
★★★★★
"Gives my checks a professional look. I highly recommend BusinessEnvelopes.com."
Cindy, Steller Management | Verified buyer, Double Window Check Envelopes
#10 security envelopes: the billing standard
The #10 envelope (4-1/8 x 9-1/2 inches) is the most widely used security envelope format for billing statements, account notices, insurance correspondence, and payroll letters. It holds a standard 8.5 x 11 inch sheet tri-folded and mails at First-Class letter rate, the lowest available postage class at $0.78 for one ounce in 2026.
Security-tinted #10 envelopes are available in plain format (delivery address printed or labelled on the face), single window format (delivery address shows from the document inside), and double window format for programs where both payer and payee addresses come from the document. For high-volume billing operations, the single window with security tinting is the most efficient combination: the software handles the address, the tinting handles the privacy, and the letter rate keeps postage at the lowest available tier. See all configurations at #10 envelopes.
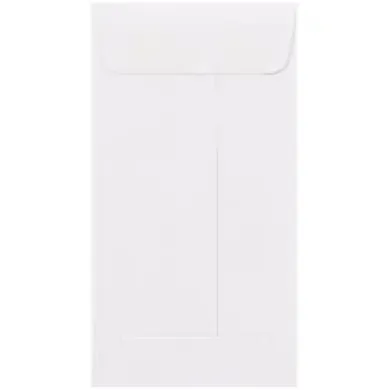
#9 reply envelopes with security tinting
The #9 envelope (3-7/8 x 8-7/8 inches) is the standard reply and remittance format that nests inside an outgoing #10. For billing programs where the payment return envelope carries check or payment information back to the organization, a security tinted #9 ensures the return path carries the same privacy protection as the outgoing statement. Using a plain #9 inside a security-tinted #10 outgoing leaves the return path unprotected.
9x12 and larger formats for flat documents
Documents that cannot be folded, such as multi-page legal filings, tax packets, medical records, and financial disclosure documents, require a flat-format envelope. The 9x12 is the standard size for unfolded 8.5 x 11 sheets, holding them with clearance on all sides. At 9x12 and above, the paper weight provides adequate opacity for most document types without additional tinting.
USPS postage for a 9x12 envelope starts at $1.63 for the first ounce in 2026. Each additional ounce is $0.20. For a typical three-page contract in a 9x12 envelope, total postage runs $1.63 to $1.83, depending on paper stock weight. Always weigh the sealed piece before applying postage, as paper weight and the envelope itself both contribute to the total. See flat-format options at all sizes of envelopes.
Closure Types for Security Envelopes
The seal on a security envelope matters almost as much as the tinting. An envelope with strong privacy protection that arrives with a failed seal or an accidental pre-activation defeats the purpose. Three closure types are available across the security envelope range, each suited to different volume levels and equipment configurations.
Gummed flap: the inserter machine standard
A gummed flap envelope has a water-activated adhesive strip on the inside of the sealing flap. The adhesive requires moisture to activate and bonds on contact once moistened. For organizations using automatic inserter equipment, a gummed flap is the required closure type. Inserters are designed around this format and moisten and seal the flap mechanically as part of the insertion sequence.
For large-volume billing programs running through inserter equipment, gummed flap security envelopes are the correct format. The equipment was designed for them. Substituting peel-and-seal or flip-and-stick formats in inserters that are not configured for them causes jams and incomplete seals.
Peel-and-seal: the hand-sealing standard
Peel-and-seal envelopes have a release liner over the adhesive strip on the inside of the flap. Peel the liner, fold the flap, press firmly, and the seal is complete with no moisture required. The liner protects the adhesive until the moment of sealing. The envelope can be stored in humid environments without the adhesive pre-activating. Laser printers can print directly on the envelope face without fuser heat, triggering an early seal.
Peel-and-seal is the most practical closure for hand-sealing operations at moderate to high volume. It is the correct choice for most accounts payable teams, payroll departments, and billing operations that do not use inserter equipment. The seal is consistent, tamper-evident, and does not require training beyond peeling and pressing. For the complete peel-and-seal range, see self-seal envelopes.
Flip-and-stick: the fastest hand seal
Flip-and-stick envelopes have adhesive on both the inner surface of the flap and on the envelope body below the flap edge. When the flap folds over and presses against the body, the two adhesive surfaces bond on contact. No liner to remove, no moisture required. Fold and press: sealed.
Flip-and-stick is the fastest per-piece closure for high-volume hand-sealing runs. Eliminating the liner-removal step reduces the hand motions per piece, which accumulates to meaningful time savings across a run of several hundred pieces. The trade-off is that adhesive on both surfaces must be covered during storage. Accidental contact between the flap and the envelope body before you are ready to seal requires opening the envelope to reset it, which is not always possible cleanly.
| Closure Type | How It Seals | Best For | Not Suited For |
|---|---|---|---|
| Gummed flap | Moisture activates the adhesive | Inserter machine programs; long-term storage before sealing | High-volume hand sealing without water source |
| Peel-and-seal | Liner protects adhesive; peel and press | Hand-sealing programs at any volume; laser printer compatibility | Inserter equipment not configured for peel-and-seal |
| Flip-and-stick | Dual adhesive surfaces bond on contact | High-volume hand sealing where speed is the priority | Programs where accidental pre-sealing would waste materials |
Which Industries Need Security Envelopes
Security envelopes for business are not industry-specific in a formal regulatory sense, but certain sectors generate the types of documents that make security tinting or Tyvek the operationally correct default.
Financial institutions and accounting firms
Banks, credit unions, financial advisors, and accounting practices routinely mail account statements, check packages, 1099s, W-2s, tax return packets, and client correspondence that contains account numbers, balances, routing numbers, and Social Security numbers. Security tinted #10 and double window check envelopes are the standard for statement and check mail programs in this sector. Opaque 9x12 envelopes handle tax packets and multi-page disclosure documents that cannot be folded.
Healthcare organizations
Medical practices, hospitals, insurance companies, and healthcare billing services send explanation of benefits (EOB) statements, appointment reminders with patient identifiers, billing statements showing procedure codes and coverage details, and correspondence that may contain protected health information. Security-tinted window envelopes are the standard for the billing portion of these programs. For medical records and clinical summaries that cannot be folded, Tyvek or heavy-stock 9x12 formats are appropriate.
Security-tinted envelopes support healthcare privacy programs by reducing the risk of contents being visible during transit. Full compliance with HIPAA requirements depends on the organization's complete mailing process, not the envelope type alone. Consult your compliance team to confirm that your mailing workflow, address formatting, and handling procedures meet current requirements alongside the envelope choice.
Legal practices
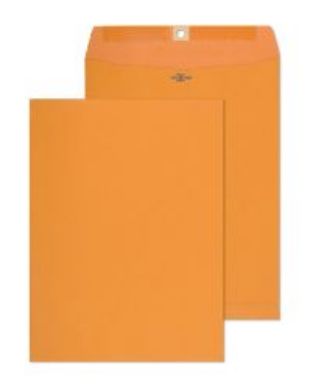
Law firms and legal departments mail client correspondence, case notices, settlement documents, regulatory filings, and other sensitive documents on a routine basis. For standard correspondence, security-tinted #10 envelopes are appropriate. For case files, pleadings, and multi-document packets, opaque 9x12 and 10x13 flat mailers or Tyvek formats ensure the document arrives undamaged and unread. Clasp envelopes in 10x13 and 10x15 sizes are standard for internal document routing in legal environments, though they trigger a USPS non-machinable surcharge of $0.49 per piece when mailed with the clasp attached. See the complete guide to clasp envelope mailing at Can You Mail Clasp Envelopes.
Human resources and payroll departments
Payroll checks, pay stubs, benefit statements, W-2s, offer letters with compensation details, and disciplinary documentation all contain information that employees reasonably expect to remain private during mail handling. Double window security-tinted envelopes handle check programs. Security-tinted #10 envelopes handle the correspondence and statement mail. For high-volume payroll operations, window formats aligned to the payroll software output eliminate the addressing step and reduce per-piece processing time significantly.
Insurance companies
Insurance correspondence routinely includes policy statements showing coverage amounts, claim settlement documents, personal health information, and billing notices. The document types are similar to healthcare. Security-tinted window envelopes handle standard-format statements. Opaque flat mailers handle multi-page policy documents and claim packets. Tyvek is appropriate for original documents that must survive long transit routes without physical damage.
Security Envelope Decision Guide: Choosing the Right Format
The correct security envelope comes from answering four questions in sequence. What is the document? How is it formatted, and does it fold? What is the privacy risk if the contents are visible? And what volume and equipment does the mailing operation use?
| Document Type | Format | Size | Closure | Where to Find It |
|---|---|---|---|---|
| Payroll or accounts payable checks | Double window, security-tinted | 8-7/8 x 3-7/8 in | Peel-and-seal or gummed flap | Check envelopes |
| Monthly billing statements | Single window, security-tinted | #10 | Gummed flap (inserter) or peel-and-seal (hand) | Window envelopes |
| Account correspondence and payroll letters | Plain, security-tinted | #10 | Peel-and-seal or gummed flap | Regular envelopes |
| Reply and remittance envelopes | Plain or window, security-tinted | #9 | Gummed flap | Regular envelopes |
| Tax documents, contracts, legal filings | Opaque flat mailer | 9x12 or 10x13 | Peel-and-seal or gummed flap | All sizes of envelopes |
| Medical records, original documents, high-value packets | Tyvek, opaque | 9x12, 10x13, or 10x15 | Peel-and-seal | Tyvek envelopes |
Custom Printing on Security Envelopes
Security-tinted envelopes are fully compatible with custom printing. The exterior face is standard white wove stock that accepts logo printing, return address printing, and colour printing in the same quality and at the same specifications as any other commercial envelope. The interior tinting is separate from the exterior print process and is not affected by the printing on the face.
For billing programs and payroll operations, custom printing the organization name and return address directly on the security envelope face eliminates the manual return address label step and creates a consistent, professional appearance for every outgoing piece. A security-tinted window envelope with a custom-printed return address and logo on the face is the complete solution for a high-volume secure billing program. The delivery address shows through the window from the document inside, and the interior tinting protects the contents.
Custom printing is available on security-tinted #10 envelopes in black, single colour, two-colour, and full colour. PDF proof before production. Artwork on file for reorders. No minimum order requirement on any format. See the full custom printing range at printed envelopes.
Why Business Envelopes for security envelope programs
Business Envelopes has supplied security-tinted envelopes to US financial institutions, healthcare billing operations, law firms, and government agencies since 1997. The security tinted stock across every format in the catalogue carries front-panel tinting coverage that passes the light test for standard business security requirements. Free ground shipping on every order to the contiguous 48 states. No minimum order on blank or custom-printed stock. Blank security-tinted envelopes ship the same or next business day. Custom-printed orders ship within 7 to 10 business days from proof approval.
For programs ordering in volume, envelope templates for the double window check format, the #10 single window, and all standard security formats are available at the envelope templates guide.