 Free shipping
Envelope Blogs
-

#10 Business Envelopes: The One Supply Every US Office Orders But Few Fully Understand
Walk into any office supply room in the United States and you'll find the same thing: a shelf of #10 business envelopes. They go out in the mail every week - carrying invoices, statements, checks, and correspondence - without anyone stopping to question whether the specification is actually right for the job. Most of the time it works. But when window positions don't align with billing software, or seal types conflict with inserter equipment, or confidential documents go out in envelopes that offer no interior privacy, the problem traces back to an ordering decision that was never examined closely enough. This guide fixes that.
What Makes a #10 Envelope the American Standard
The #10 envelope measures 4 1/8 inches by 9 1/2 inches. That specific dimension wasn't chosen arbitrarily - it was built around the standard US letter sheet. Fold an 8.5 x 11 inch sheet into three equal horizontal sections and it fits a #10 envelope cleanly, with proper margins on all sides and no forced creasing or bunching.
That fit matters for three distinct reasons. First, it qualifies the mailing for USPS letter-rate postage - the lowest tier available for business correspondence. Once an envelope exceeds the standard letter dimensions, it gets reclassified as a flat-mail piece and postage increases accordingly. For billing departments sending several hundred statements per month, or marketing teams running direct mail campaigns, staying inside the letter-rate classification is a genuine budget consideration.
Second, the #10 format is universally compatible with mailing equipment. Every desktop laser printer, office inkjet, and industrial mailing machine inserter on the market is designed with the #10 in mind. No compatibility checks, no margin adjustments, no special handling. It loads and processes without friction.
Third, the tri-fold presentation is clean. Documents arrive flat, properly folded, and looking professional rather than wedged into an envelope that was too small or rattling around in one that was too large.
That combination -right postage, right equipment compatibility, right presentation -is why the #10 has held its position as the default for US business mail for decades. The format does exactly what it needs to do, consistently, without demanding attention.
The Specification Decisions That Actually Determine Whether It Works
The size is fixed. Everything else is a variable. And those variables are where ordering decisions either get it right or create operational problems downstream.
Window Configuration
This is the decision that produces the most real-world mailing errors when it's gotten wrong.
A non-window #10 requires the envelope to be addressed separately - printed directly on the envelope, applied via label, or handwritten. For personalized correspondence, executive communications, and individually addressed mail, this is correct. For billing operations running hundreds of pieces at a time through accounting software, it creates unnecessary manual work and introduces human error into the addressing step.
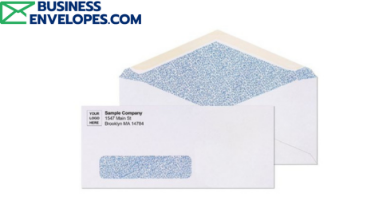
A single window envelope has a transparent opening in the lower-left area of the envelope face. The recipient's address, already printed on the document inside, shows through. Nothing is written or applied to the envelope. The document and the envelope work as one system - addressing happens at the printing stage, not the mailing stage. For invoices, statements, and any standardized business mail produced by accounting or billing software, single window is the operationally correct format.
A double window envelope adds a second opening for the sender's return address, also pulled from the document inside. This format exists specifically for check mailing. When QuickBooks, Sage, Peachtree, or any compatible payroll platform prints a check with both the payer and payee addresses already on the form, the double window envelope handles the entire addressing step automatically. Payroll and accounts payable teams running regular check runs don't treat this as optional — it's the only format that processes correctly.
The practical rule is straightforward: match the window to your software's document output. If your invoices print with a recipient address in the lower-left when tri-folded, use single window. If your checks carry both addresses, use double window. If your documents don't have a consistent address position, use no window.
Seal Type
Three options exist across the #10 format, each with a clear right use case:
Gum flap carries water-activated adhesive on the flap. Moistening activates the seal. Industrial mailing machine inserters are designed around this type — they moisten and close flaps mechanically as part of the insertion sequence. If your operation uses an inserter, confirm what seal type the equipment requires before ordering. Substituting self-seal in a machine built for gum flap creates feed errors.
Peel-and-seal uses a pressure-sensitive adhesive strip under a protective liner. Peel, press, sealed -no moisture needed. The bond is tamper-evident. Best for teams sealing by hand at moderate weekly volumes.
Flip-and-stick bonds latex adhesive on both the flap and envelope body when pressed together. No liner to remove. Slightly faster than peel-and-seal for repetitive hand sealing. The adhesive has roughly a 12-month shelf life, which limits how far ahead you'd want to stock it.
If the question is hand sealing versus machine sealing, the answer determines the seal type. Everything else is secondary.
Security Tinting
Security tinting is an interior print pattern - typically a dark cross-hatch design - that makes envelope contents completely unreadable when held to light. Only the address block showing through the window remains visible from outside.
For financial statements, patient correspondence, insurance documents, legal notices, payroll information, and check mailings, this is not an optional upgrade - it's the professional standard. A clear envelope where account numbers and payment amounts are visible to anyone handling it during transit is an operational risk that security tinting eliminates at minimal cost. Healthcare billing operations, financial institutions, law offices, and payroll departments use security-tinted envelopes by default.
Custom Printed #10 Envelopes: When the Envelope Becomes Part of the Message
A blank #10 delivers the mail. A custom printed #10 delivers the mail and the brand simultaneously.
Pre-printing your company logo, return address, and brand colors on the envelope face does three things at once. It removes the manual return address application step from every mailing. It ensures your return address is always accurate and consistent. And it means your brand is present the moment the envelope enters someone's hands -before it's opened, before the contents are read.
For organizations mailing regularly at volume, the operational math on custom printing is straightforward. The cost difference between blank and printed envelopes is smaller than most purchasing managers expect. The time saved from eliminating manual address application and the brand consistency gained across every piece of outgoing correspondence make it one of the most practical upgrades available in a mailing workflow.
Custom printing is available on both window and non-window #10 formats. Security tinting is compatible with custom printed exteriors, meaning brand presence on the outside and content protection on the inside aren't competing requirements - they work on the same envelope
Why BusinessEnvelopes.com for #10 Business Envelopes
There are plenty of places to buy #10 envelopes. Most of them are general retailers where envelopes are one line item in a broad catalog. BusinessEnvelopes.com has been supplying envelope-specific inventory to US businesses since 1997 - nearly three decades of working with billing departments, payroll teams, legal offices, healthcare administrators, and operations managers who depend on their mailing supplies to work correctly every week.
That depth of specialization shows in the practical details. Window positions are specced to the standard output positions of QuickBooks, Sage, Peachtree, and other major platforms. Security tinting is a standard catalog option across window configurations, not a special order with extended lead time. Every seal type, paper weight, and print option is organized around actual mailing workflow decisions, not just product variety.
No minimum order means you order what your operation needs - whether that's one box or a full pallet - without being pushed into excess inventory that degrades before it's used. Free ground shipping applies across the entire catalog. And because the product knowledge runs deep, questions about window alignment, software compatibility, or inserter seal requirements get real answers.
Conclusion
The #10 business envelope is the most ordered, most relied-upon, and least examined supply in most US offices. Getting the specification right -window type matched to your software, seal type matched to your process, security tinting where your content requires it - determines whether it runs smoothly or creates friction that compounds across every mailing cycle. BusinessEnvelopes.com carries every configuration of the #10 format, stocked to the specifications that real mailing operations need, with no minimum order requirement and free ground shipping site-wide. For offices that depend on mail running correctly week after week, that combination of expertise and availability is exactly what a supplier relationship should deliver.
FAQs
Q: What does a #10 business envelope measure?
4 1/8 x 9 1/2 inches. It fits a standard 8.5 x 11 sheet folded into thirds and qualifies for USPS letter-rate postage, keeping mailing costs at the lowest tier.
Q: How do I know whether I need a window or non-window #10?
If your billing or accounting software prints documents with a consistent address block, use window envelopes. Non-window suits personalized or individually addressed correspondence requiring separate addressing.
Q: What seal type works best if my team seals envelopes by hand?
Peel-and-seal or flip-and-stick both work cleanly without moisture. Flip-and-stick is marginally faster. Gum flap is specifically for automated mailing machine inserter equipment.
Q: Is security tinting only for large businesses?
No. Any business mailing financial documents, medical correspondence, legal notices, or check payments should use security-tinted envelopes regardless of volume or company size.
Q: Can I get custom printing on window envelopes with security tinting?
Yes. Custom exterior printing and interior security tinting are both available on the same envelope at BusinessEnvelopes.com.
Q: Is there a minimum order quantity for #10 business envelopes?
No minimum at BusinessEnvelopes.com. Order exactly what your mailing cycle requires, with free ground shipping on every order regardless of quantity.
-
Custom Printed #10 Window Envelopes: Brand Every Piece of Mail You Send
Every invoice, statement, and business letter your company mails is a brand touchpoint. Most businesses treat the envelope as an afterthought - a blank white carrier that gets torn open and discarded. That's a missed opportunity. Custom printed #10 window envelopes put your logo, brand colors, and return address on every outgoing piece without adding a single manual step to your mailing process. The window handles addressing automatically. The printing handles your brand. The result is professional, consistent business mail that looks intentional from the moment it lands in someone's hands.
What Makes the #10 Window Envelope the Right Format for Custom Printing
The #10 envelope is the American standard for business mail - measuring 4 1/8" x 9 1/2", it takes a standard 8.5" x 11" sheet folded into thirds and qualifies for USPS letter-rate postage. It's what billing departments, law offices, insurance companies, and accounting teams reach for by default because it works with virtually every document their software outputs.
Adding a window to that format makes it smarter operationally. The transparent opening - positioned in the lower-left area of the envelope face - shows the recipient's address directly from the document inside. No labels. No manual addressing. No risk of a mismatch between the envelope and its contents. The document and the envelope work as a single system.
What custom printing adds to that system is brand presence. A blank #10 window envelope gets the job done. A custom printed #10 window envelope with your company name, logo, and return address pre-printed on the front does the same job while making your business look established, consistent, and professional before the recipient reads a single word of what's inside.
For companies sending invoices, account statements, legal correspondence, or any high-volume business mail, the difference between blank and custom printed isn't cosmetic - it's the difference between mail that looks like it came from a business and mail that looks like it came from your business.
What You Can Print on a #10 Window Envelope
Custom printing on business envelopes isn't limited to a small return address in the corner. The full face of a #10 envelope gives you meaningful surface area to work with, and the window position is fixed - which means everything printed around it can be designed intentionally.
Here's what typically goes on a custom printed #10 window envelope:
- Company logo - positioned in the upper-left area, above or alongside the return address
- Return address - pre-printed so it's consistent across every piece and eliminates the need for labels or handwriting
- Brand colors - envelope printing supports single-color and full-color options depending on your budget and brand requirements
- Taglines or messaging - some businesses use the envelope face for a short brand statement, a department identifier, or a compliance notice
- QR codes - increasingly common for marketing mail, linking recipients to a landing page or payment portal before they've opened the envelope
The window itself creates a natural design constraint that actually helps: everything printed on the envelope has to work around a fixed opening in the lower-left. Good envelope design accounts for that, using it as an anchor point rather than fighting it.
One practical consideration worth knowing: if you're printing full color, ensure that nothing in the design area overlaps or competes visually with the address block showing through the window. USPS OCR equipment needs to read that address cleanly, and a busy printed background immediately behind the window can create readability problems.
Choosing Between Single-Color and Full-Color Printing
The right print specification for your envelopes depends on how you use them and what you want them to communicate.
Single-color printing - typically black, navy, or your primary brand color - is the practical choice for most business mailing operations. It's cost-effective, prints cleanly on white wove stock, and looks sharp for everyday invoice, statement, and correspondence mailing. If your logo works well in a single color (which most professional logos do), single-color printed envelopes give you 90% of the brand impact at a fraction of the cost of full-color production.
Full-color printing makes sense when the envelope itself is doing marketing work - when you're running a direct mail campaign, announcing a new product or service, or mailing to prospects rather than existing clients. Full-color envelopes stand out in a physical mailbox the same way a well-designed ad stands out on a page. The envelope becomes part of the message, not just the carrier.
For day-to-day transactional mailing - invoices, statements, payroll correspondence, legal notices - single-color custom printed envelopes are the professional standard. For outbound marketing, client acquisition, or high-value communications where first impression carries extra weight, full-color is worth the investment.
Security Tinting on Custom Printed Window Envelopes
If your business mails financial documents, healthcare correspondence, legal notices, or any content where confidentiality matters during transit, security tinting belongs in the specification alongside custom printing.
A security-tinted envelope has a darkened interior pattern - typically a cross-hatch or geometric design printed on the inside - that makes the contents completely unreadable by holding the envelope up to light. Only the recipient's address, showing through the window, remains visible from outside.
Custom printing and security tinting are not mutually exclusive. You can have your logo and return address printed on the exterior and full security tinting on the interior, giving you brand presence on the outside and complete content protection on the inside. For billing departments, insurance companies, healthcare billing operations, and law firms, this combination is the professional standard - not an optional upgrade.
Security-tinted window envelopes available at BusinessEnvelopes.com can be custom printed to your specifications, so confidentiality and brand consistency work together rather than requiring a tradeoff.
Why BusinessEnvelopes.com Is Where Your Custom Printed #10 Window Envelopes Should Come From
There are plenty of places to order printed envelopes. Most of them are general print shops that treat envelopes as one item in a catalog of thousands. BusinessEnvelopes.com has been doing exactly this - supplying professional-grade envelopes to US businesses - since 1997. That's not a marketing line; it's nearly three decades of understanding what accounting departments, billing teams, legal offices, and operations managers actually need from their mailing supplies.
When you order custom printed #10 window envelopes here, you're not working with a generalist printer who happens to carry envelopes. You're working with a specialist who knows that window position alignment matters, that security tinting specifications vary by use case, that paper weight affects how envelopes feed through inserters, and that a business ordering 500 envelopes a month needs a supplier who gets that right every time - not just on the first order.
The inventory is built around the formats US businesses actually use. The #10 window is the core of the catalog, not an afterthought. Every printed envelope ships to USPS specifications so you don't get hit with non-machinable surcharges or alignment failures mid-run. And because there's no minimum order requirement, you can order what you actually need rather than committing to quantities that sit in a storage room for two years.
Custom printing is available in single-color and full-color formats. You submit your artwork - logo, return address, any additional elements - and receive envelopes that represent your business the way your business deserves to be represented. Free ground shipping applies site-wide. No minimum order. No compromise on quality.
If you're still mailing invoices in blank envelopes or applying return address labels by hand, you're spending time and money on a problem that custom printed window envelopes solve permanently. It's one of the simplest operational upgrades a mailing-dependent business can make, and the cost difference between blank and printed envelopes is smaller than most people expect.
Conclusion
Custom printed #10 window envelopes combine operational efficiency with consistent brand presentation across every piece of mail your business sends. The window eliminates the addressing step. The custom printing ensures your logo, company name, and return address appear on every outgoing envelope without manual effort. Add security tinting for confidential correspondence and you have a complete mailing solution that handles compliance, branding, and workflow efficiency simultaneously. For businesses that mail invoices, statements, legal documents, or any regular correspondence at volume, this is the format that removes friction and adds professionalism to a process that happens every single week. Order exactly what you need at BusinessEnvelopes.com - no minimums, free ground shipping, and nearly thirty years of envelope expertise behind every order.
FAQs
Q: What is a custom printed #10 window envelope?
A #10 window envelope with your company logo, return address, and brand colors pre-printed on the exterior. The window shows the recipient's address from the document inside automatically.
Q: Can I order custom printed #10 window envelopes without a minimum quantity?
Yes. BusinessEnvelopes.com carries no minimum order requirement, so you can order exactly the quantity your mailing operation needs.
Q: Do custom printed window envelopes work with billing and accounting software?
Yes. Standard #10 window envelopes align with QuickBooks, Sage, Peachtree, and most billing platforms. Custom printing doesn't affect window position or document alignment.
Q: Can I get security tinting on custom printed window envelopes?
Yes. Custom exterior printing and security interior tinting are both available, giving you brand presence outside and content privacy inside on the same envelope.
Q: What file format do I need to submit for custom envelope printing?
Most professional printers require print-ready artwork in PDF or vector format. Contact BusinessEnvelopes.com directly to confirm artwork specifications before submitting your design files.
Q: How long does it take to receive custom printed #10 window envelopes?
Production and shipping timelines vary by order size and print specification. Contact BusinessEnvelopes.com for current turnaround times on your specific order requirements.
-
_390.png)
What Envelopes Do I Need for QuickBooks Checks?
If you're printing checks through Quick Books and mailing them out, you need more than just any envelope off the shelf. Quick Books check forms are designed with specific dimensions, address block positions, and fold points that only align correctly with a particular envelope format. Use the wrong one and you're looking at misaligned address windows, checks that don't fit cleanly, or confidential financial information partially visible from outside. Getting the right business envelope for your Quick Books work flow isn't complicated once you know what to look for - and that's exactly what this guide covers.
The Right Envelope for QuickBooks Checks Depends on Your Check Format
Quick Books prints checks in three standard formats, and each one has a different envelope requirement. Most accounting professionals work with one format consistently, but if you've recently switched Quick Books plans, upgraded to a newer check template, or taken over bookkeeping for a business that was using a different setup, it's worth verifying which format you're actually printing before ordering envelopes in bulk.
Standard Voucher Checks are the most widely used Quick Books check format. The check itself occupies the top third of an 8.5" x 11" sheet, with two voucher stubs below it carrying payment details. When you tear off the check portion and fold it, it fits into a standard #10 double window envelope. The payee address shows through the lower window, and your return address shows through the upper window. Nothing needs to be written or printed on the envelope itself. Wallet Checks are smaller, producing three checks per page. These don't require window envelopes in the traditional sense since they're often distributed in person or inserted into regular envelopes with accompanying documentation. If you are mailing wallet checks, a standard #10 regular envelope works fine.
Three-Per-Page Business Checks follow the same logic as wallet checks. Window envelope alignment doesn't apply here the same way it does with full-sheet voucher checks. For the vast majority of Quick Books users printing and mailing checks to vendors, contractors, or employees, the answer is a #10 double window envelope. That's the format Quick Books' standard voucher check was designed around.
Why Double Window Envelopes Are the Only Correct Answer for Voucher Checks Here's what makes double window envelopes specifically right for this job not just convenient, but operationally necessary. When Quick Books prints a standard voucher check, it places your company's return address and the payee's mailing address in two fixed positions on the check form. These positions correspond exactly to the upper and lower window placements on a standard #10 double window envelope. When the check is folded correctly and inserted, both addresses sit cleanly inside their respective windows with proper clearance on all sides.
This means: No address labels to apply No printing on the envelope No handwriting anything No risk of putting the wrong payee name on the wrong envelope Both addresses verified visible before sealing For an accounts payable team processing weekly check runs, this eliminates an entire manual step per envelope. Across hundreds of vendor payments per month, that's real time saved and a meaningful reduction in mailing errors.
The security aspect matters too. Quick Books checks contain sensitive financial information account numbers, routing numbers, payment amounts. A standard clear envelope lets any of that be visible if someone holds it up to light. Security-tinted double window envelopes block the contents entirely while keeping both address windows visible. For check mailing specifically, security tinting isn't optional it's standard practice.
Seal Type Matters More Than Most People Realize
Once you've confirmed the envelope format, the sealing method is the next decision — and it affects daily workflow more than people expect. Flip-and-Stick (Press Seal) is the preferred option for most Quick Books check mailing operations that seal by hand. There's no liner to peel, no moisture required. Press the flap against the adhesive band and it seals instantly. For a team processing 50 to 200 checks per week by hand, this is the fastest option with the least friction.
Peel-and-Seal works well too. The protective liner peels away to reveal an adhesive strip, and the flap presses down cleanly. Slightly slower than flip-and-stick because of the liner removal step, but the tamper-evident bond is strong and reliable.
Gum Flap is the right choice if your office uses an automated inserter or mailing machine. Mechanical inserters are designed to moisten and close gum flap envelopes at speed. If you're hand-sealing, though, gum flap is the least convenient of the three.
For most small to mid-sized businesses running Quick Books check mailing without dedicated mailing equipment, self-seal double window envelopes in either flip-and-stick or peel-and-seal format are the practical choice.
Always Test Alignment Before a Full Check Run
This is the step that gets skipped and then regretted. Before mailing any batch of Quick Books checks, print one check, fold it exactly as you will in the full run, and insert it into the envelope. Hold it up to light and confirm: The payee name and address appear fully inside the lower window with clearance on all sides Your company return address appears fully inside the upper window No account numbers, routing numbers, or check amounts are visible through the envelope body or windows The fold is clean and the check sits flat inside without bunching
Quick Books' standard check template is designed to align with the standard window positions on a #10 double window envelope. But template customizations, paper stock thickness, printer margin settings, or a supplier change can shift alignment. One test print catches that before 300 checks go out wrong.
Stock Up Without Overstocking: Ordering the Right Quantity
Quick Books check mailing is predictable volume for most businesses. Payroll runs on a schedule. Vendor payments follow accounts payable cycles. That predictability makes it easy to order sensibly. A few practical points on quantity: Self-seal envelopes, particularly flip-and-stick formats, have a latex adhesive with a shelf life of approximately 12 months from manufacture. Ordering 12 to 18 months of supply at a time is reasonable. Ordering two or three years' worth risks adhesive degradation on the older stock. Gum flap envelopes have a longer shelf life when stored correctly cool, dry, away from humidity. Bulk ordering makes more sense for gum flap than for self-seal. BusinessEnvelopes.com carries double window envelopes with no minimum order requirement, so you can match your order to your actual check run volume rather than being pushed into quantities that sit in a cabinet for years.
Why BusinessEnvelopes.com Is the Right Supplier for Your QuickBooks Check Envelopes?
Sourcing check envelopes from a general office supply retailer works until it doesn't. Window positions vary between manufacturers, security tinting standards differ, and when something is misaligned on a check run, you need answers fast — not a return form. BusinessEnvelopes.com has been supplying accounting departments, payroll teams, and small business owners with check-compatible envelopes since 1997. The inventory is built around the actual formats that QuickBooks, Sage, Peachtree, and Wave users are printing. Every double window envelope in the catalog is spec'd to the standard #10 window positions those platforms output to. Security tinting is standard on check envelopes, not an upgrade you have to hunt for. There's no minimum order, which matters for smaller operations running weekly check batches rather than monthly bulk runs. Free ground shipping applies site-wide. And if you need custom printed envelopes with your company name and return address pre-printed for a more polished presentation on outgoing payments, that's available too. When check mailing is a regular part of your accounts payable or payroll workflow, the envelope supplier you use should know that workflow. That's what you get here.
Conclusion
QuickBooks check mailing has one right answer for envelope type: a #10 double window envelope with security tinting, in whichever seal format matches how your team processes outgoing mail. The double window eliminates manual addressing, the security tinting protects financial information in transit, and the #10 format is built around the exact dimensions QuickBooks' standard voucher check uses. Test alignment before every batch run, order quantities that match your actual mailing cycle, and source from a supplier whose inventory is designed around accounting software compatibility. Get those three things right and check mailing becomes one of the most systematic, low-effort parts of your accounts payable workflow.
FAQs Q: What size envelope do I need for QuickBooks checks?
A standard #10 double window envelope fits QuickBooks voucher checks. It measures 4 1/8" x 9 1/2" and aligns with QuickBooks' standard address block positions.
Q: Do I need a special envelope for QuickBooks or will any #10 work?
You need a #10 double window envelope specifically. A regular #10 without windows requires separate addressing. Single window envelopes only show one address, not both.
Q: Why do QuickBooks check envelopes need security tinting?
Checks contain account and routing numbers. Security tinting prevents that information from being visible through the envelope material during transit, protecting against fraud and unauthorized access.
Q: Can I use peel-and-seal envelopes for QuickBooks check mailing? Yes. Peel-and-seal and flip-and-stick double window envelopes both work well for hand-sealing check runs. Gum flap is only necessary if you're using an automated mailing machine inserter.
Q: How do I confirm my QuickBooks checks align with the envelope windows? Print one check, fold it, insert it, and hold the envelope to light. Both addresses should appear fully inside their respective windows with 1/8-inch clearance on all sides. Q: Where can I buy double window envelopes for QuickBooks checks? BusinessEnvelopes.com carries #10 double window envelopes compatible with QuickBooks, Sage, and Peachtree, with no minimum order and free ground shipping.
-
Window Envelopes: The Complete Guide for Businesses
Walk into any billing department, accounts payable office, or healthcare administration team in the United States, and you'll find the same thing sitting in the supply cabinet: window envelopes. Stacks of them.
And honestly? There's a very good reason for that.
Window envelopes solve one of the most repetitive, time-draining problems in business mailing: addressing. Instead of writing, printing, or sticking a label on every single envelope, the recipient's address shows right through a transparent opening on the front, already printed on the document you're sending inside. No extra step. No label. No chance of putting the wrong address on the wrong envelope.
It's one of those solutions that feels almost too simple once you understand it.
But there's more to windowed envelopes than most people realize. Different window positions, multiple sizes, security options, recycling questions, software compatibility: it adds up. And picking the wrong type can mean misaligned addresses, returned mail, or confidentiality issues you really don't want to deal with.
This guide walks you through everything, clearly and without the fluff, so you can pick exactly what your business envelopes needs and get on with it.
What Is a Window Envelope?
A window envelope is a standard mailing envelope with a rectangular cutout on the front face, covered by a thin transparent film. That opening, the window, lets the address printed on the document inside show through, so you never have to address the envelope separately.
The window sits on the lower-left side of the envelope, which is exactly where USPS sorting equipment looks for the delivery address. The transparent film is usually either glassine (a thin paper-based material) or polypropylene (a thin plastic film). That distinction matters when it comes to recycling, and we'll cover that shortly.
Window envelopes come in every standard business envelope size, with different window positions, sealing options, and security features depending on what you're mailing. They're used for invoices, billing statements, legal notices, tax documents, payroll checks, and any correspondence where the address is already on the document going inside.
How Window Envelopes Actually Work
The concept is simple, but it does take a few minutes to set up properly the first time.
When you print an invoice, statement, or letter, the recipient's address is already on that document, usually near the top of the page. You fold the document into thirds for a standard #10 envelope so the address block faces outward, sitting directly behind the window.
When it's inserted correctly, the full address is visible through the film, with clear margins on all four sides. No label. No handwriting. No extra printing step. The document is both the letter and the address label at the same time.
For this to work every time, two things need to stay consistent: where the address block appears on your document, and how the document is folded. If either shifts, the address moves out of the window, and that's when things go wrong. We'll cover alignment checks later so you can catch that before a big mailing, not after.
Types of Window Envelopes
Not all windowed envelopes are built the same. The right type depends on what you're mailing and how your documents are formatted.
Single Window Envelopes
The most common type by far. One transparent opening in the lower-left area shows the recipient's delivery address. Your return address is either pre-printed on the envelope or added separately in the top-left corner.
Single window envelopes work well for:
- Monthly billing statements
- Invoice mailings
- Marketing letters with a personalized address block
- Legal and healthcare notices
- Any regular correspondence where only the delivery address needs to show
The #10 single window envelope is what most US businesses keep in their supply closet as a default.
Double Window Envelopes
Double window envelopes have two openings: one lower for the recipient's address and one upper for your return address. Both come from the document inside, so nothing at all needs to be printed or labeled on the envelope itself.
This format was made for:
- Business check mailing
- Payroll distribution
- Accounts payable operations
- Any workflow where both addresses are already printed on the document
If your accounting software, whether QuickBooks, Sage, Peachtree, Wave, or similar, prints checks with both the payer and payee addresses on the form, a double window envelope is your answer. Slide the check in, both addresses sit in their windows, seal it. Done. It genuinely removes an entire step from the process.
Security-Tinted Window Envelopes
Same transparent window as a standard envelope, but the inside of the envelope is printed with a dark cross-hatch or geometric pattern. This tinting makes it impossible to read the contents by holding the envelope up to light. Only the address block behind the window shows through.
Security tinting is standard for:
- Financial documents and bank statements
- Healthcare correspondence including EOBs and lab results
- Insurance documents
- Any mailing where privacy or regulatory compliance matters
It's not a specialty item for most professional offices. It's their default. The combination of window efficiency and interior privacy protection is exactly what high-volume sensitive mail requires.
Full-Face Window Envelopes
A less common type where the window covers nearly the entire front of the envelope. Used mostly in promotional or catalog mail where the printed insert creates the visual impact. You probably won't need this for standard business envelope correspondence, but it's worth knowing it exists.
Window Envelope Sizes: Which Size for Which Job
Window envelopes are available in every standard US business size. Here's a plain-English breakdown of which size fits which situation:
#10 Window Envelope (4 1/8" x 9 1/2") The American standard for business mail. Takes a standard 8.5" x 11" sheet folded into thirds. Invoices, letters, statements, general correspondence: this is the one.
#9 Window Envelope (3 7/8" x 8 7/8") A little smaller than a #10. Commonly used as a reply envelope tucked inside a #10, so the recipient has something to mail back their payment in. If you're sending invoices with a return remittance envelope, you want a #9 for the insert.
#11 Window Envelope (4 1/2" x 10 3/8") Slightly larger than a #10. Useful for documents that are too long for a standard tri-fold, or when you're including additional inserts alongside the main document.
6" x 9" Window Envelope When documents need a wider format or less aggressive folding. Common in direct mail and marketing campaigns with larger-format letters or brochures.
9" x 12" Window Envelope For flat document mailing: contracts, multi-page legal filings, healthcare records, anything that shouldn't arrive creased. Window versions let you maintain the efficiency of auto-addressing on larger, unfolded pieces.
The right size always comes down to two things: your document's physical dimensions once folded or flat, and where the address block sits relative to the window position on the envelope.
Window Position: The Detail Most People Overlook
The window's position on the envelope is fixed. Your document's address block position is set by your software or template. They need to match, and that's where problems sneak in.
Most #10 window envelopes follow a standard window position: roughly 7/8 inch from the left edge and 1/2 inch from the bottom of the envelope. This is exactly the position that QuickBooks, Microsoft Word mail merge, Sage, and most invoice platforms are already designed around. So if you're using standard software with standard envelopes, it should work right out of the box.
But not every window envelope matches this position. If you switch suppliers, change software, or use a custom document layout, always test one piece before running a large batch. Fold a printed document, insert it, hold the envelope up to light. The full address should sit inside the window with at least 1/8-inch clearance on all four edges. If it's even slightly cut off on one side, fix the template or switch envelope variants before printing 500 of them.
Sealing Options for Window Envelopes
The window is one choice. The seal is another. Here's how to match the seal type to how your team actually works:
Gum Flap (Remoistenable)
The original envelope seal: a strip of water-activated adhesive that gets moistened and pressed closed. Gum flap envelopes are the right choice for automated mailing machine inserters, which moisten and seal envelopes mechanically at high speed. Most industrial mailing equipment is built for this format specifically.
Peel and Seal
A self-adhesive strip under a protective paper liner. Peel the liner, press the flap down, sealed. No water, no sponge, no mess. The bond is tamper-evident. If someone tries to open it after sealing, the flap tears. Fast and reliable for hand sealing in moderate volumes.
Flip and Stick (Press Seal)
Latex adhesive on both the flap and envelope body. Press them together and the bond forms instantly. Even faster than peel and seal since there's no liner to deal with. Self-seal window envelopes in this style are popular in billing teams and small business offices doing regular hand sealing without a machine.
Quick rule of thumb: if you're running a mailing machine, use gum flap. If you're sealing by hand, use peel-and-seal or flip-and-stick.
Window Envelopes vs Regular Envelopes: An Honest Comparison
There's no "better" option here. They serve different purposes and most businesses end up using both.
Use a window envelope when the delivery address is already on the document you're inserting. Invoices, checks, statements, form letters, anything your software prints with a standard address block. The window eliminates one entire step in your mailing workflow and removes a common source of human error.
Use a regular envelope when you're sending personalized or individually addressed correspondence, when the document inside doesn't have the address in the right position, when you want complete visual privacy from outside, or when you're mailing something that isn't a standard document.
Think of it this way: window envelopes are for your systems and processes. Regular envelopes are for your people-to-people communication.
Window Envelopes in Different Industries
Window envelopes aren't used the same way everywhere. Here's how specific sectors put them to work:
Healthcare and Medical Billing
Clinics, hospitals, insurance carriers, and billing services send enormous volumes of sensitive mail including EOBs, lab results, appointment reminders, invoices, and HIPAA-covered documents. Security-tinted window envelopes are the professional standard here. They combine the efficiency of auto-addressing with interior tinting that keeps patient information private during transit. If you work in healthcare billing and you're not using security-tinted window envelopes, it's worth reconsidering.
Legal and Financial Services
Law firms, accounting offices, banks, and financial institutions deal in time-sensitive documents where confidentiality is non-negotiable. Security-tinted window envelopes with tamper-evident closures are the default. The combination protects client information and provides basic evidence of tampering if an envelope arrives opened.
Accounts Payable and Payroll
Teams writing physical checks, whether payroll, vendor payments, or reimbursements, depend on double window envelopes. When a check from QuickBooks or ADP already has both addresses printed, the double window handles the entire mailing step. The efficiency gain is real: no labels, no handwriting, no separate printing, no chance of a mismatch between check and envelope.
Direct Mail and Marketing
Marketing teams use window envelopes for personalized direct mail where each letter is addressed differently but the format is the same. Mail merge produces documents with each recipient's address in position, window envelopes handle the addressing, and the campaign runs efficiently at any volume.
Why Choose BusinessEnvelopes.com for Your Window Envelopes
With so many places selling envelopes, office supply chains, Amazon, wholesale distributors, it's fair to ask why BusinessEnvelopes.com deserves a look. Here's the honest answer.
We've been doing this since 1997. That's nearly three decades of serving billing departments, accounting firms, healthcare offices, law practices, and small businesses across the United States. We know the difference between an envelope that works for a hand-sealing operation versus one built for a mailing machine inserter. We've answered the alignment questions, the compatibility questions, the recyclability questions, because our customers ask us these things every day and have for almost thirty years.
No minimums. This is genuinely rare. A lot of envelope suppliers push you toward bulk quantities whether you need them or not. We don't. You can order exactly what you need, whether that's a small box or a warehouse pallet, without being forced into a quantity that doesn't make sense for your operation.
Free ground shipping site-wide. No spend threshold to hit, no minimum order to qualify. Your envelopes ship free. It's that straightforward.
Every window envelope type in one place. Single window, double window, security-tinted, gum flap, peel-and-seal, flip-and-stick, #10, 6x9, 9x12, blank, or custom printed with your logo and return address. You don't need multiple suppliers. Everything is here.
Custom printing done right. If you want your logo, brand colors, and return address pre-printed on your window envelopes, we handle that too. Pre-printed envelopes look more professional, save time on every mailing, and eliminate the label application step entirely.
USPS-compliant inventory. Every envelope we carry meets current USPS standards for automated processing. You won't get hit with non-machinable surcharges or returns caused by envelope dimensions that don't comply with postal specifications.
Real customer support. If you're not sure which window position works with your QuickBooks template, or whether you need security tinting for your type of mailing, or what seal type your inserter requires, call us. Our team knows the product and knows the industry. We'll help you figure it out rather than leave you guessing.
Choosing the right envelope supplier matters more than it sounds. A poor match between your envelope and your document layout, your mailing volume, or your equipment costs you time and money on every single mailing. We've been helping businesses get that match right since 1997, and we're not going anywhere.
Getting Window Alignment Right Before a Large Mailing
Before any large batch, a five-minute alignment check prevents a lot of pain later.
Print one document exactly as it'll look in the final run. Fold it the same way every piece will be folded. Insert it into the envelope and hold it up to a bright light or window.
Check four things:
- Is the complete delivery address visible through the window, with no characters cut off?
- Is there at least 1/8 inch of clearance between the address text and all four sides of the window opening?
- Is any sensitive information, such as account numbers, financial figures, or patient data, visible through the window or through the envelope body?
- Does the address appear straight, not tilted or shifted to one side?
If the first two are yes and the second two are no, you're ready. If anything is off, adjust your document template's address block position before running the full job. Don't skip this step when you're switching suppliers, changing software, or using a new template. It takes five minutes and saves a lot of awkward phone calls.
Five questions. Clear answers. Right envelope.
FAQs
Q: What is a windowed envelope used for?
A window envelope is used for any business envelope mailing where the recipient's address is already printed on the document inside. The address shows through a transparent opening on the envelope face, eliminating the need to address the envelope separately. They're most commonly used for invoices, billing statements, checks, legal notices, healthcare documents, and direct mail campaigns.
Q: What's the difference between a single window and a double window envelope?
A single window envelope has one transparent opening in the lower-left area showing only the recipient's delivery address. A double window envelope has two openings: one for the recipient's address and one for the sender's return address. Both come from the document inside. Double window envelopes are designed primarily for check mailing and payroll, where both addresses are already printed on the check form.
Q: Do window envelopes work with QuickBooks and other accounting software?
Yes. Standard #10 window envelopes are designed to align with the address block position used by QuickBooks, Sage, Peachtree, Wave, and most major accounting platforms. When checks or invoices are printed and tri-folded, the address lands in the window. For check mailing specifically, double window envelopes are the right match. Always test alignment with one piece before a bulk run.
Q: Can window envelopes be recycled?
It depends on the window material. Envelopes with glassine (paper-based) windows can typically be recycled with regular paper. Envelopes with polypropylene (plastic) windows aren't accepted in standard paper recycling in most areas. The plastic film should be removed first or the envelope placed in general waste. Check your local recycling guidelines to be sure.
Q: Are security-tinted window envelopes required for medical billing?
HIPAA doesn't specify a particular envelope type, but it does require covered entities to protect patient health information during transmission. Security-tinted window envelopes have a darkened interior pattern that prevents the contents from being read through the envelope material. They are the recognized professional standard for sensitive medical correspondence. Most healthcare billing operations use them by default, not as a special precaution.
Q: How do I know if my documents are aligned correctly with the window?
Print one document, fold it exactly as you will in the full run, insert it into the envelope, and hold it up to a bright light. The complete delivery address should appear fully inside the window with at least 1/8-inch clearance on all four sides. Nothing sensitive should be visible through the window or the envelope body. If alignment is off, adjust your document template's address block before running the full batch.
-
How to Print on Envelopes: The Complete Guide for Laser, Inkjet, and Bulk Office Printing
Can You Print Directly on Envelopes?
Short answer: yes, and most offices already have a printer capable of handling standard envelope sizes. The longer answer is that printing on envelopes involves a few variables that aren't obvious until you've already wasted a stack of them: paper weight, feed direction, printer type, and whether the envelope has a self-seal mechanism that your laser printer might accidentally activate.
If you're sending fewer than 50 envelopes per month, printing them yourself is usually fine once you've dialed in the settings. If you're running billing cycles, payroll batches, or direct mail campaigns at any real volume, this guide will also show you the point at which ordering pre-printed envelopes starts saving you more money than the DIY approach.
This guide covers everything: hardware setup for laser and inkjet printers, software configuration in Word and Google Docs, bulk mail merge for high-volume operations, and the specific problems that derail most first-time envelope printing attempts.
What You Need Before You Start
Before loading anything into a printer, two decisions will determine whether your envelope printing session goes smoothly or turns into a frustrating hour of paper jams and smeared addresses.
Choosing the Right Envelope Paper Weight for Printing
Not all envelopes are printer-compatible. The paper weight printed on the box matters. Standard envelope stock runs from 20lb (thin, common in bulk packs) to 28lb (heavier, more rigid, preferred for laser printing). Here's the practical breakdown:
- 20lb: Works in most inkjet printers. Some laser printers struggle to feed this reliably, especially through straight-through paper paths. Fine for low-volume inkjet use.
- 24lb: The sweet spot for most office environments. Compatible with both inkjet and laser, feeds consistently, and holds toner well without curling under heat.
- 28lb: Preferred for professional laser printing at volume. More rigid means fewer jams. Standard stock for pre-printed business envelopes for good reason.
If your box just says 'standard weight' without a specific lb rating, test a small batch before committing to a full run. Thin envelopes under 20lb are not reliably laser-printable.
Checking Your Printer Type (Laser vs Inkjet)
Laser printers use heat to fuse toner to paper. Inkjet printers spray liquid ink. Both can print on envelopes, but the risks are different. Laser printers run hot, which means self-seal envelopes with pressure-activated adhesive can accidentally seal inside the machine. Inkjet printers don't have this heat problem, but liquid ink applied to glossy or heavily coated envelope stock may smear if the envelope is handled before the ink dries.The next two sections cover each printer type separately.
How to Print on Envelopes in a Laser Printer
Most modern laser printers handle #10 envelopes without difficulty if you follow three rules: use the correct tray, set the right media type in the driver, and never overload.
Start with the manual feed tray or multipurpose tray if your printer has one. This tray bypasses the paper path rollers that sometimes crush or skew envelopes. If your printer only has a standard cassette tray, check the manufacturer's documentation for envelope capacity — most cassette trays support between 5 and 15 envelopes at a time.
Load envelopes with the print side facing up, flap closed, and the short edge feeding into the printer first for standard #10 envelopes. If your printer driver shows an orientation diagram in the paper type settings, match exactly what it shows; guessing orientation is the single most common cause of upside-down or backwards printing.
In your print driver, set the media type to 'Envelope' or 'Heavy' before sending the job. This tells the printer to reduce the fuser temperature slightly and slow the feed speed. Skipping this step is why addresses come out smeared or why the paper path jams on the thick flap corners.
Loading Envelopes into a Laser Printer Tray
- Open the manual feed tray or multipurpose tray (not the main paper cassette for first-time setup)
- Adjust the paper width guides so they hold the envelope snugly without bending the edges
- Insert no more than 10-15 envelopes at a time, fan them slightly before loading to separate sheets
- Position envelopes with the address-side facing up, flap closed, short edge leading into the printer
- In the print driver, select Paper/Media Type: Envelope (or Thick for 28lb stock)
- Set paper size to match your envelope (#10 = 4.125 x 9.5 inches)
- Send a test page first before running the full batchWhy Laser Printers Sometimes Seal Self-Seal Envelopes Shut
This is the catch that nobody mentions until it happens. If you're using self-seal envelopes, specifically peel-and-seal or flip-and-stick types, the laser printer fuser can activate the pressure-sensitive adhesive before you seal the envelope yourself, leaving the flap fused shut with nothing inside.
The simple fix: if you're printing on self-seal envelopes in a laser printer, load them with the flap fully open and facing away from the fuser, or switch to gummed flap envelopes for laser printing runs. For pre-sealing workflows where you print addresses on already-sealed envelopes, this isn't an issue. But if you're printing blank addressed envelopes to stuff later, verify that the adhesive strip does not contact the fuser path. Most manufacturers specifically state that press-and-seal envelopes should not be used in laser printers.
How to Print on Envelopes with an Inkjet Printer
Inkjet printers are generally more forgiving than laser printers for envelope printing. There's no heat risk, and the feed mechanism is less aggressive, reducing jam frequency. The primary concern with inkjet printing on envelopes is ink adhesion and drying time, particularly on glossy or wax-coated envelope surfaces.
Use the same basic loading approach as laser: manual feed if available, flap closed, address side up. For inkjet printers, orientation matters just as much, but the direction you load depends on your specific model. Test on a blank sheet first if you're unsure, by drawing a pencil mark on the sheet and seeing how it emerges.
Avoiding Smearing and Smudging on Inkjet-Printed Envelopes
- Use standard wove-finish envelopes, not glossy or coated stock. Liquid ink needs a slightly absorbent surface to bind. Glossy stock sits on top and smears when touched before fully dry.
- Select 'Plain Paper' or 'Envelope' media type in the printer settings. High-quality or photo settings often apply more ink, which takes longer to dry.
- Allow 60-90 seconds after printing before handling the envelope. Stack them face-up and don't slide them against each other.
- If smearing persists, try a lighter ink density setting in your print preferences. A slightly lighter address print dries faster and still reads clearly for USPS automated sorting.
How to Print on Envelopes in Microsoft Word
Word has a dedicated envelope tool that most people never find because it's buried in a tab called Mailings rather than under File or Print where you'd expect it. Once you find it, it works well for both single envelopes and mail-merge batch runs.
Setting Up the #10 Envelope Template in Word
- Open Word and click the Mailings tab in the top ribbon
- Click Envelopes in the Create group at the left
- In the Envelopes and Labels dialog, click Options
- Under Envelope Size, select standard #10 envelope template — Size 10 (4 1/8 x 9 1/2 in) — for standard business envelopes
- Adjust address position if needed: Delivery address approximately 2.5 inches from top, 4 inches from left is the standard for #10
- Click the Printing Options tab. This shows a diagram of how to load the envelope. Match this exactly when loading your printer.
- Click OK, type your delivery address in the Delivery address field and your return address in the Return address field
- Load one test envelope into the printer as shown in the feed diagram
- Click Print
For formats other than #10, use Custom Size in the Envelope Size dropdown and type the exact dimensions of your envelope. See the full standard business envelope sizes guide for dimensions across all sizes: #9 (3.875 x 8.875 in), #10 (4.125 x 9.5 in), #11 (4.5 x 10.375 in), and #14 (5 x 11.5 in).
Printing Return Addresses on Envelopes in Word
Word saves your return address between sessions if you set it in the right place. Go to File, Options, Advanced, scroll to the General section, and enter your company name and address in the Mailing address box. This becomes the default return address for all future envelope jobs in Word on that machine.
If you're printing on envelopes that already have your return address pre-printed, which is exactly what pre-printed business envelopes provide, check the Omit checkbox next to the return address field. This tells Word to print only the delivery address.
How to Print on Envelopes in Google Docs
Google Docs doesn't have a native envelope tool the way Word does. Your best options are either using a template or setting up a custom page size. Go to File, Page setup, and set the paper size to Custom. For a #10 envelope, set width to 9.5 inches and height to 4.125 inches (note that orientation matters here, landscape orientation fits the #10 format). Set margins to approximately 0.5 inches on all sides.
Position your delivery address roughly 2.5 inches from the top of the document and 4 inches from the left margin using paragraph indentation or a text box. Add your return address in the upper-left area within the 0.5-inch margins.
When printing, go to File, Print, and verify that the paper size in the print dialog matches the custom envelope dimensions you set. Many print drivers override Google Docs page settings, so always check both.
For bulk envelope printing through Google Docs, use Google Workspace's mail merge add-ons rather than the native tools. Extensions like Mail Merge with Attachments or Autocrat allow you to link a Google Sheets contact list to a Docs template and generate individual envelope documents automatically.
How to Print Envelopes in Bulk (Mail Merge)
Mail merge is how professional billing departments, law offices, and HR teams print hundreds or thousands of addressed envelopes without addressing each one manually. The process links a contact list (in Excel, CSV, or an Outlook address book) to an envelope template in Word.
- Go to Mailings, Start Mail Merge, Envelopes in Word
- Set your envelope size and printing options in the dialog that appears
- Click Select Recipients and choose Use Existing List to connect your Excel spreadsheet or CSV file
- With your cursor in the delivery address area, click Insert Merge Field and add: First Name, Last Name, Company (optional), Address Line 1, City, State, ZIP
- Click Preview Results to verify the first few addresses look correct
- Click Finish and Merge, Print Documents
- In the print dialog, select All records and match the envelope paper size to what's loaded in your printer
Before running 500 envelopes, always test with 3-5 first. The most common issue with mail merge envelope batches is address field alignment: the merge fields placing a long company name on the same line as the street address. Verify your merge field layout using Preview Results before printing the full run.
For recurring mail cycles, save your envelope merge document. Word maintains the connection to the original data source, so the next billing cycle you just update the spreadsheet and re-run the merge rather than rebuilding the template from scratch.
Common Envelope Printing Problems and How to Fix Them
Envelope Feeding Issues and Jams
- Envelope skews sideways during feeding: Adjust width guides snugly against the envelope edges. A loose guide allows the envelope to pivot during the feed path.
- Printer won't pick up the envelope: Fan the envelopes before loading to reduce static buildup. Make sure the stack doesn't exceed the printer's stated capacity. Try the manual feed slot with one envelope at a time.
- Double-feeding (two envelopes at once): Fan the stack thoroughly, or reduce the stack to 5 envelopes at a time. Envelopes sticking together is almost always the cause.
Print Alignment Is Off
This is the most common issue with new envelope setups. If your delivery address is printing too high, too low, or landing on the flap instead of the front face, it usually means the feed orientation doesn't match what the driver is expecting.
- In Word: Go back to Mailings, Envelopes, Options, Printing Options and re-verify the feed method matches exactly how you loaded the envelope into the printer.
- In the print driver: Confirm that paper size is set to the correct envelope dimensions, not to Letter or A4.
- Run a test on blank copy paper first: print your envelope layout on a sheet of paper and hold it up against an actual envelope to verify the address lands in the correct zone before using real envelopes.
Ink or Toner Smearing
- Laser printer smearing: The fuser temperature may be too high for the envelope paper weight. Set media type to Envelope or Thick in the print driver to lower fuser heat.
- Inkjet smearing: The envelope surface is too smooth or coated. Switch to standard wove envelope stock and allow longer drying time before handling.
- Both types: Check that the printer path isn't contaminated with old toner or dried ink. Run a printer cleaning cycle before a large envelope batch.
When It Makes More Sense to Order Pre-Printed Envelopes
Printing your own addresses works fine for occasional or small-volume needs. But for offices running monthly billing cycles, payroll distributions, or any kind of recurring high-volume mail, the math usually shifts in favor of ordering pre-printed envelopes.
For billing workflows specifically, window envelopes eliminate the delivery address printing step entirely. The recipient's address on the invoice inside shows through the transparent panel, so there's no print job on the envelope at all. Read the complete guide to business window envelopes to see how to align your accounting software's address block to the window zone.
Cost Comparison: Printing Yourself vs Ordering Pre-Printed
Factor
Printing Yourself
Pre-Printed Envelopes
Setup time per run
5-15 min (template, tray, test)
None — envelopes arrive ready
Ink/toner cost (per 500)
~$4-8 laser, ~$8-14 inkjet
Included in envelope price
Staff time per 500 units
30-45 min with feeding
Under 5 min (stuff and seal only)
Error/waste rate
2-5% from jams/misfeeds
Under 1% from quality supplier
Result consistency
Varies by ink level/printer
Consistent across every batch
Branding quality
Limited to office print quality
Professional offset/digital print
If you're sending more than 250 envelopes per month, the combined cost of blank stock, ink or toner, and staff handling time almost always exceeds the per-unit cost of ordering pre-printed envelopes with your logo and return address already applied. For billing departments running window envelope workflows, the break-even point is even lower because the window format eliminates the delivery address print step entirely.
Frequently Asked Questions
Can you print on self-seal envelopes?
Yes, but with an important caveat: if you're using a laser printer, the fuser heat can activate the adhesive before you seal the envelope. For laser printing, use gum-flap envelopes or load peel-and-seal envelopes with the flap fully open and facing away from the fuser. Inkjet printers don't have this heat issue, so self-seal envelopes work fine with inkjet.
What is the correct orientation to load a #10 envelope in a printer?
For most laser and inkjet printers, load the #10 envelope with the address side facing up, the flap closed, and the short edge (the 4.125-inch side) feeding into the printer first. Always verify against the orientation diagram in your printer driver's Envelope Options screen.
Why does my printer keep jamming on envelopes?
The most common causes are: the envelopes are too thin for the paper path (switch to 24lb or 28lb stock), the width guides aren't snug enough against the envelope edges, or you've loaded too many envelopes at once. Try 5 envelopes at a time in the manual feed tray with the width guides set firmly against the edges.
How do I print return addresses on envelopes without them showing?
If your envelopes already have a pre-printed return address, go to the Mailings tab in Word, click Envelopes, and check the Omit checkbox next to the Return address field. Word will then print only the delivery address, leaving your pre-printed return address untouched.
Is it cheaper to print envelopes yourself or order pre-printed ones?
For fewer than 100 envelopes per month, printing yourself is usually cheaper in direct material costs. Above 250 per month, pre-printed envelopes from a specialist supplier typically cost less when you factor in ink or toner consumption, paper waste from jams and tests, and staff time. Pre-printed envelopes also eliminate the setup step entirely, which matters for offices with recurring monthly billing cycles.
-
Self-Seal Envelopes: Peel-and-Seal vs Flip-and-Stick Guide
Okay so here's something nobody tells you when you're setting up an office for the first time. You'll spend an embarrassing amount of time thinking about envelopes. Not the fun kind of thinking either. More like standing in a supply closet at 4pm wondering why half your outgoing mail came back because the flaps popped open.
That happened to me. Spring of 2019, running admin for a small CPA firm in Charlotte. We'd been using the cheapest gummed envelopes we could find. The kind where you have to lick the flap or use one of those little sponge roller things. And look, the sponge roller worked fine when it was new. But after a few months the sponge got this grey crusty film on it, nobody wanted to touch it, and our receptionist started just licking them which... yeah. Not great. Especially when you're sending 400+ pieces during tax season.
We switched to self-seal envelopes that April. No water, no sponge, no licking. Just fold and press. Done. But here's the thing. When I went to reorder a few months later, I realized there were actually two completely different types of self-seal, and they work nothing alike.
What Is the Difference Between Gummed and Self-Seal Envelopes?
"Self-seal" is an umbrella term. It just means the envelope closes without moisture. But underneath that umbrella you've got two mechanisms that work differently. Most office supply sites don't bother explaining the difference. They just slap "self-seal" on everything and call it a day.
Gummed envelopes have a strip of water-soluble glue on the flap. You lick it or moisten it with a sponge, fold the flap down, and press. The glue activates with water and bonds when it dries. They've been around forever. They're cheap. And they're the reason people associate envelope sealing with that weird taste.
Self-seal envelopes skip the moisture entirely. The adhesive is pressure-activated instead of water-activated. That's the core difference. No water, no sponge, no licking, no waiting for anything to dry. You fold the flap and press. The bond happens immediately.
How Do Peel-and-Seal Envelopes Work?
First type: peel-and-seal. There's an adhesive strip on the flap, covered by a thin paper liner. You grab the liner, peel it off like a sticker backing, fold the flap down, and press. Strong bond. Permanent. And here's the detail that matters for certain industries. It's tamper-evident. If someone tries to steam it open or peel it back, the paper tears visibly. You can tell it's been opened. That's why law firms and medical offices tend to prefer peel-and-seal envelopes. Anything with patient data, legal privileged info, or financial records. The tamper evidence actually matters in those settings.
Downside? The liner strips pile up. At 200 envelopes you've got a little mound of paper strips on your desk. At 2,000 you've got a small mountain. Some people don't care. Some offices go nuts about it. Minor thing but worth knowing before you order 5,000.
How Do Flip-and-Stick Self-Seal Envelopes Work?
Second type: flip-and-stick. This one's clever. There's adhesive on the flap AND on the body of the envelope. When you fold the flap down, the two sticky surfaces meet each other and bond. No liner to pull off. No waste at all. Literally one motion. Flip, press, done. These tinted self-sealing #10 envelopes use this mechanism and honestly, for pure speed, nothing beats it. We timed it once at the CPA firm. Our billing clerk could seal about 140 envelopes in 10 minutes with flip-and-stick. With peel-and-seal it was closer to 100. With gummed? Maybe 60, and her fingers were pruney by the end.
The catch, and it's a small one, is that flip-and-stick isn't tamper-evident the way peel-and-seal is. If someone really wanted to carefully pry it open, they probably could without leaving obvious damage. For everyday billing and correspondence, that's totally fine. For sensitive legal or medical stuff, you might want peel-and-seal instead.
Are Self-Seal Envelopes Better Than Gummed?
I know some offices still buy gummed because they're a few cents cheaper per envelope. And I get it. When you're ordering 2,000 at a time, a few cents per piece adds up. But here's what that math doesn't account for.
Time. Each gummed envelope takes roughly 3 to 4 seconds to seal when you factor in the moistening, folding, pressing, and waiting a beat for the gum to activate. Each self-seal takes under a second. At 500 envelopes per month, that's the difference between 30 minutes and 8 minutes. Every single month. Over a year, gummed envelopes burn through about 4 extra hours of someone's time just on sealing. Is that really where you want your payroll going?
And then there's the failure rate. Gummed flaps fail at something like 2 to 5 percent depending on humidity, how much water you used, whether the sponge was fresh. All these variables. That means out of every 1,000 envelopes, 20 to 50 arrive partially or fully open. I had a client call once to tell me he could see his tax return through a gap in the envelope flap. Fun conversation.
Self-seal envelopes, both types, have essentially a zero percent failure rate when stored properly. The adhesive doesn't depend on humidity, application technique, or sponge freshness. It just works.
How Long Do Self-Seal Envelopes Last in Storage?
Self-seal adhesive holds up for years if you keep the envelopes in a cool dry place. I've used envelopes that sat in a supply closet for 18 months and the seal was still perfect. What kills them is heat and humidity. Don't store them in a warehouse with no climate control or in a garage in Florida. Flip-and-stick envelopes have a slightly shorter shelf life than peel-and-seal because the adhesive is exposed (no liner protecting it). Manufacturers generally recommend using flip-and-stick within 6 to 12 months. Peel-and-seal lasts longer because the liner protects the adhesive until you're ready to use it.
Which Type of Self-Seal Envelope Should You Order?
If you're a billing department, utility company, property manager, or anyone pumping out hundreds of invoices and statements every month, go flip-and-stick. Speed wins. Tamper evidence doesn't matter for a water bill. Zero waste is a nice bonus. Pair them with window envelopes and you've eliminated both the addressing step AND the sealing step from your workflow.
If you're a law firm, medical practice, HR department, or financial advisor mailing documents that contain genuinely sensitive information, go peel-and-seal. The tamper evidence matters. Pair them with security tint and you've got serious mail security. Check envelopes should always be peel-and-seal with security tint, no exceptions.
And honestly? A lot of offices just stock both. Flip-and-stick for the daily grind, peel-and-seal for anything sensitive. It's not an either/or.
Why Choose BusinessEnvelopes.com for Self-Seal Envelopes
I've tried VistaPrint, Staples, Amazon, and a couple of random online printers for envelopes over the years. I keep coming back to BusinessEnvelopes.com for a few reasons that actually matter day to day.
They're an envelope company. That's it. That's all they do. They've been doing it since 1997, over 27 years, and you can tell because the product range is deep. Every #10 envelope variant you could want is there. Tinted, windowed, double window, peel-and-seal, flip-and-stick, colored, blank, printed. Try finding that range at Staples.
They ship free on every order, no minimum. They send you a free proof before printing so you can check your logo looks right. And they've got real humans who answer questions. I once called about window alignment for a QuickBooks invoice template and the person actually knew what I was talking about. That doesn't happen at a big-box store. For the full range of sizes, check the envelope size guide.
Bottom line: if your office is still using gummed envelopes in 2026, you're spending more money than you need to and your mail is arriving open more often than you think. Switch to self-seal. Pick peel-and-seal or flip-and-stick based on what you're mailing. And never look at a crusty sponge roller again.
-
Business Envelopes with Logo: Why Businesses Need Them
The envelope alone makes an impression even before a person has opened the mail or read inside. In a fast world, people make decisions within a few seconds. That is why sending an ordinary envelope will get lost in the mail stack. Business Envelopes with Logo that has your name will stand out and it will be noticed immediately.
Business Envelopes with logo transform ordinary mail into another way to display your brand. Whether you are mailing invoices, contracts, account statements, marketing letters, or official papers, the envelope is the first thing that people see about your company.
Business firms that are concerned about their appearance understand this. The envelope's exterior is the first step toward professionalism. When businesses consistently use envelopes bearing their logo, trust is created, it is easier to remember, and the business appears more reliable without spending money on additional advertising.
What is Business Envelopes with logos?
Business envelopes with logos are mailing envelopes printed with your company logo, return address, and other brand details.
They differ from plain envelopes because they are custom-printed to match your brand while still meeting postal requirements and staying strong enough for mailing.
You can get them in various sizes, with or without windows, peel-and-seal or gum flap closures, security tint inside, booklet styles, and good, heavy paper weights made for business use.
Benefits of Choosing Business Envelopes with Logo
The contents of these envelopes are more than just papers. They assist in making your company appear better to the people, maintaining your branding and making the daily mailing easier. These are the key benefits companies gain from using branded envelopes regularly.
1. Instant Brand Recognition
Once you have your logo on all envelopes in a strategic position, people will start recognizing your mail fast. The recipients recognize it is you even before they check the sender information. This frequent exposure will leave your name in their memory, will create credibility and will silently tell them that your company is in charge of everything they get in the mail.
2. Elevated Professional Image
Plain envelopes appear simple and ordinary. Envelopes bearing your logo are organized and detail-oriented. They perceive your business as established, careful, and trustworthy even before clients, suppliers, or partners open the letter when they receive it.
3. Improved Mail Open Rates
Official-looking and familiar envelopes do not end up in the garbage pile as junk mail. An easily understandable logo makes people know that the mail is real and hence they have higher chances of opening and seeing what is in the mail than throwing it.
4. Stronger Brand Consistency Across Departments
When all the printed envelopes are used by accounting, HR, operations and the marketing department, the company appears united. This matching style strengthens your overall brand and prevents the messy look that can happen with different kinds of stationery.
5. Enhanced Security Perception
Envelopes with your logo look purposeful and professional, making tampering less likely and helping them stand out. Add security tint inside and they protect private information better while still looking completely reliable.
10 Best Options for Business Envelopes with Logo
1. #10 White Tinted Self-Sealing Printed Envelopes
#10 white envelopes with tint and self-seal work well for sending large amounts of professional mail daily. The colored interior ensures document privacy, and the peel-and-seal tab makes it easy to close. It is compatible with typical 8.5 x 11-inch paper folded into thirds and presents a tidy, professional appearance. Print your logo on it, and regular mail starts to seem like bold brand statements. The paper is durable and has a good print quality, making it suitable for finance, corporate, and administrative tasks.
Key Benefits
- Tinted security interior
- Self-sealing for speed
- Fits standard business documents
- Clean white appearance
- Meets USPS size standards
Ideal for Industry
- Accounting firms
- Legal offices
- Corporate finance teams
- Insurance companies
- Medical billing services
2. Window White Wove Printed Envelopes
The white wove window envelope gives extra space for documents while keeping a sharp, professional style. The window saves time since you do not need separate address labels. Print your logo, and it reinforces your brand without blocking the address. The wove texture adds a nice touch for formal business mail.
Key Benefits
- Window for easy addressing
- Smooth wove texture
- Good for larger folded documents
- Strong paper quality
- Works well with logo printing
Ideal for Industry
- Government agencies
- Corporate HR departments
- Banks and financial institutions
- Utility companies
3. White Open End Peel & Seal 28lb Printed Envelopes
These white open-end envelopes are great for mailing papers flat without folding. The 28-pound paper makes them durable, and the peel-and-seal closure keeps everything secure. Add your logo, and they give contracts, reports, or internal mail a strong professional look.
Key Benefits
- Heavy 28lb stock
- Peel and seal closure
- Clean windowless design
- Professional appearance
- Works well for flat documents
Ideal for Industry
- Real estate offices
- Corporate reporting teams
- Schools and universities
- Professional consultants
4. #10 Window White Tinted Self-Sealing Printed Envelopes
This window-tinted self-sealing envelope mixes privacy, speed, and branding power. The window displays the address on the letter inside, the color conceals sensitive data, and your logo continues to brand uniformly across large mail campaigns.
Key Benefits
- Window for address display
- Security tinted lining
- Self-sealing closure
- Great for invoices
- Bright white exterior
Ideal for Industry
- Banks
- Credit unions
- Payroll services
- Subscription companies
5. #14 Window White Wove Printed Envelopes
Bigger than standard, this #14 white wove window envelope easily holds multiple pages. It suits formal company mail and keeps your branding looking polished and professional.
Key Benefits
- Extra document capacity
- Professional wove texture
- Address window included
- Durable build
- Good for custom printing
Ideal for Industry
- Legal firms
- Corporate headquarters
- Government offices
6. #10 Window White Wove Printed Envelopes
This #10 white wove window envelope makes mailing invoices and statements quick and professional-looking. It skips address labels, keeping your logo visible for consistent branding.
Key Benefits
- Window for efficiency
- Quality wove paper
- Fits standard business letters
- Clean professional look
- Good for regular mailings
Ideal for Industry
- Accounting firms
- Healthcare providers
- Utility services
7. Colored Printed Envelopes
If you want your mail to stand out, these colored envelopes add attention while staying professional. Choose from different colors, add your logo, and your direct mail gets noticed without losing brand focus.
Key Benefits
- Several color choices
- Ready for logo printing
- Helps your mail stand out
- Standard #10 size
- Solid durability
Ideal for Industry
- Marketing agencies
- Creative companies
- Retail promotions
8. Wove Window Envelopes Gum Flap
The wove window envelope features a traditional gum-flap seal for a classic feel. Print your logo on it, and it meets professional standards while making addressing easy.
Key Benefits
- Gum flap sealing
- Window for speed
- Premium wove texture
- Strong paper
- Good for branding
Ideal for Industry
- Law offices
- Corporate communications
- Educational institutions
9. 9x12 Brown Booklet Printed Envelopes
These 9x12 brown booklet envelopes let you mail full-size documents flat. The strong kraft paper handles catalogs, contracts, and marketing materials well. Custom printing makes them look sharp and keeps them tough.
Key Benefits
- Large size capacity
- Heavy brown kraft stock
- Custom printing available
- No folding required
- Reliable structure
Ideal for Industry
- Architecture firms
- Legal departments
- Publishing companies
10. 6x9 Brown Open-End Printed Envelopes
These 6x9 brown open-end envelopes offer strength and clean branding. They work great for smaller reports or flat documents and keep a professional look with solid construction.
Key Benefits
- Durable kraft paper
- Compact flat mailing
- Logo printing option
- Open end access
- Good value in bulk
Ideal for Industry
- Small businesses
- Accounting firms
- Non-profit organizations
How to Choose the Right Business Envelopes with Logo
Picking the right business envelopes with a logo means more than choosing size or color. It means matching your documents, brand style, security needs, and daily mailing process into one good decision. The envelope you pick affects how people see your company and how easy your mail routine is. Here is how to decide.
1. Start With Document Type and Size
Look at what you mail most often before anything else.
- Standard invoices and letters go in #10 envelopes
- Larger stacks of pages go in #11 or #14 envelopes
- Flat contracts or booklets go in 6x9 or 9x12 envelopes
The right size stops extra folding, keeps papers looking good, and maintains a professional feel.
2. Decide Between Window and Non-Window
Window envelopes save time by showing the address right from the paper inside.
Choose window envelopes when:
- You send repeat invoices or statements
- You do high-volume billing
- You want to skip printing labels
Choose non-window envelopes when:
- You like a cleaner front look
- You print addresses directly on the envelope
- You mail marketing or promo pieces
Let efficiency and your brand goals guide you.
3. Consider Security Features
If your mail contains financial info, medical details, or any private information, use envelopes with tinted security interiors.
Security-lined envelopes:
- Stop people from seeing through the envelope
- Protect confidential information
- Lower the risk of data leaks
For billing teams, legal offices, and healthcare, security should always be included.
4. Choose the Right Closure Type
The way you seal envelopes affects daily work more than many realize.
Peel & Seal or Self-Sealing:
- Fast for large amounts of mail
- Clean with no moisture needed
- Perfect for busy finance or billing teams
Gum Flap:
- Traditional and dependable
- Lower cost for smaller volumes
- Fine for average daily mailing
Pick the closure that fits the amount of mail you handle.
5. Align With Brand Presentation
Parameters such as logo placement, envelope color, and paper feel shape first impressions.
- White envelopes give a clear and professional vibe.
- Woven textures add a subtle, nice touch.
- Colored envelopes help marketing mail get noticed.
The key is consistency. Every envelope should match the style of your letterhead and business cards.
Conclusion
Business envelopes with logos are not just a nice extra. They are important tools for how your company communicates.
At Business Envelopes, you get printed envelopes made to last, follow USPS rules, and match your brand exactly. From regular #10 envelopes for invoices to larger booklet styles, every option focuses on performance and good looks.
When companies choose Business Envelopes, they do not just buy envelopes. They invest in better visibility, consistent branding, and smoother daily operations. Improve your regular mail. Build your brand stronger with every piece you send. Choose Business Envelopes.
FAQs
-
Why should businesses use envelopes with logos instead of plain envelopes?
Your logo on envelopes will establish trust faster, your mail can be identified more easily, and the image is professional at first glance.
-
Are printed business envelopes USPS compliant?
Yes. All standard sizes meet USPS mailing requirements.
-
Do window envelopes support logo printing?
Yes. Logos get printed in safe areas that do not block the address window.
-
Which envelope size is best for invoices?
#10 window envelopes are the most common choice for invoices and statements.
-
Can I order business envelopes in bulk?
Yes. Ordering in bulk lowers the cost per envelope and keeps your branding the same across the company.
-
Step-by-Step Process to Order Envelope Custom Solutions Online
Previously, when you ordered mailing supplies, you had to call and wait until you received the proofs, hoping they matched what you wanted to see. Businesses are now demanding things to be fast, definite, and within their control. That is why many companies choose to order custom envelopes online.
A simple online system lets teams pick sizes, add their branding, review designs, and set delivery dates without stopping their regular work. Custom envelopes are no longer just supplies. Companies now use them to support branding, streamline mailing, and improve communication.
When you order online the right way, it becomes a reliable system for sending professional email, from invoices to big email campaigns.
What Are Custom Envelopes for Business?
Custom business envelopes are mailing envelopes designed to reflect your company’s look and handle daily needs. They include your logo, your address, and a design that meets your brand guidelines.
They make things stand out, unlike ordinary envelopes, helping individuals recognize your mail immediately, maintain a corporate outlook, and ensure that all your mail appears consistent, whether invoices, statements, contracts, or official letters.
Businesses choose them to look better and to save time by not having to add labels or fix formats every time.
Adding branding directly to the envelopes makes normal mail a clear part of your company’s identity and daily operations.
Why Businesses Are Moving Toward Online Custom Envelope Ordering?
The companies nowadays must work more quickly, reduce the number of steps to be made manually, and make all things consistent to the customers.
Having old methods of ordering, like emails, phone calls, back-and-forth changes and uncertain delivery dates, slows down the process.
Online ordering takes away those problems. It gives businesses a clear, repeatable way to handle custom envelopes as part of regular operations, rather than a one-time purchase.
Greater Visibility and Control Over Every Order
Online tools let teams see all details, approve designs, and follow progress without chasing people by email or phone.
- One place to check sizes, designs, and past orders
- Better teamwork between departments
- Fewer delays from unclear messages
Faster Turnaround That Matches Business Pace
Online systems fit the speed businesses need today.
- Quick proof checks and approvals
- Less time spent coordinating
- Steady delivery dates for regular orders
Consistency Across Locations and Teams
Companies with many teams or offices get the same look every time.
- Same branding no matter who sends the mail
- Easy to reorder without mistakes
- No more mixed-up supplies
Scalable Solution for Growing Communication Needs
When you send more mail, online ordering makes it simple to keep up.
- Adjust quantities for bigger runs easily
- Use saved designs for fast reorders
- Keep supplies steady without extra work
Online ordering is a clever, controlled aspect of your business which makes custom envelopes a smarter switch, more efficient, less error-prone, and leaves your brand unchanged over time.
Step-by-Step Process to Order Custom Envelopes Online
Online ordering needs to be straightforward and user-friendly. An easy step-by-step guide will ensure you do it correctly the first time and avoid any difficulties with the size or design.
Step 1: Identify Your Mailing Purpose Before Choosing a Format
Take your time to think of the contents of the envelopes.
- Invoices or statements sent often
- Marketing letters
- Legal papers or flat documents
This will ensure that the envelope functions and then you work on the appearance.
Step 2: Select the Correct Envelope Size for Your Documents
Pick the wrong size and you get folding issues or mailing problems.
- #10 for letters folded in thirds
- 6×9 for papers sent flat
- 9×12 for thick stacks or many pages
The right size saves paper and makes your mail look better.
Step 3: Prepare Your Branding Assets for Upload
Good files lead to good printing.
- Use sharp logos or vector files
- Double-check your return address format
- Keep space open for clear reading
Clean files help your custom envelopes print exactly as planned.
Step 4: Choose Paper Stock and Construction Based on Usage
The material matters for how the envelope holds up.
- Regular weight for normal mail
- Thicker stock for important items
- Security lining for private contents
Good materials keep envelopes strong through shipping.
Step 5: Approve Digital Proofs Carefully Before Production
This is the last chance to catch mistakes—take it seriously.
- Check logo position and straightness
- Make sure addresses are easy to read
- Look at the full design balance
Careful review stops reprints and keeps your brand strong.
Step 6: Schedule Delivery to Match Operational Needs
Plan delivery so it fits your schedule.
- Order in bulk for regular use
- Prevent running out at busy times
- Build steady stock levels
This turns envelopes into something you control instead of scramble for.
Key Design Considerations When Ordering Custom Envelopes
Good design goes beyond adding a logo. Every part needs to keep things clear, work with mail rules, and last in daily use. An intelligent design ensures the envelopes appear professional and are easy to handle from printing through delivery.
Maintain a Clean and Functional Layout
Do not create a lot of problems with the front as it is simpler to read and process. Do not fill it with too many graphics or words. Leave room for addresses, return info, and postal marks. This keeps the envelope useful while showing your brand.
Use Proper Logo Size and Placement
Envelope with logo should stand out but not take over. Good size and position look professional and make your brand easy to spot. Too big hurts function. The right scale gives a clean business look.
Choose Colors That Print Reliably
Stick to calm, professional colors. They print the same way every time across big orders. Simple colors avoid surprises and keep the focus on your message.
Ensure Readability Through Appropriate Typography
Pick clear, standard fonts that remain readable even when handled frequently. Simple type helps machines read it and stops smudges. Good fonts make both look and function better.
Respect Postal and Addressing Requirements
Leave space for barcodes, stamps, and delivery details. Skipping these can delay mail or result in returns. Build the design around mail rules so everything works smoothly.
Standardize Design Across All Envelope Sizes
Use the same setup on every size you order. Keep logo spot, layout, and style the same. This makes your mail look more connected, easier to order, and helps build stronger recognition.
How Custom Envelopes Strengthen Long-Term Brand Communication?
When you use them every time, envelopes become part of how people see your brand.
- People know it is from you right away
- Each piece shows that you are a professional
- Mail feels planned and careful
This quiet effect makes custom envelopes worth it for how others view your company over time.
Where to Find Custom Envelopes for Businesses?
Picking the right supplier matters as much as the design. You need someone who knows business mail standards, prints consistently, and makes the process easy.
Business Envelopes is a reliable choice for companies that want smooth ordering and high-end custom envelopes for professional mailings. We focus on accuracy, quality, and formats built for business use. This helps you move past basic envelopes and get ones that really fit your daily needs and brand.
- Many standard business sizes and styles
- Sharp printing made for professional mail
- Same quality on every order, big or small
- Simple process designed for business teams
- Strong materials for safe mailing
- Fast, dependable delivery to keep you running
Conclusion
Ordering envelopes online goes beyond saving time. It builds a solid system that supports your brand, saves effort, and keeps every piece of mail looking the same. When businesses switch to clear online ordering, they remove uncertainty, cut setup time, and ensure all communication meets a high professional standard.
At Business Envelopes, we make this easy with dependable printing, exact work, and formats that match real business use. We keep ordering simple while delivering what your operations need.
Whether it is day-to-day or large-scale mailings, we equip you with the tools to manage communication materials with confidence and without hiccups.
FAQs
- How long does it take to receive custom envelopes after ordering online?
Times vary by order size and details; however, online ordering reduces wait time, as approvals, proofs, and shipping are quicker than in older systems.
- Can I reorder the same design without starting over?
Yes. Most sites store your information so you can easily rearrange the same envelopes and maintain the same thing.
- Are custom envelopes suitable for high-volume mailing operations?
Yes. Companies with lots of regular mail achieve better flow and a consistent professional look across all teams.
- Do online ordering platforms allow design flexibility?
Yes. You post logos, select layout options, select sizes and everything gets approved online before it is printed.
- Why should businesses standardize their envelope ordering process?
It reduces extra work, prevents mismatched mail, keeps every piece looking professional, and makes growth easier.
-
What to Include on an Envelope With Logo: Design, Placement, and Print Tips
The envelope is what your customer sees first, before they read its contents. The Envelope With Logo immediately conveys that your business is professional and serious.
That first look sets the tone. It influences the levels of trust and order in people's thoughts about you. An ordinary envelope is lost in the mail. Therefore, Envelope With Logo stands out. It shows you care about details and stay consistent.
Companies that use branded envelopes for all their mail do more than send papers. They help people remember their names. They look more reliable. Every letter feels planned and important.
Over time, envelopes with your logo become a simple way to keep your brand visible in daily mail.
Benefits of Choosing Envelopes With Logo for Businesses
An envelope is more than a cover. It is part of how your company communicates. When you use printed envelopes with your logo, you get real benefits in operations and marketing without extra work.
Stronger Brand Recall With Every Delivery
Using the same design every time makes your email easy to recognize. People know it is from you before they check the return address.
- Links your logo to your company in their mind
- Keeps your look the same on invoices, letters, and notices
- Turns regular mail into quiet branding
Professionalism That Builds Immediate Trust
A clean envelope with a logo tells people the contents matter. It looks official and well-prepared.
- Stops mail from looking like junk
- Shows you run things in an orderly way
- Adds weight to financial or legal papers
Operational Consistency Across Teams
When different teams use different envelopes, the mail looks messy. One standard envelope keeps everything matching.
Faster Mail Identification and Handling
Easy-to-spot envelopes move more quickly through mailrooms and offices.
- Helps people pick out important mail first
- Speeds up sorting
- Cuts delays in getting documents delivered
Reliable Results When Using Established Suppliers
Trusted Envelope With Logo suppliers like Business Envelopes provide sharp printing, strong paper, and accurate layouts that look good even after shipping.
- Same quality every time
- Meets postal placement rules
- Uses paper made for business mail
Long-Term Cost Efficiency Through Standardization
One standard printed envelope saves on design, labels, and sourcing over time while maintaining high quality.
- No need for separate address labels
- Makes bulk orders easy
- Keeps supply steady and predictable
Read more about custom business window envelopes so you can choose the best for your business.
What Information Should Be Included on an Envelope With Logo?
The envelope needs to be clear and simple. Do not crowd it. The goal is to present the key details in a neat, professional format that complies with postal regulations. Every item should have a clear purpose and maintain a balanced design.
Company Name and Logo Identity
People can identify you by your logo. Make it the right size for the envelope. Position it so it is visible without obscuring the address information. This makes the envelope with Logo reusable and defines your brand image.
Complete Return Address for Reliability
Always include your full return address. If the mail cannot be delivered, it will be returned to you quickly. It also verifies the mail is legitimate and provides a way to reply or keep records.
Contact Details When Relevant
Some companies add a phone number or website under the return address. Keep it small so it does not detract from the main purpose or make the front too busy.
Clear Recipient Address Space
Leave the middle of the envelope open for the delivery address. Good spacing helps machines read it correctly and prevents sorting problems.
Postal Compliance and Clear Zones
Follow mail service rules to avoid delays or returns.
- Leave space for barcodes
- Keep graphics away from the address area
- Follow correct alignment rules
Subtle Design Elements for Brand Character
Small touches can improve the look if used carefully.
- Thin borders or light lines
- Soft background patterns
- Short tagline when it fits
Correct Logo Placement: Where Is the Ideal Choice?
The position of the logo matters. The right spot makes it look planned and keeps the envelope easy to use.
Upper-Left Corner for Recognition and Balance
This is the standard and best place. It aligns with how people read and complies with postal guidelines.
- Easy to see as soon as someone picks up the mail
- Leaves the full address area clear
- Keeps the envelope looking clean and organized
Scaled Proportion to Envelope Size
The logo should fit the envelope. Too big crowds the space. Too small loses impact.
- Keep even margins around it
- Make sure it prints sharply and clearly
- Balance the logo and address so neither overpowers the other
Consistency Across All Envelope Sizes
Use the same placement on every size you order.
- Same spot on #9, #10, and larger catalog envelopes
- Builds a consistent look that people recognize
- Makes your design rules simple to follow
4 Best Size Options for Envelope With Logo
Choose the right size so documents fit well, and the envelope still looks professional. Each size works for different tasks.
#9 Envelope for Reply Mail and Statements
#9 Envelope size is designed for return mail or smaller inserts, such as pre-addressed reply envelopes.
- Good for getting responses back
- Small but professional
- Fits standard mail processes
#10 Envelope for Standard Business Communication
#10 Envelope is the most common business envelope. It works for letters, invoices, and regular mail.
- Holds letter-size paper folded in thirds
- Used in every industry
- Perfect for daily use
6×9 Envelope for Flat Document Mailing
This size lets you send documents flat without folding.
- Best for reports or presentations
- Keeps papers safe and flat
- Looks more serious
9×12 Envelope for Bulkier Materials
Use this for thick items such as catalogs, contracts, or multi-page documents.
- No folding needed
- Good for important submissions
- Handles larger or heavier contents
How a Well-Designed Envelope Improves Daily Operations?
An envelope is more than just a carrier of mail. It takes minor issues out of the ordinary work. Envelopes can be standard or printed, then laid out to save time on setup and on actual work. The result is improved communication, fewer errors, and easier mail processing.
Reduces Preparation Time Across Departments
With the logo and layout already on the envelope, no one has to print labels or fix formats each time.
- Cuts out repeat setup steps
- Speeds up sending invoices and documents
- Let's teams focus on important work
Creates Consistency in High-Volume Mailings
Companies that send a lot of mail benefit from one reliable format that works every time.
- Every piece looks the same and professional
- Makes bulk mail runs easier
- Prevents mixed-up stationery
Improves Accuracy and Minimizes Handling Errors
Clear spaces for addresses reduce mistakes that cause delays or returns.
- Stops bad placement or overlaps
- Helps mail go through the postal systems smoothly
- Lowers the chance of lost or returned mail
Supports Faster Internal Workflow Coordination
When supplies are predictable, staff can prepare and send mail without second-guessing.
- Speeds up putting documents together
- Makes training new staff easier
- Builds processes that scale
Strengthens Professional Communication Without Extra Effort
The envelope shows your brand automatically. No need for extra inserts or labels to look professional.
- Keeps mail looking sharp every day
- Builds trust in regular communication
- Turns basic mail into brand support
Simply stated, a properly designed envelope integrates into your everyday system. It makes your business run more quickly, keeps it organized, and maintains a professional appearance without additional procedures.
Design Tips That Actually Improve Printing Results
Good print design needs attention to detail. Small errors can affect clarity, strength, and cost.
- Use Print-Friendly Fonts: Choose simple, clear fonts that print well every time without blurring.
- Keep Color Controlled: Use only a few colors. This keeps printing simple and matches a professional business style.
- Maintain White Space: Leave open space around text and the logo. It makes addresses easy to read.
- Use High-Resolution Artwork: Always use sharp, high-quality logo files. Low-resolution files cause blurry prints.
- Align Layout With Envelope Size: Design for the exact envelope size. Do not stretch one layout across different sizes.
Common Mistakes to Avoid When Customizing an Envelope With Logo
Even good teams can make these mistakes. Below are some of the most common mistakes to avoid When Customizing an Envelope With Logo.
- Oversized Logos: They occupy too much space, leaving less room for the address.
- Ignoring Postal Zones: Not leaving clear areas can lead to mail issues.
- Crowded Layouts: Too much information makes everything hard to read.
- Using Low-Quality Files: Poorly formatted files lead to lower print quality.
- Treating Envelopes Like Marketing Pieces: Envelopes are for clear delivery, not advertising. Focus on being clean and professional.
Conclusion
Minor details matter a lot in business. Envelopes are used daily and provide silent branding. An excellent envelope with your logo conveys trust, organization, and confidence even before the letter is opened.
At Business Envelopes, we offer high-quality business envelopes that suit actual business requirements. Our printing is high-quality, the material is durable, and the size is efficient to make your mail presentable and easy to handle.
We make every envelope work in favor of your brand, streamline your operations, and provide the consistency you want, regardless of whether you are sending invoices, statements, or bulk mailings.
FAQs
1. Why should businesses use an envelope with logo instead of plain envelopes?
Branded envelopes help people recognize you, project a more professional image, and build trust. Another benefit is that they save time by eliminating labels and keeping the inbox tidy.
2. Does logo printing affect mailing compatibility?
No. The envelope will fit all postal regulations when correctly placed, the logo is visible, and it can be sorted by postal machines.
3. Which envelope size works best for everyday business use?
The #10 size is the standard. It fits folded letter paper and handles invoices, statements, and regular mail in most industries.
4. Can branded envelopes improve internal workflow efficiency?
Yes. They reduce preparation time, simplify document workflows, and ensure consistent processes across teams.
5. How do I ensure consistent quality when ordering envelopes with logo?
Collaborate with a trusted supplier such as Business Envelopes. They offer correct printing, high-quality paper, and consistent quality in each order.
-
Best Personalized Envelopes for Offices and Small Businesses
In regular office work, envelopes still play a big role, way more than most people realize. Invoices, agreements, statements, promotional offers, official letters, and new client packets all go out in envelopes to reach customers, suppliers, or colleagues. Once your branding appears on that envelope, it shifts from simple wrapping to a real part of your company's image.
For regular offices and smaller companies, custom envelopes offer one of the easiest, most cost-effective ways to create a consistent, reliable look and keep everything matching — all without making daily tasks harder. Whether your team mails 50 items weekly or thousands monthly, printed envelopes help people spot your brand, get quicker replies, and ensure everyone inside sticks to the same standards.
At Business Envelopes, we focus on solid, work-ready custom envelopes built just for offices, small outfits, new ventures, and companies on the rise. We handle everything ourselves. No off-the-shelf stuff or middlemen. Only envelopes that fit actual business routines.
This article highlights the top custom envelopes we offer, tips on picking the best match, and smart ways offices plus smaller teams can put them to work, focused on function, not just looks.
Why Personalized Envelopes Still Matter in Modern Offices?
Email and online tools haven't wiped out paper mail, they've just made it count for the important stuff. The physical mail companies send now usually carry real weight.
Custom envelopes make a difference since they:
- Show reliability right away, even before anyone opens the contents
- Cut down on mix-ups when sorting mail inside or outside the company
- Build stronger name recognition with no extra ad spend
- Keep everything looking the same, no matter the team or branch
Especially for smaller operations, these envelopes work like quiet ambassadors. A sharp logo, neat lettering, and steady design create instant trust — way before the reader gets to the message.
What Makes a Good Business Envelope?
Many printed envelopes are available, but not all meet real office needs. Offices and smaller companies require ones that hold up to heavy use.
A solid work envelope needs to provide:
- Spot-on printing — logos, addresses, return details lined up exactly
- Tough paper — handles forms, bills, and extra sheets without tearing
- Steady dimensions — fits printers, filing systems, and postal machines
- Clean professional vibe — sharp and simple, nothing over-the-top
- Reliable results — looks identical across orders and runs
That's precisely the approach we take at Business Envelopes, built for everyday operations, not show.
Types of Personalized Envelopes
1. Personalized Business Envelopes
Personalized Business Envelopes are the go-to choice for offices, corporate groups, and professional setups. Made for routine exchanges, they serve as the main support for formal messages.
Best for:
- Regular letters
- Formal alerts
- Client updates
- Supplier exchanges
Customization covers:
- Your company logo
- Full business name
- Return address spot
- Team or location specifics
Every piece you send automatically carries your company's look — no extra steps needed from anyone on staff.
2. Personalized Window Envelopes
Personalized Window Envelopes speed up processing with built-in clear panels that show the address, eliminating manual stickers or extra printing.
Great for:
- Bills
- Account summaries
- Pay stubs
- Large office batches
Main advantages:
- Quicker handling in bigger runs
- Fewer mistakes on addresses or mailing
- Neat, uniform finish
Your logo and return info stay prominent, while the delivery details line up right inside the window — delivering accuracy and polish during heavy mailing periods.
3. Personalized Invoice & Billing Envelopes
Sending payment-related items requires clear messaging, confidence, and a steady presentation. At Business Envelopes, we customize invoice and billing envelopes specifically for financial matters and recurring billing workflows.
Typical uses:
- Monthly bills
- Reminder notices
- Balance overviews
Reasons companies pick them:
- Strong branding creates confidence
- Sharp design lifts opening chances
- Steady look cuts mix-ups and arguments
A solid billing envelope feels official and purposeful, helping speed up replies and streamline payment handling.
4. Personalized Security Envelopes
Some mail needs protection from prying eyes right from the start. These keep private details hidden while keeping the outside looking sharp.
Ideal for:
- Court documents
- Employee files
- Money records
- Private customer info
Protection elements:
- Dark inside patterns block the see-through
- Heavy, sturdy material
- Clean outside branding
They offer privacy internally paired with a pro outside — crucial when rules or sensitivity come into play.
5. Personalized Mailing Envelopes for Marketing & Outreach
Real mail still delivers when it feels personal and familiar. These help your efforts pop without seeming like junk or salesy spam.
Perfect for:
- Targeted campaigns
- Invite cards
- Company updates
- Onboarding packages
Once people spot your brand immediately, they open it more often. Branded versions keep mail from looking like trash and frame it as a serious business contact.
6. Personalized Envelopes for Small Businesses & Startups
Newer or smaller teams sometimes miss how envelopes shape opinions. Truth is, they provide one of the quickest paths to showing you're legit.
Personalized envelopes assist by:
- Earning trust from the very first send
- Keeping branding uniform in all exchanges
- Giving a mature feel — even with lower volumes
Sending only 10–20 pieces weekly? Branded ones still convey the organization's credibility and dependability.
How Offices Should Choose the Right Personalized Envelopes
Picking envelopes comes down to matching your daily flow forget chasing styles.
Step 1: Identify Document Type
Consider:
- Letters or invoices?
- Confidential or general?
- Single page or multi-page?
This guides size, paper weight, and window choice.
Step 2: Align with Mailing Volume
For big quantities:
- Go with window styles
- Stick to standard setups
- Pick machine-friendly options
For smaller, key items:
- Skip windows
- Choose a thicker stock
- Focus on clear branding
Step 3: Stick to Basic Branding
Work envelopes aim for pro, not flashy.
Smart moves:
- Single logo placement
- Simple color choices
- Readable fonts
- Zero extras
Steady wins over fancy every time.
Benefits of Using Personalized Envelopes for Offices
1. Brand Recognition at Zero Extra Cost
You send mail anyway. Adding your mark costs nothing more in postage — yet it sticks in minds longer.
2. Professional Image Across Departments
From payroll to sales to support, every group mails stuff. Matching envelopes let every area present a consistent, polished front.
3. Faster Mail Processing
Window styles plus uniform designs cut:
- Hand-address errors
- Wrong placements
- Hold-ups
Speed counts in busy offices.
4. Improved Trust & Response Rates
People open familiar company mail more quickly than plain mail. Real-world habit, not just guesswork.
Why Small Businesses Benefit the Most from Personalized Envelopes
Smaller outfits live or die by how they come across. Clients, partners, and suppliers form opinions before even reading inside. Custom envelopes deliver outsized returns here compared with big companies.
1. Professional Appearance Without Enterprise-Level Spend
Limited funds mean no room for huge branding pushes. Custom envelopes fix that fast. A neat logo, address, and name deliver a sharp, put-together vibe for pennies compared to ads or redesigns. Small teams get that established feel without outside help.
2. Instant Trust in Client and Vendor Communication
Blank or store-bought envelopes scream casual or unimportant. Branded ones shout real business. Seeing clear branding on invoices, deals, or notices makes people take it seriously, speeding cooperation and responses.
3. Consistent Branding Across Every Touchpoint
Many small teams struggle with scattered looks across docs, emails, and mail. These envelopes quietly fix it. Every outgoing piece shares the same style, font, and setup, building recognition and making the operation appear solid.
4. Higher Open Rates for Important Mail
Smaller groups need quick action on payments, sign-offs, and confirmations. Recognizable envelopes get opened sooner. Official-looking mail moves faster than unmarked stuff — driving quicker decisions that help cash and workflow.
5. Low-Effort, High-Impact Branding Tool
No need to add branding inserts or reminders. Print once, and every bill, alert, or note carries your mark automatically. For busy small crews, that hands-off boost saves huge time.
6. Helps Small Businesses Look Established from Day One
Early ventures face tough scrutiny. Branded envelopes even the odds. At just 10–20 sends per week, they project experience and steadiness, letting smaller players hold their own against giants, particularly in business deals.
If you want to know about Coin Envelopes, this guide is your end-to-end playbook.
Common Mistakes Businesses Make with Personalized Envelopes
Steer clear of:
- Loading them with too much design
- Picking flimsy stock for bills
- Using different versions by team
- Switching formats often
Steady choices outperform constant tweaks.
How Personalized Envelopes Support Compliance & Documentation
Some emails require clear records and a professional presentation.
Branded versions aid with:
- Easier audits
- Proper official records
- Regulated exchanges
They appear deliberate — never thrown together.
Why Choose Business Envelopes for Personalized Envelopes
We skip reselling and outsourcing. No mixed batches.
What you get:
- Work-focused custom envelopes
- Steady printing results
- Formats ready for office life
- Easy repeat ordering
- Support for small and growing businesses
Our products suit constant business needs, not occasional projects.
Conclusion
Custom envelopes aren't fancy add-ons; they're basic business tools. Offices and small companies use them to sharpen their pro edge, streamline handling, and lock in brand strength, all without added hassle or expense.
At Business Envelopes, we deliver custom envelopes crafted for day-to-day operations, covering bills, letters, confidential files, and bulk mailings. Direct from us. No fluff. Just reliable, sharp-looking envelopes that grow alongside your setup.
If your business mails anything, make sure the envelopes do your name justice.
Step up your office mail game now with Personalized Envelopes from businessenvelopes.com.