When an address does not show through a window envelope correctly, the problem is rarely the printer. It is a mismatch between the template used to print the document and the exact position of the window on the physical envelope. A difference of a quarter inch between where you expect the address to sit and where the window actually is means the recipient's name is cut off. The check amount may be visible when it should not be. Or the whole piece goes to manual sorting at USPS and loses automation pricing.
This guide gives you the precise dimensions for three envelope template formats: the double window envelope template, the #10 window envelope template, and the coin envelope template. For each one, you get confirmed outer envelope dimensions, exact window size and position measurements, software settings for correct alignment in QuickBooks, Sage, Xero, and Microsoft Word, and the specific checks to run before any production batch.
★★★★★
"Amazing company! Excellent service and great products, especially the double window envelopes. Gives my checks a professional look. I highly recommend BusinessEnvelopes.com."
★★★★★
"I have now ordered from businessenvelopes.com four times. Every time my order is perfect and always looks exactly as ordered. Business Envelopes exceeds my expectations on shipping and the product is excellent."
★★★★★
"The quality of the paper feels much more substantial than envelopes I have ordered from sites like Office Depot. The tinting is solid, and you cannot see through it at all. Definitely will be re-ordering."
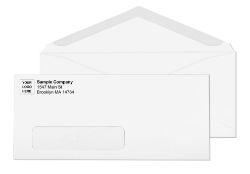
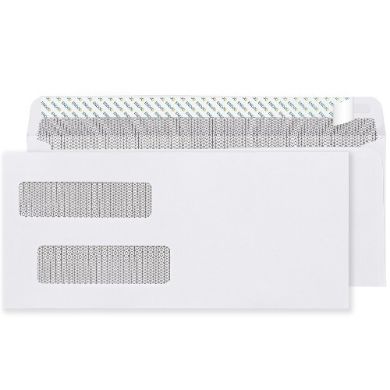
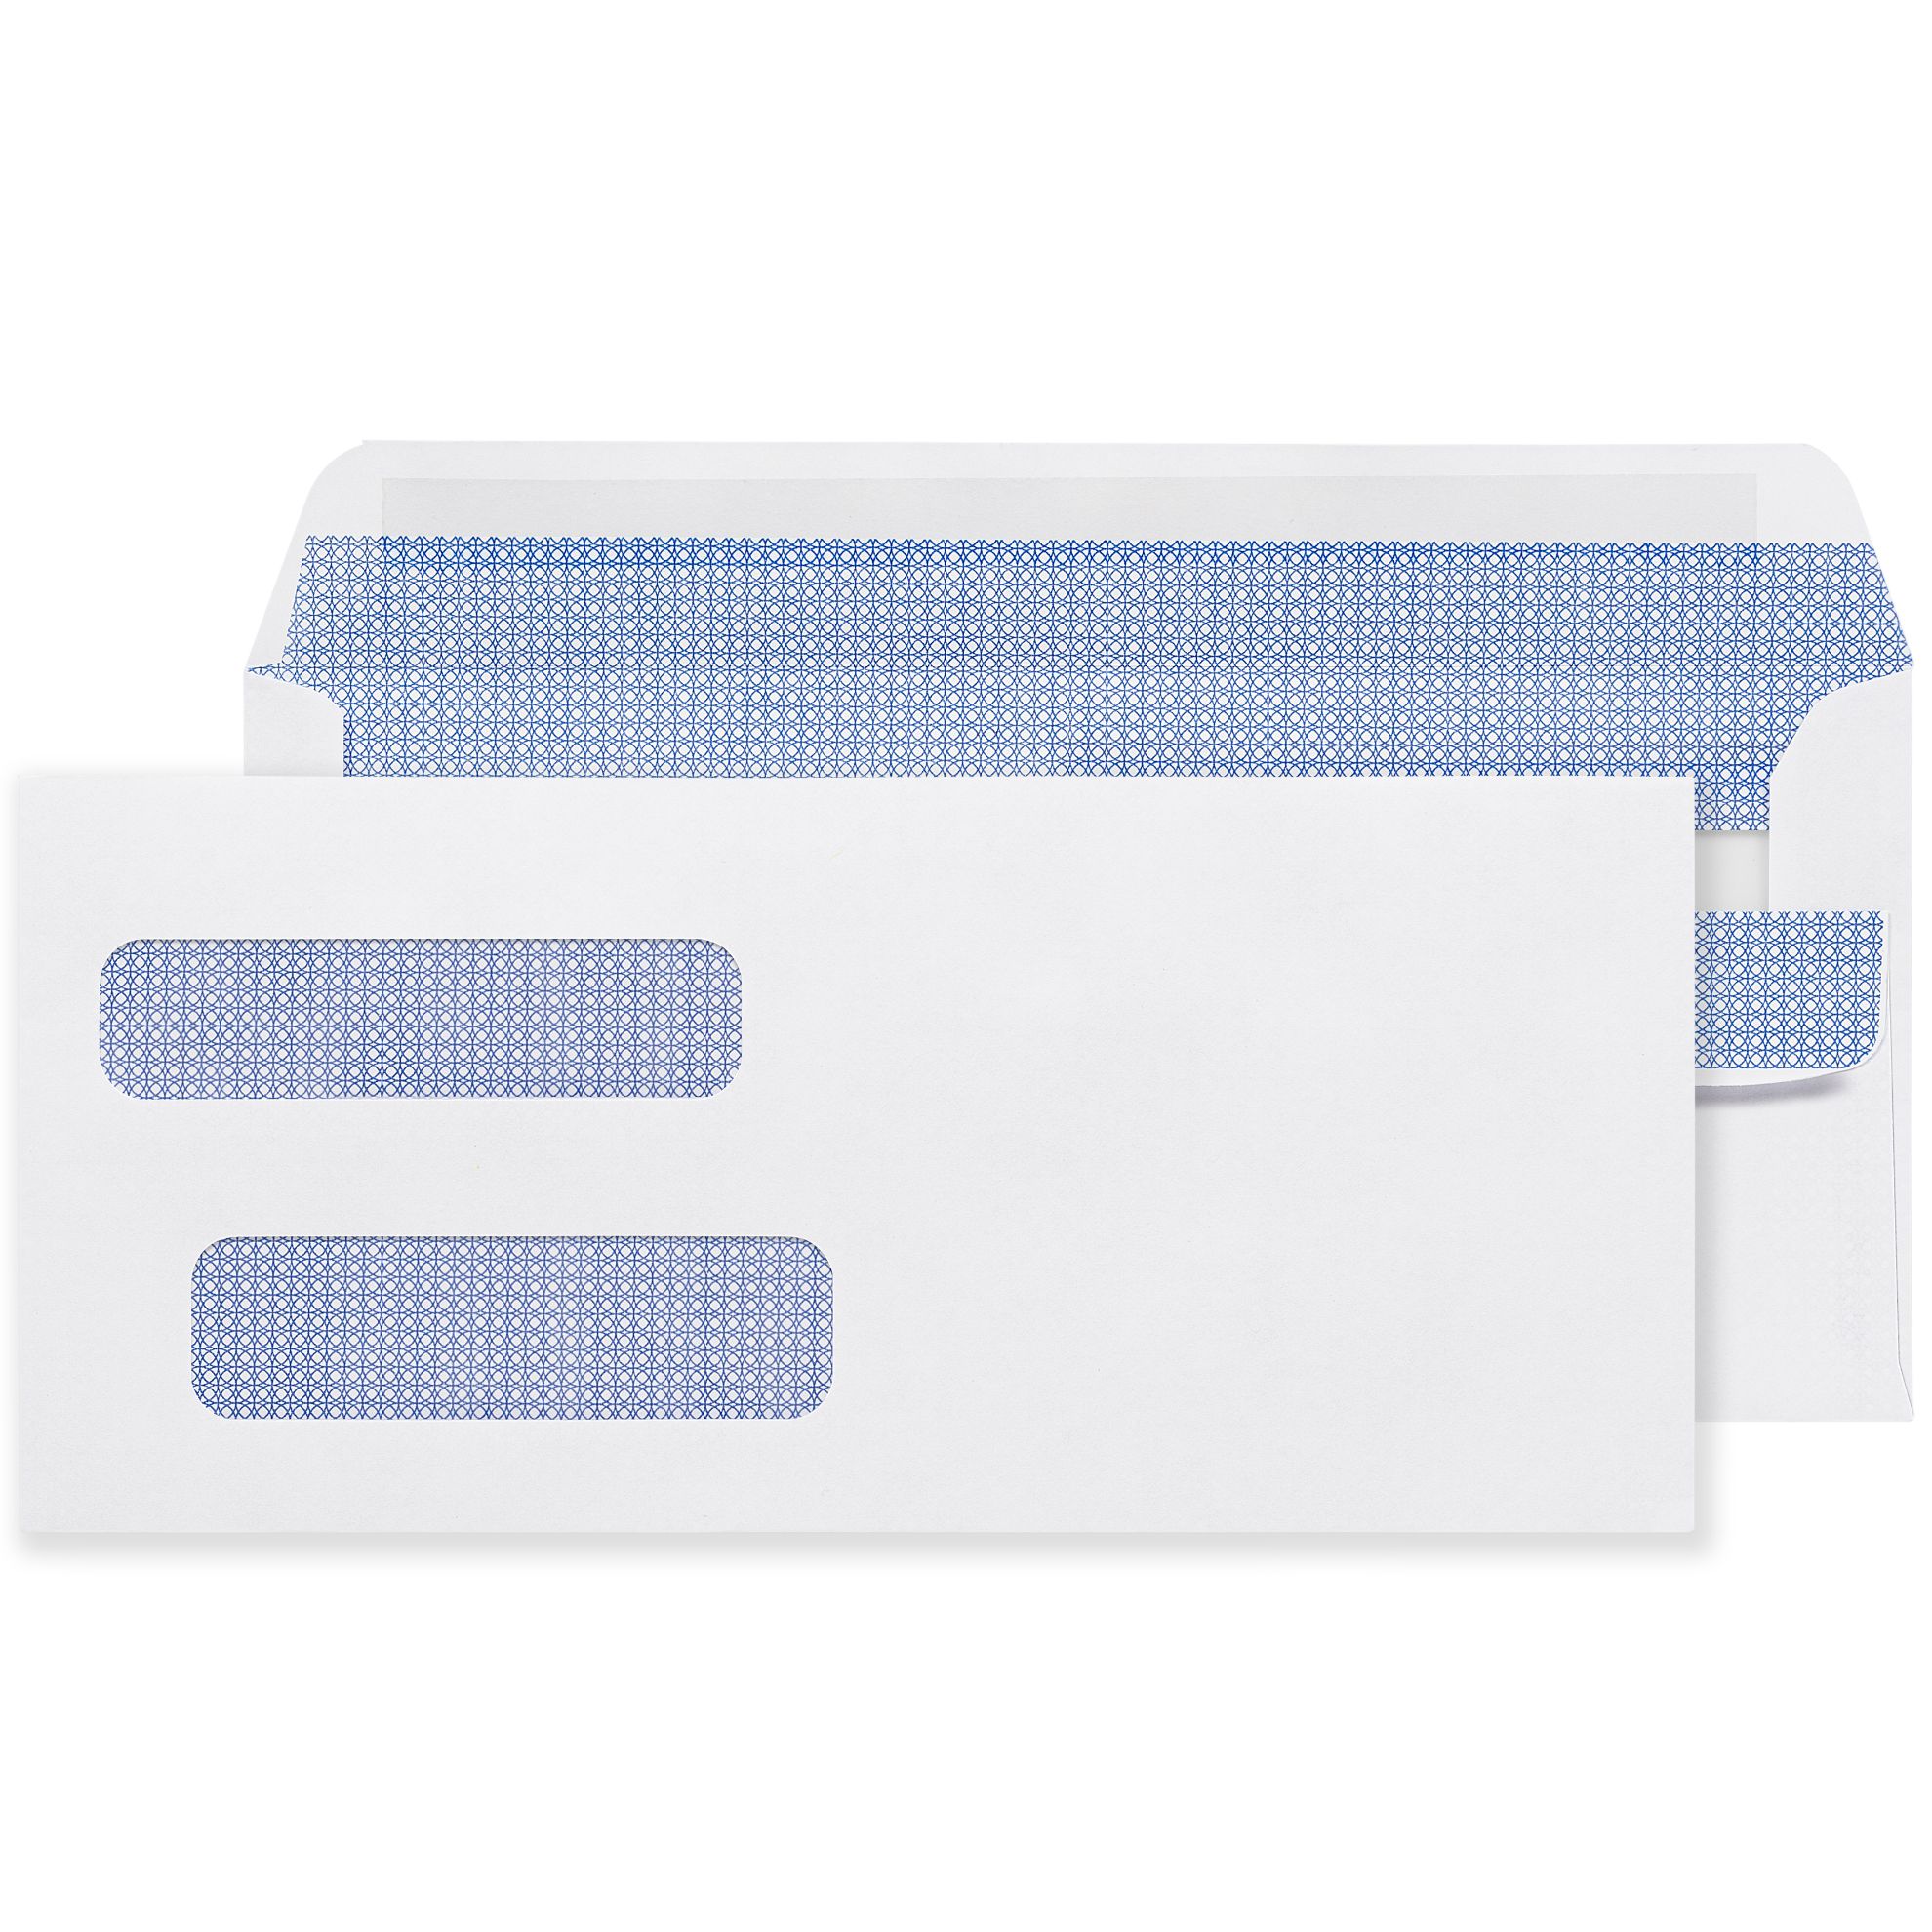
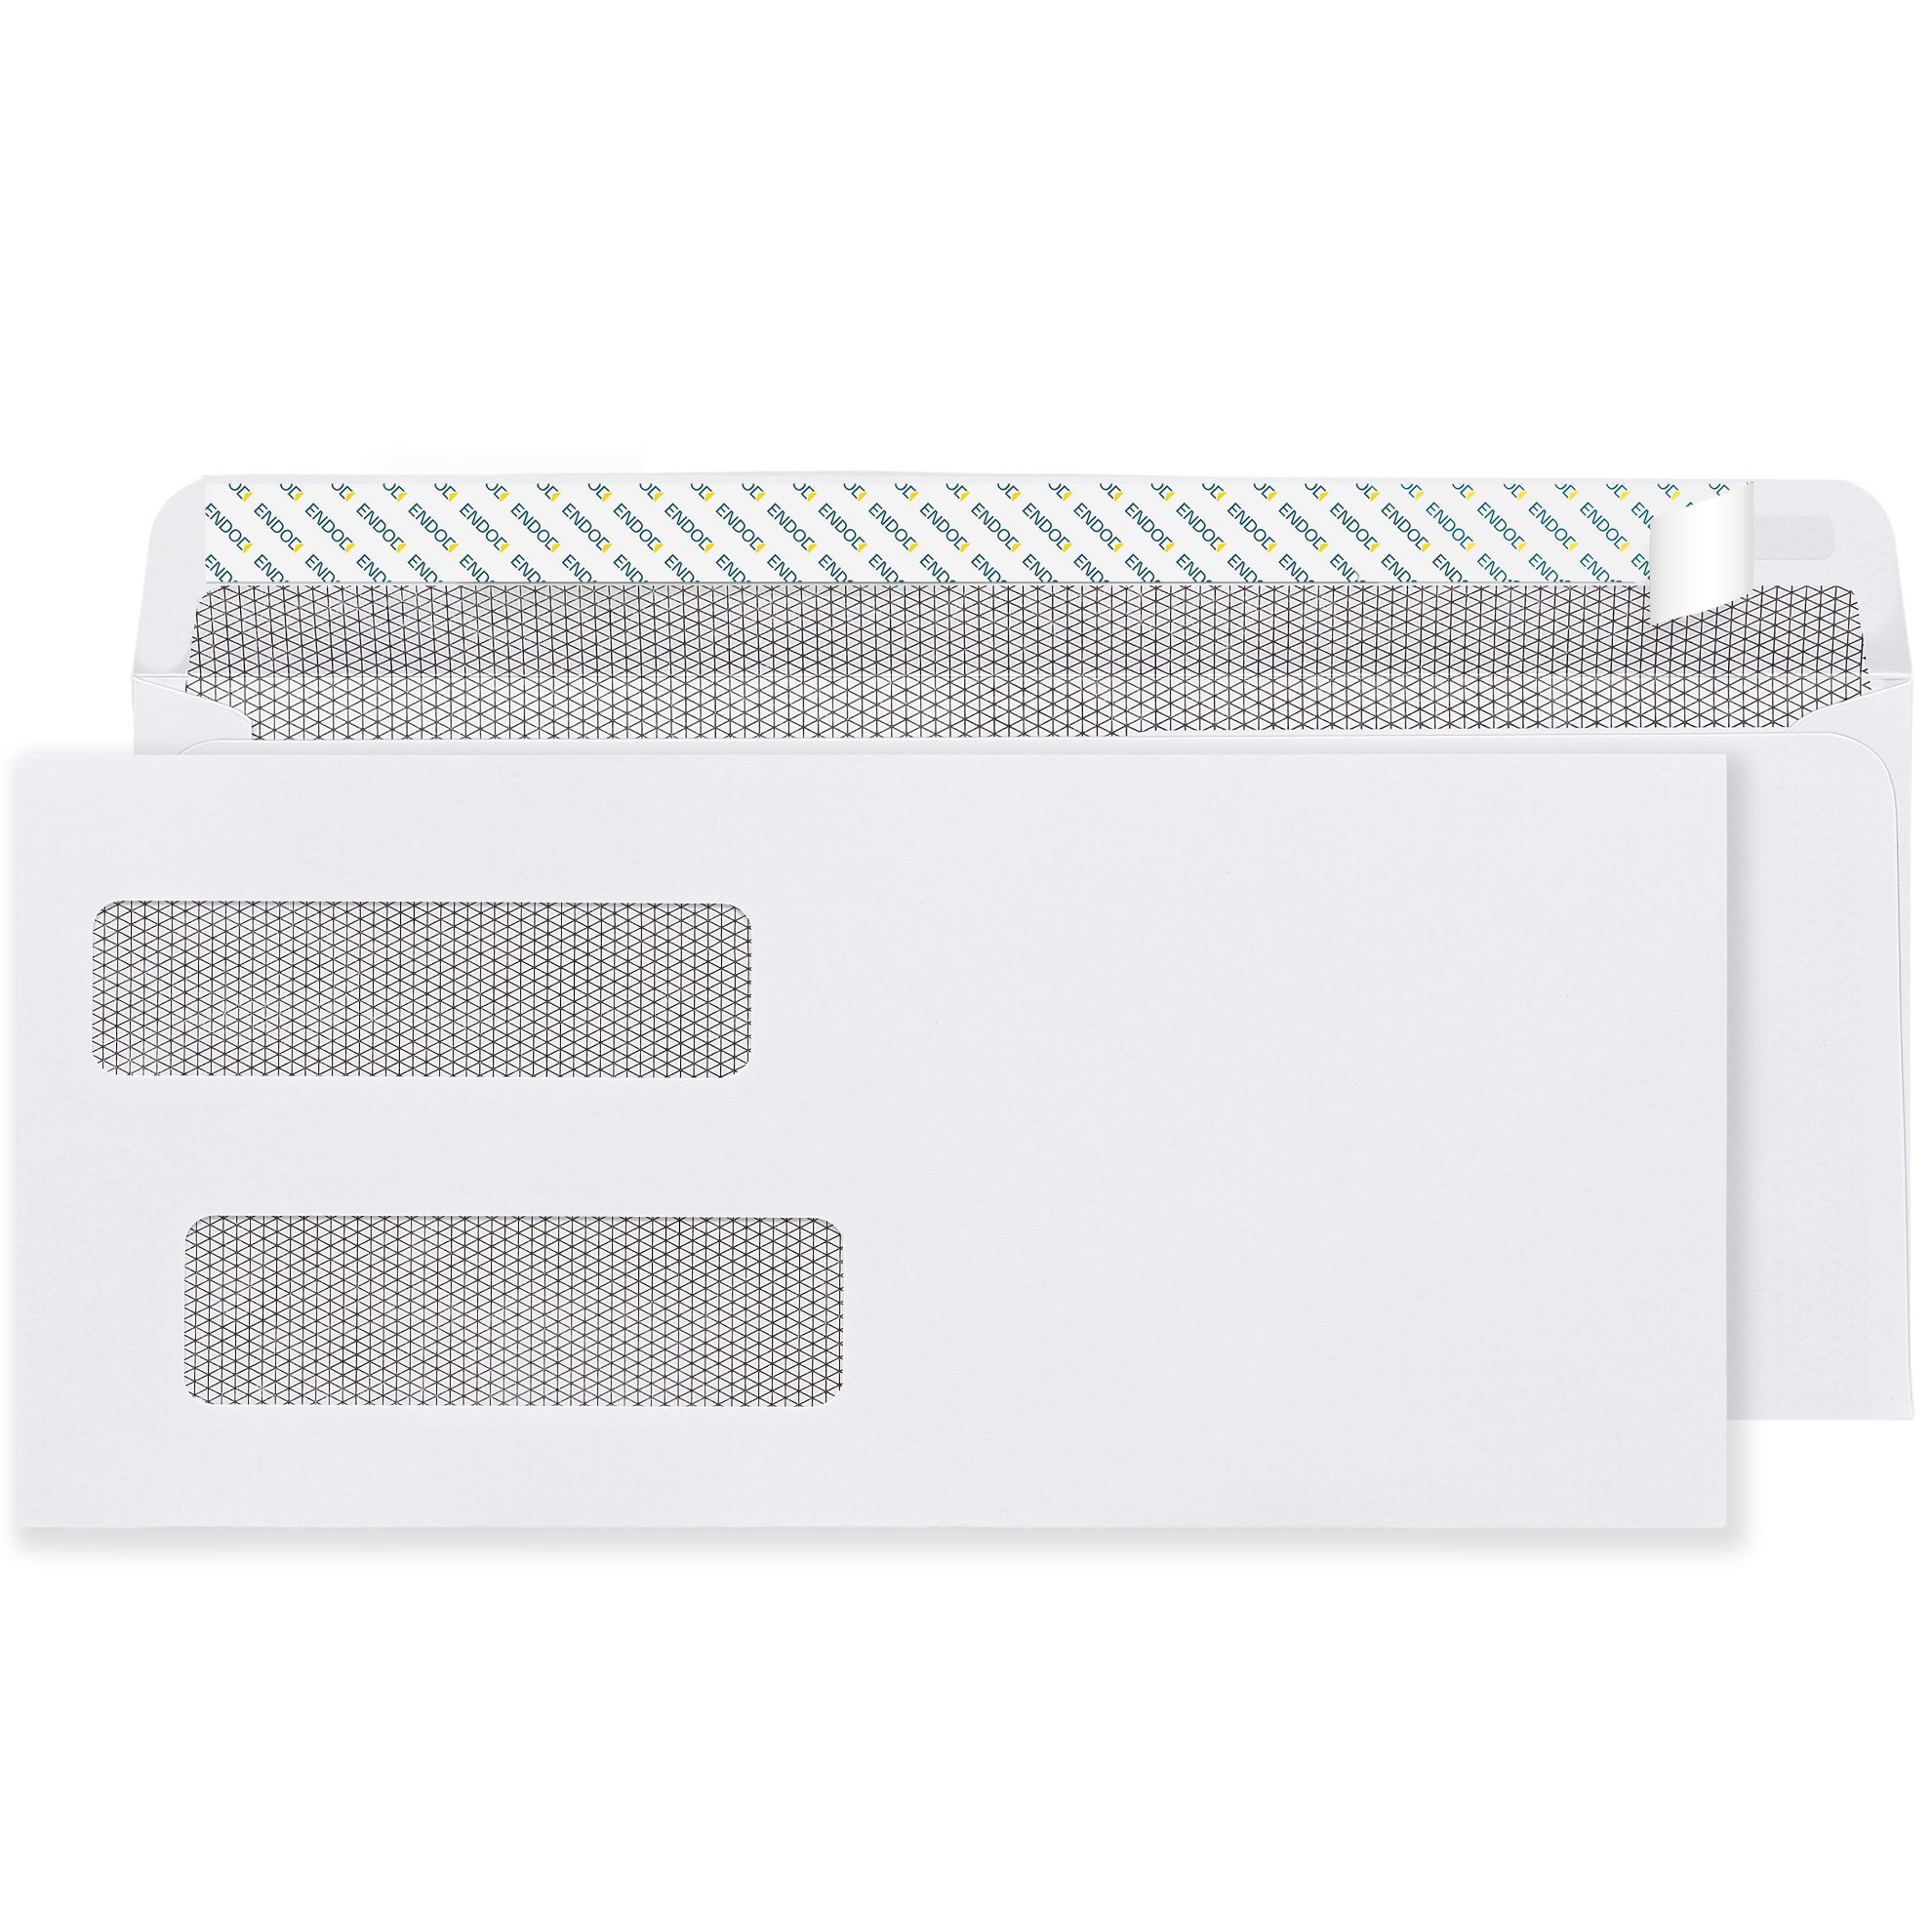
The double window envelope template is the specification set that tells your check-printing software exactly where to place address blocks so they show through both windows of the physical envelope. The double window envelope itself exists specifically for check mailing. A standard single window envelope shows the recipient's delivery address from the document inside. The double window adds a second opening that shows the sender's return address from the same document, eliminating the need to print, label, or address anything on the envelope face at all. Both addresses come directly from the printed check inside.
The standard double window check envelope at Business Envelopes measures 8 7/8 inches by 3 7/8 inches. This is the format sized for the standard US business check, which measures 3.5 by 8.5 inches, giving approximately a quarter inch of clearance on each side when the check is properly inserted.
A slightly smaller variant used by some suppliers measures 8 3/4 inches by 3 11/16 inches. Another common variant is 8 3/4 inches by 3 5/8 inches. All sizes are compatible with standard US business checks. The 8 7/8 by 3 7/8 format provides marginally more insertion clearance, which reduces the chance of the check catching on the envelope walls during high-speed insertion. All double window check envelopes at Business Envelopes are compatible with all QuickBooks versions, including QuickBooks Online, QuickBooks Desktop, QuickBooks Pro, Premier, and Enterprise.
The upper window, which shows the payer's return address from the check, measures 7/8 inch tall by 3 1/2 inches wide. Its position is measured from the left edge of the envelope face and from the bottom of the envelope: 5/16 inch from the left edge and 2 3/8 inches from the bottom.
The lower window, which shows the payee's delivery address, measures 1 inch tall by 4 inches wide. Its position is 11/16 inch from the left edge and 11/16 inch from the bottom of the envelope.
| Window | Size | From Left Edge | From Bottom Edge |
|---|---|---|---|
| Upper (payer/return address) | 7/8 in x 3.5 in | 5/16 in | 2 3/8 in |
| Lower (payee/delivery address) | 1 in x 4 in | 11/16 in | 11/16 in |
| Envelope outer dimensions | 8 7/8 in x 3 7/8 in | ||
These measurements define the standard double window envelope template that QuickBooks, Quicken, Sage, and ADP check formats are all calibrated against.
QuickBooks prints three check formats. Each one has a different address block position on the printed check:
Voucher checks print on a full 8.5 by 11-inch sheet with the check in the upper third and two identical voucher stubs below. The check portion is torn off and inserted into the double window envelope. This is the most common format for business payroll and accounts payable, and it is the format the double window envelope template dimensions above are calibrated to.
Standard checks print three checks per 8.5 by 11-inch sheet. Each check is 3.5 by 8.5 inches. These also use the double window envelope at the same dimensions.
Wallet checks print three smaller checks per sheet, each measuring approximately 2.75 by 6 inches. Wallet checks require a different, smaller envelope, typically a 6 1/4 by 3 1/2 inch format. The standard double window envelope is too large for the wallet check dimensions, and the address blocks will not align with the windows correctly.
To confirm which check format you have: open QuickBooks, go to File, then Print Setup, then Check. The format listed there is the one your printer is currently configured for. If you are ordering envelopes and are unsure, print a single test check onto plain paper and measure the position of both address blocks before ordering a box of envelopes.
In QuickBooks Online, the form setup for window envelope compatibility is under Settings, then Custom Form Styles. Select your check or invoice form, then Edit. Go to the Design tab and select Edit Print Settings. Check the box labeled Fit printed form with pay stub in window envelope and select Done.
QuickBooks Online formats both the return address and the customer address to a maximum of six lines each. If your company address or the customer address exceeds six lines, the final lines will be omitted from the printed output. Keep both addresses to six lines or fewer to ensure the full address appears in the window.
The double window position standard was established around the QuickBooks check format and has been adopted by virtually every major US business accounting platform. Sage 50, Xero, Wave, FreshBooks, and ADP all print address blocks in positions designed to align with the same double window envelope template dimensions listed above.
This means an envelope purchased for QuickBooks compatibility will, in almost all cases, be compatible with your accounting software, regardless of the platform, as long as you are using the voucher or standard check format rather than wallet checks.
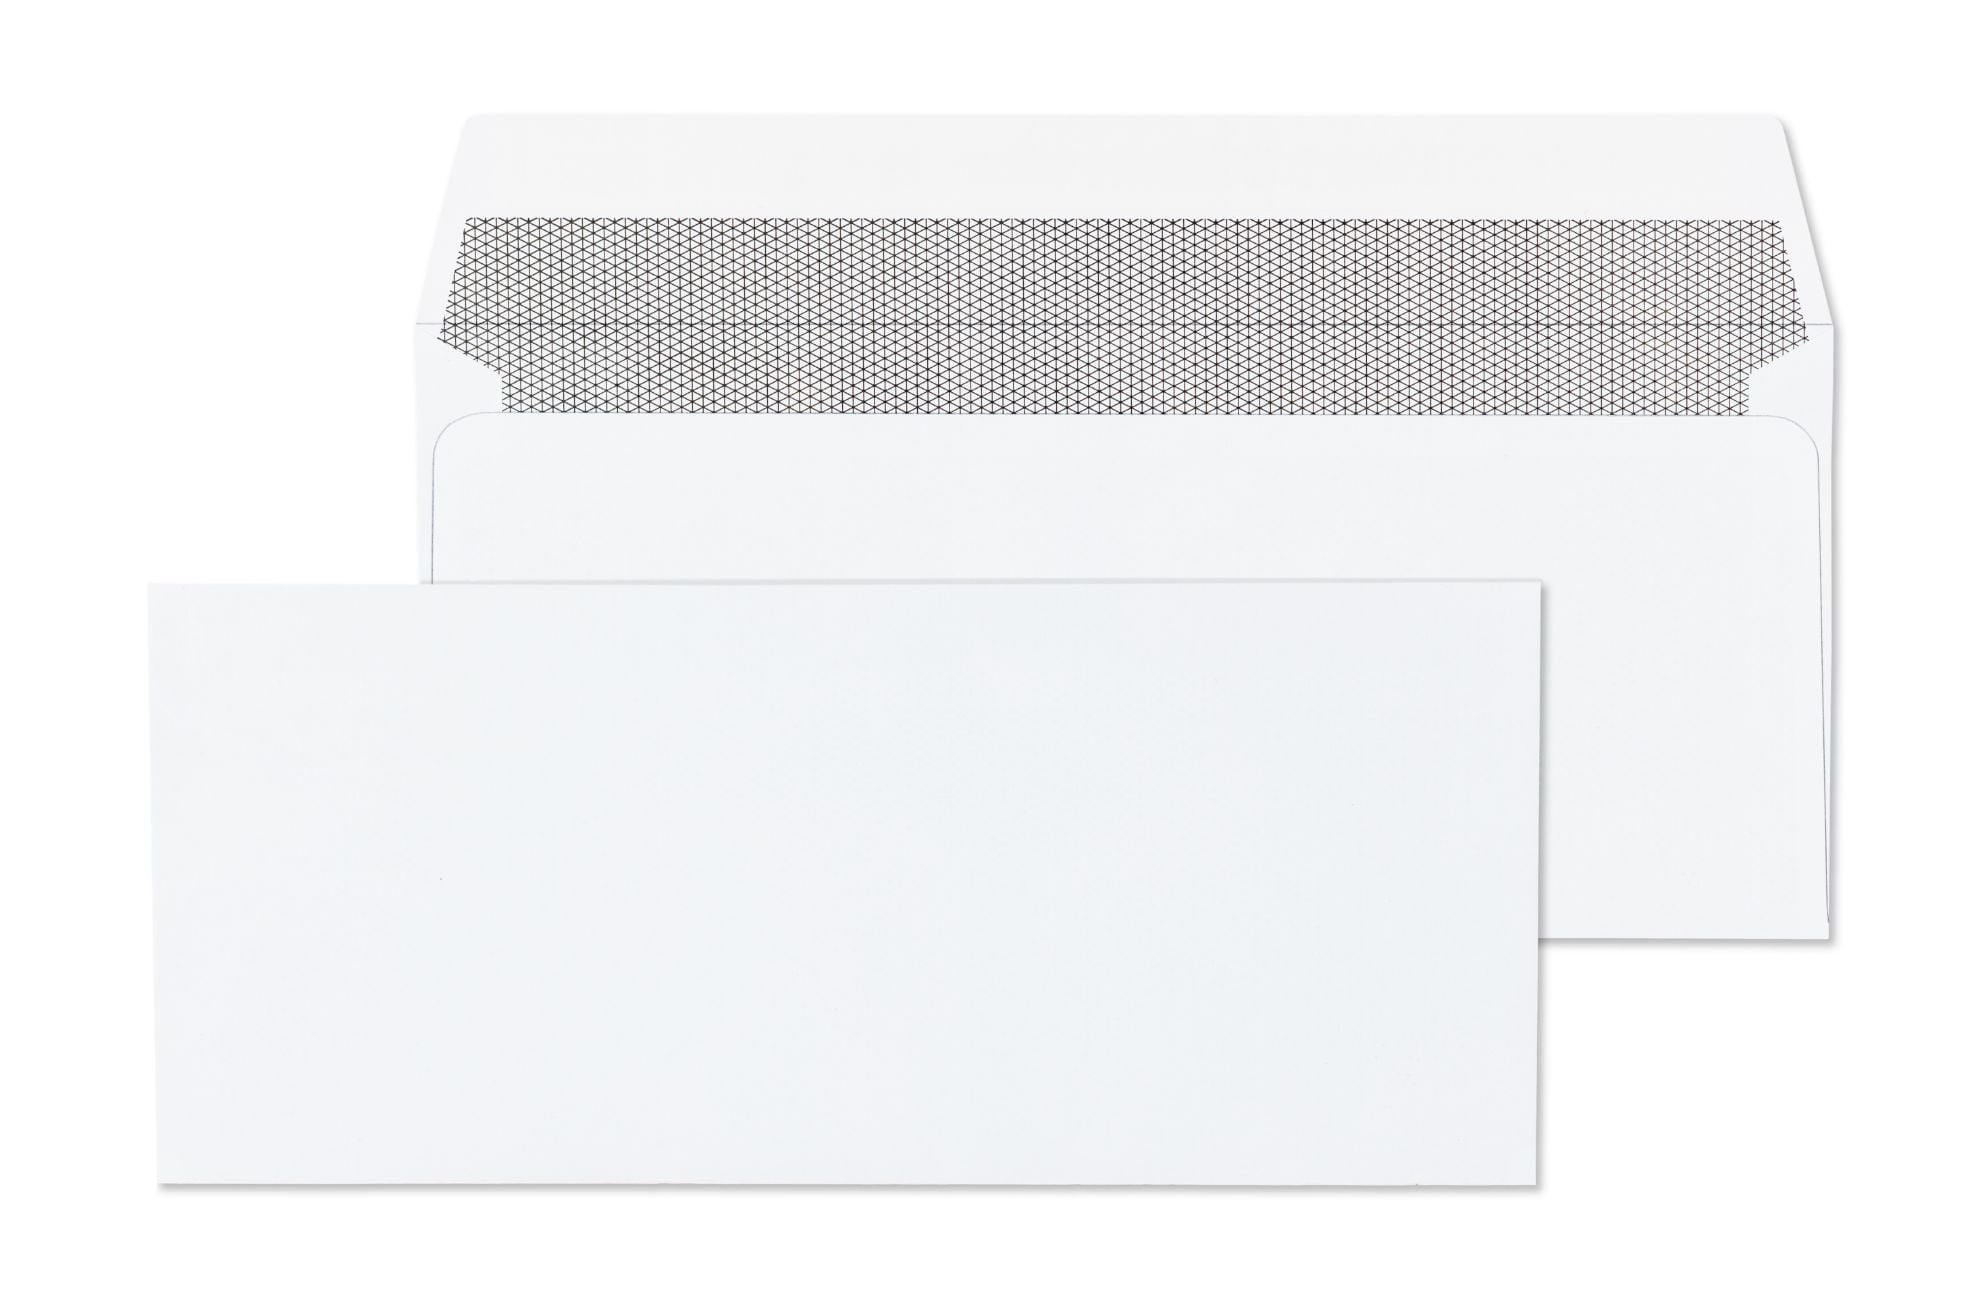
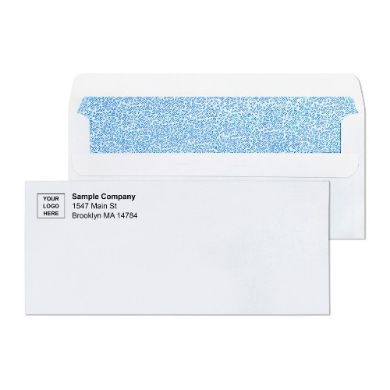
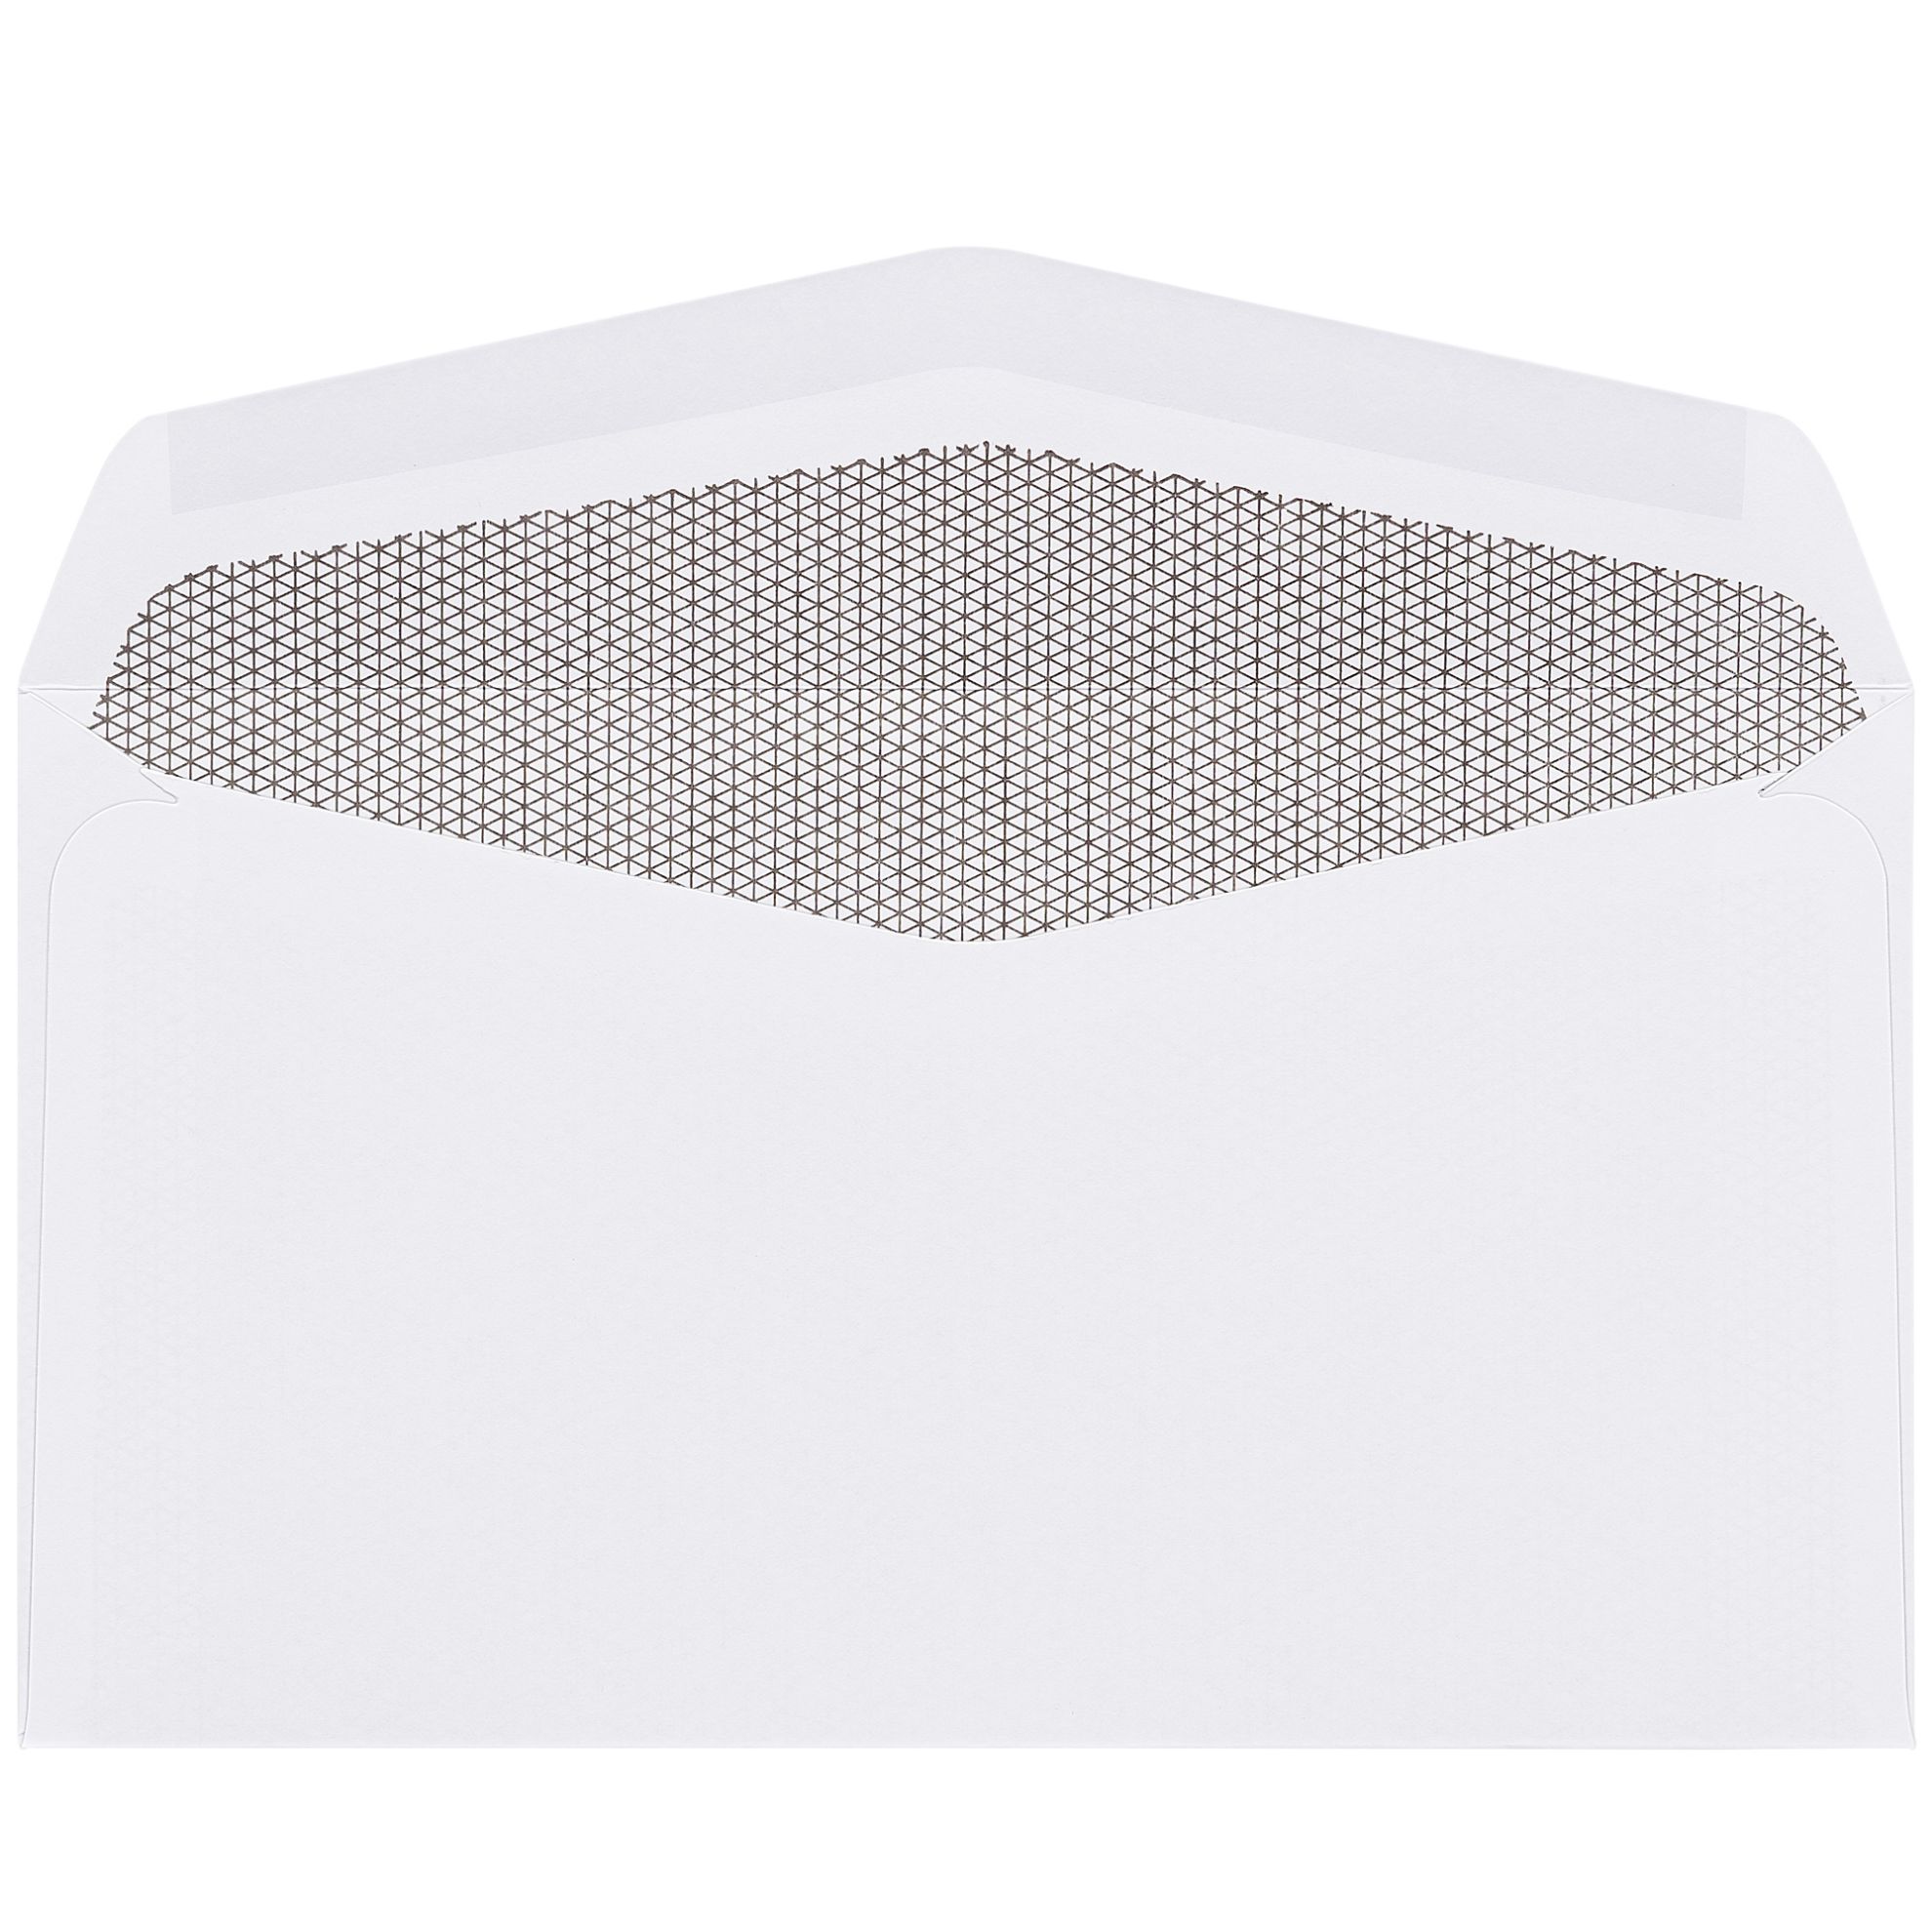
Every double window check envelope at Business Envelopes includes a security-tinted interior. The interior print pattern blocks the check contents from being read through the envelope paper when held to light. The routing number, account number, authorized signature, and check amount are all invisible from the outside without opening the envelope. Only the two address windows remain visible because the window film itself is clear.
The tinting must cover the front panel of the envelope, not just the back. Some lower-cost envelopes apply tinting to the back panel only. Because a sealed envelope is viewed from the front face under light, back-panel-only tinting provides no practical protection. Business Envelopes double window check envelopes carry full interior tinting coverage on all panels.
The three closure types available at check envelopes:
Print a single test check on plain white paper. Do not use an actual check blank for the first test. Fold the plain paper exactly as you would fold and insert the actual check. Insert it into one envelope from the box. Seal the envelope.
Hold the sealed envelope up to a bright light with the front face toward you. This front-panel light test is the standard check for both address visibility and tinting adequacy. Both address blocks should be fully visible in their respective windows with at least 1/8 inch of clear space between the address text and all four edges of each window. This is the USPS minimum clearance requirement for automated processing.
Then tap the sealed envelope firmly on all four sides in sequence: top, bottom, left, right. After each tap, confirm both addresses are still fully visible with 1/8 inch clearance at every edge.
If the test fails, here is how to diagnose the problem:
Print 10 test sheets, fold and insert all 10, and run the light and tap test on every one before committing to a production run. A single-sample test catches the average case. Ten samples catch the full range of variance your actual process produces.
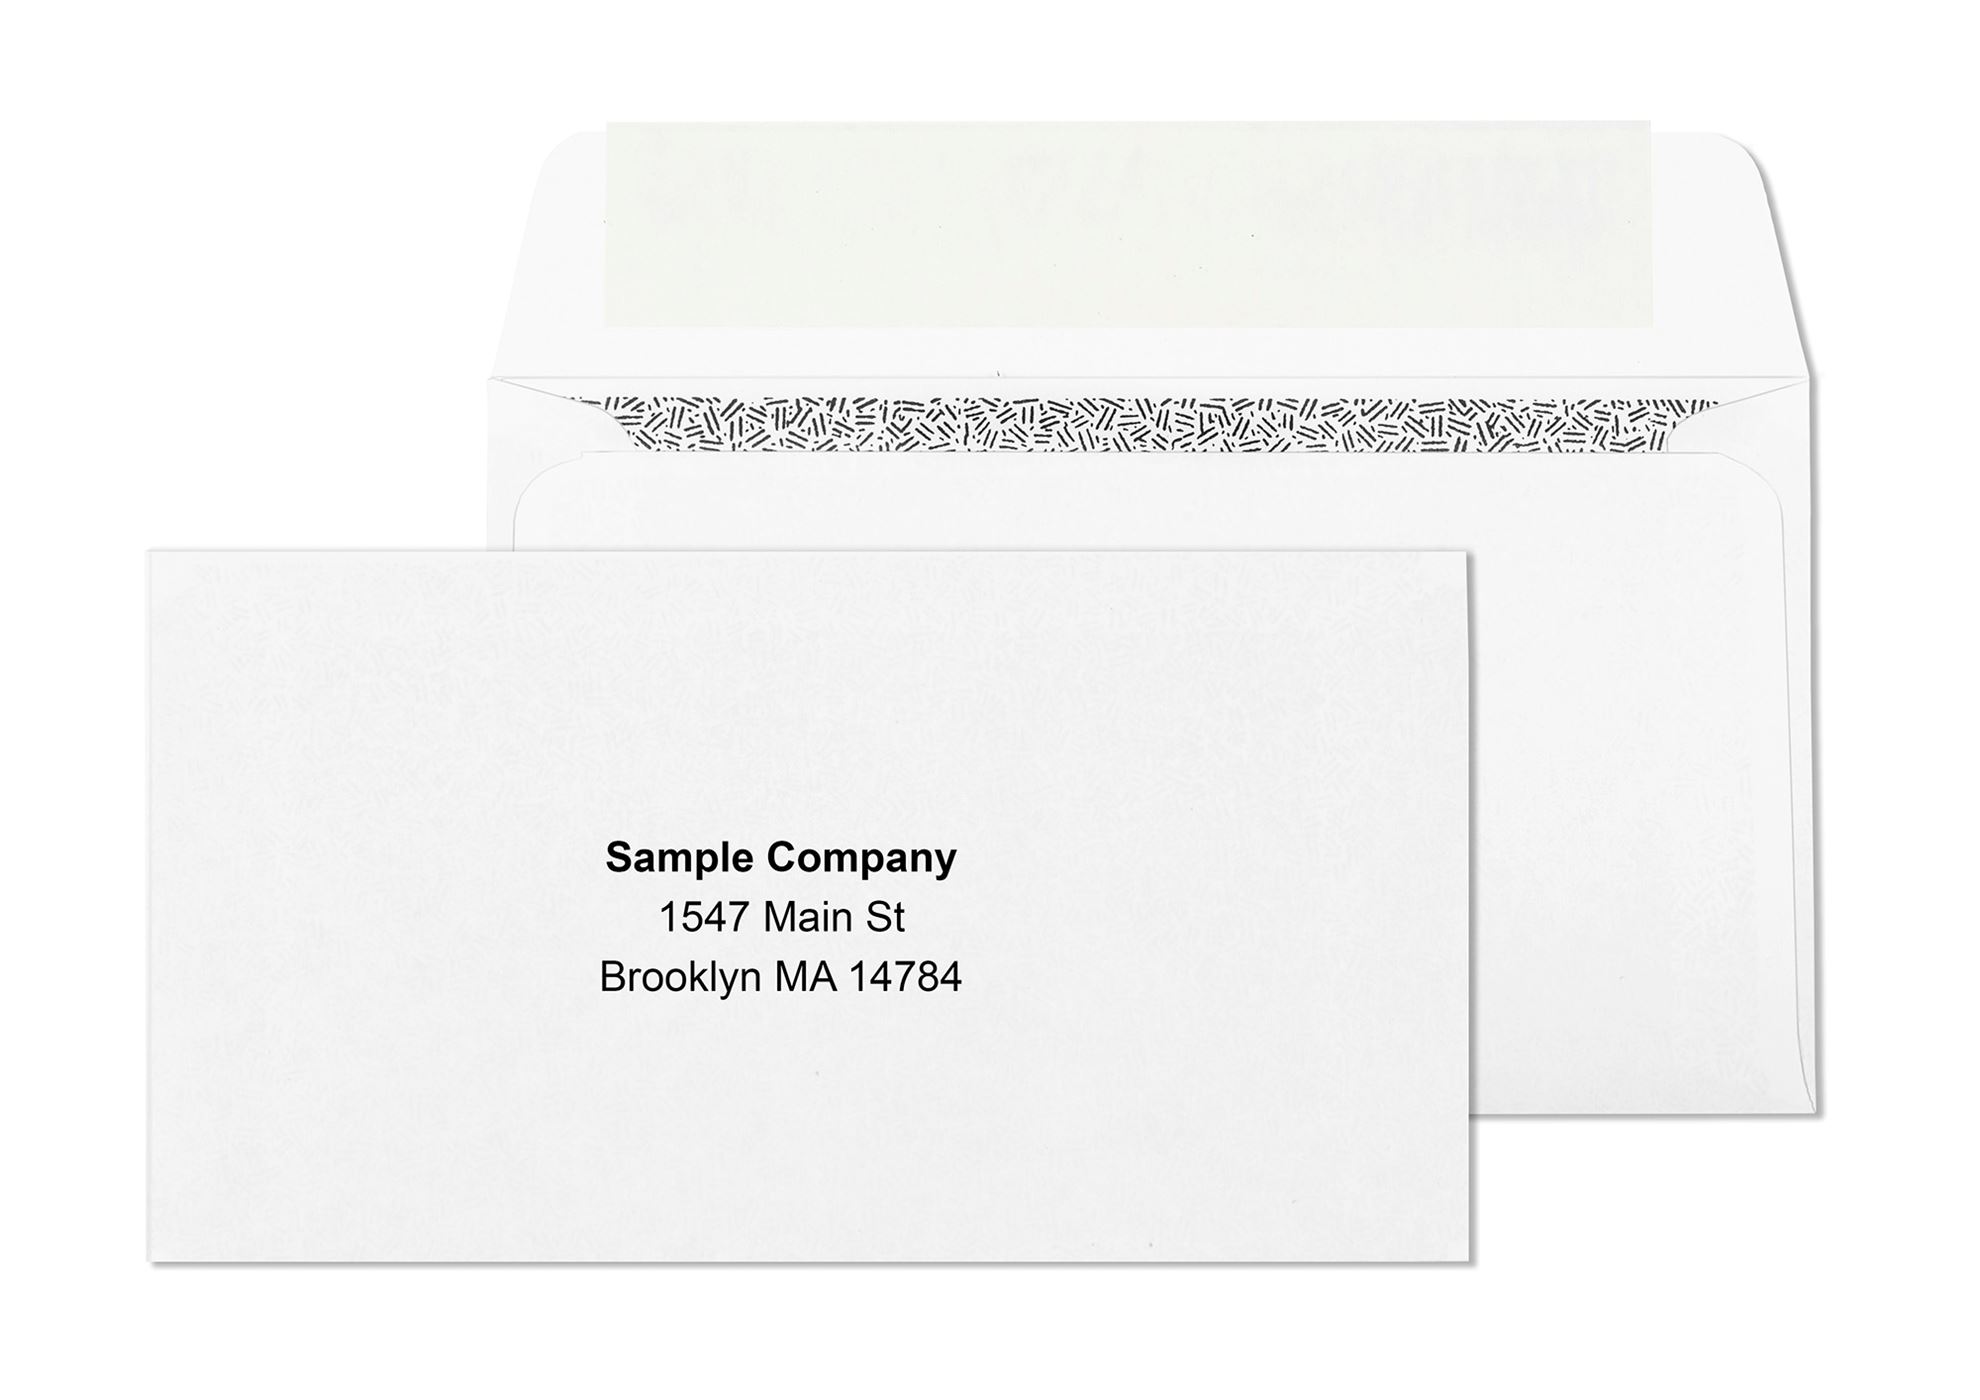
For invoices and statement billing programs, the double window check envelope is the wrong format. QuickBooks invoices and statements print on standard 8.5 by 11-inch paper, not on check stock. For these documents, a number 9 window envelope (3 7/8 by 8 7/8 inches) works as an enclosed reply piece inside a standard outgoing number 10 mailer. For the outgoing statement itself, a number 10 window envelope handles the job with the customer address showing through from the printed page inside.
The custom number 8 check envelope versus the standard number 8 is a dimension difference worth knowing. Some suppliers offer a standard number 8 envelope measuring 3 5/8 by 8 5/8 inches. The custom number 8 format-sized for QuickBooks checks measures 3 5/8 by 8 11/16 inches. That 1/16 inch of additional length accommodates the QuickBooks check format with slightly more clearance and reduces the chance of the check end catching the envelope seam during insertion.
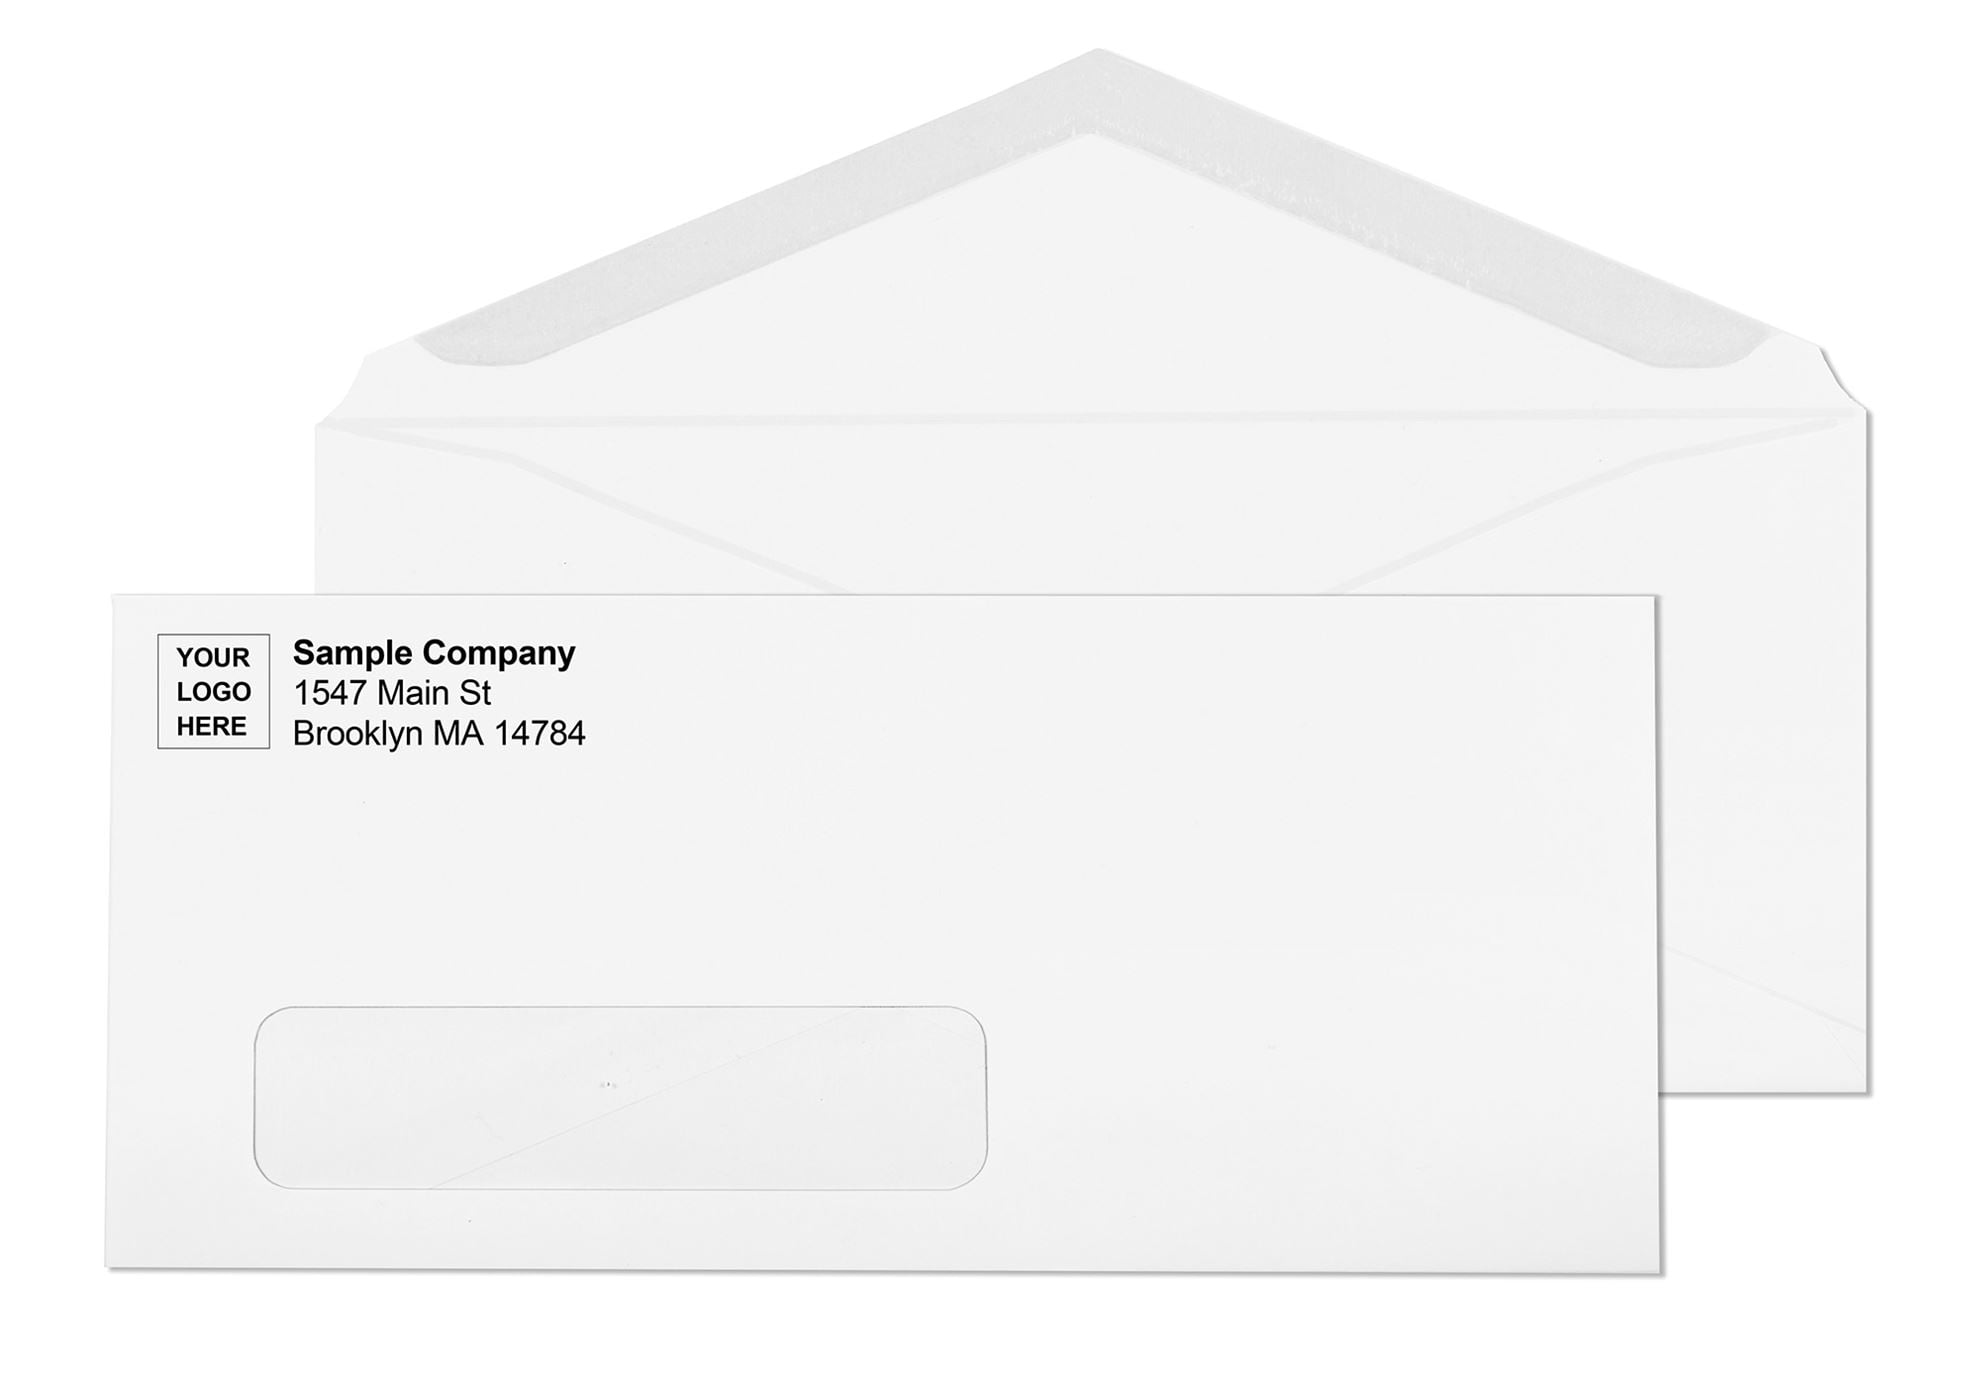
The #10 window envelope template defines where a document's address block must be positioned to show correctly through the window of a #10 envelope. The #10 window envelope itself is the most widely used business envelope in the United States. The outer dimensions are 4 1/8 inches tall by 9 1/2 inches wide. A standard 8.5 by 11-inch letter sheet, folded into thirds, fits inside with the address block showing through the window automatically when the document is formatted correctly.
The standard window on a #10 envelope measures 1 1/8 inches tall by 4 1/2 inches wide. Its position is 7/8 inch from the left edge of the envelope face and 1/2 inch from the bottom edge.
| Specification | Measurement |
|---|---|
| Outer envelope | 4.125 in x 9.5 in |
| Window size | 1.125 in x 4.5 in |
| From the left edge | 7/8 in (0.875 in) |
| From the bottom edge | 1/2 in (0.5 in) |
| Interior clearance | 3.875 in x 9.25 in |
This is the industry-standard #10 window position that Microsoft Word, Google Docs, QuickBooks Online invoice templates, Xero invoices, FreshBooks, and virtually all US billing software are calibrated to match when the window envelope printing option is selected.
For window envelope printing, the address comes from the document inside rather than being printed on the envelope face. The practical setup is a letter template that positions the delivery address in the exact location that lands behind the window when the letter is tri-folded.
For a standard tri-fold letter in a #10 window envelope, the delivery address block should begin approximately 2 inches from the top of the 8.5 by 11-inch page and be left-aligned at approximately 3.5 inches from the left margin. This positions the address block so that when folded, it lands in the window zone.
Verify with a test fold before printing a batch. Fold the template into thirds using your actual production fold method. Insert it into one envelope from your stock and run the front-panel light test and tap test.
Mail merge in Microsoft Word combines a recipient list with a letter template to produce individually addressed letters ready for folding and inserting. Set up the letter template with the delivery address block positioned at the location that lands behind the window when tri-folded. Under Mailings, select Start Mail Merge, then Letters. Connect an Excel spreadsheet or CSV file containing recipient addresses using Select Recipients. Insert the merge fields for name, address, city, state, and ZIP into the address block position on the letter template.
Preview results on several records before completing the merge to confirm the address block lands in the correct position before running the full batch.
A common mail merge printing problem for window envelopes is the address block printing in the correct position on screen, but shifting slightly on the printed output due to printer margin differences. Always print a test sheet on plain paper first. Fold it to production fold depth and insert it into a window envelope to verify physical alignment before printing the batch.
In QuickBooks Online, follow the same Custom Form Styles path. For invoices and statements, enable the window envelope printing option and confirm the customer address is set to six lines or fewer. A correctly set up #10 window envelope template in QuickBooks positions the invoice delivery address in the window zone automatically when the page is tri-folded. If the customer address appears too high or too low in the window after a test fold, the adjustment is in the document template, not the envelope.
The window envelope collection at Business Envelopes includes:
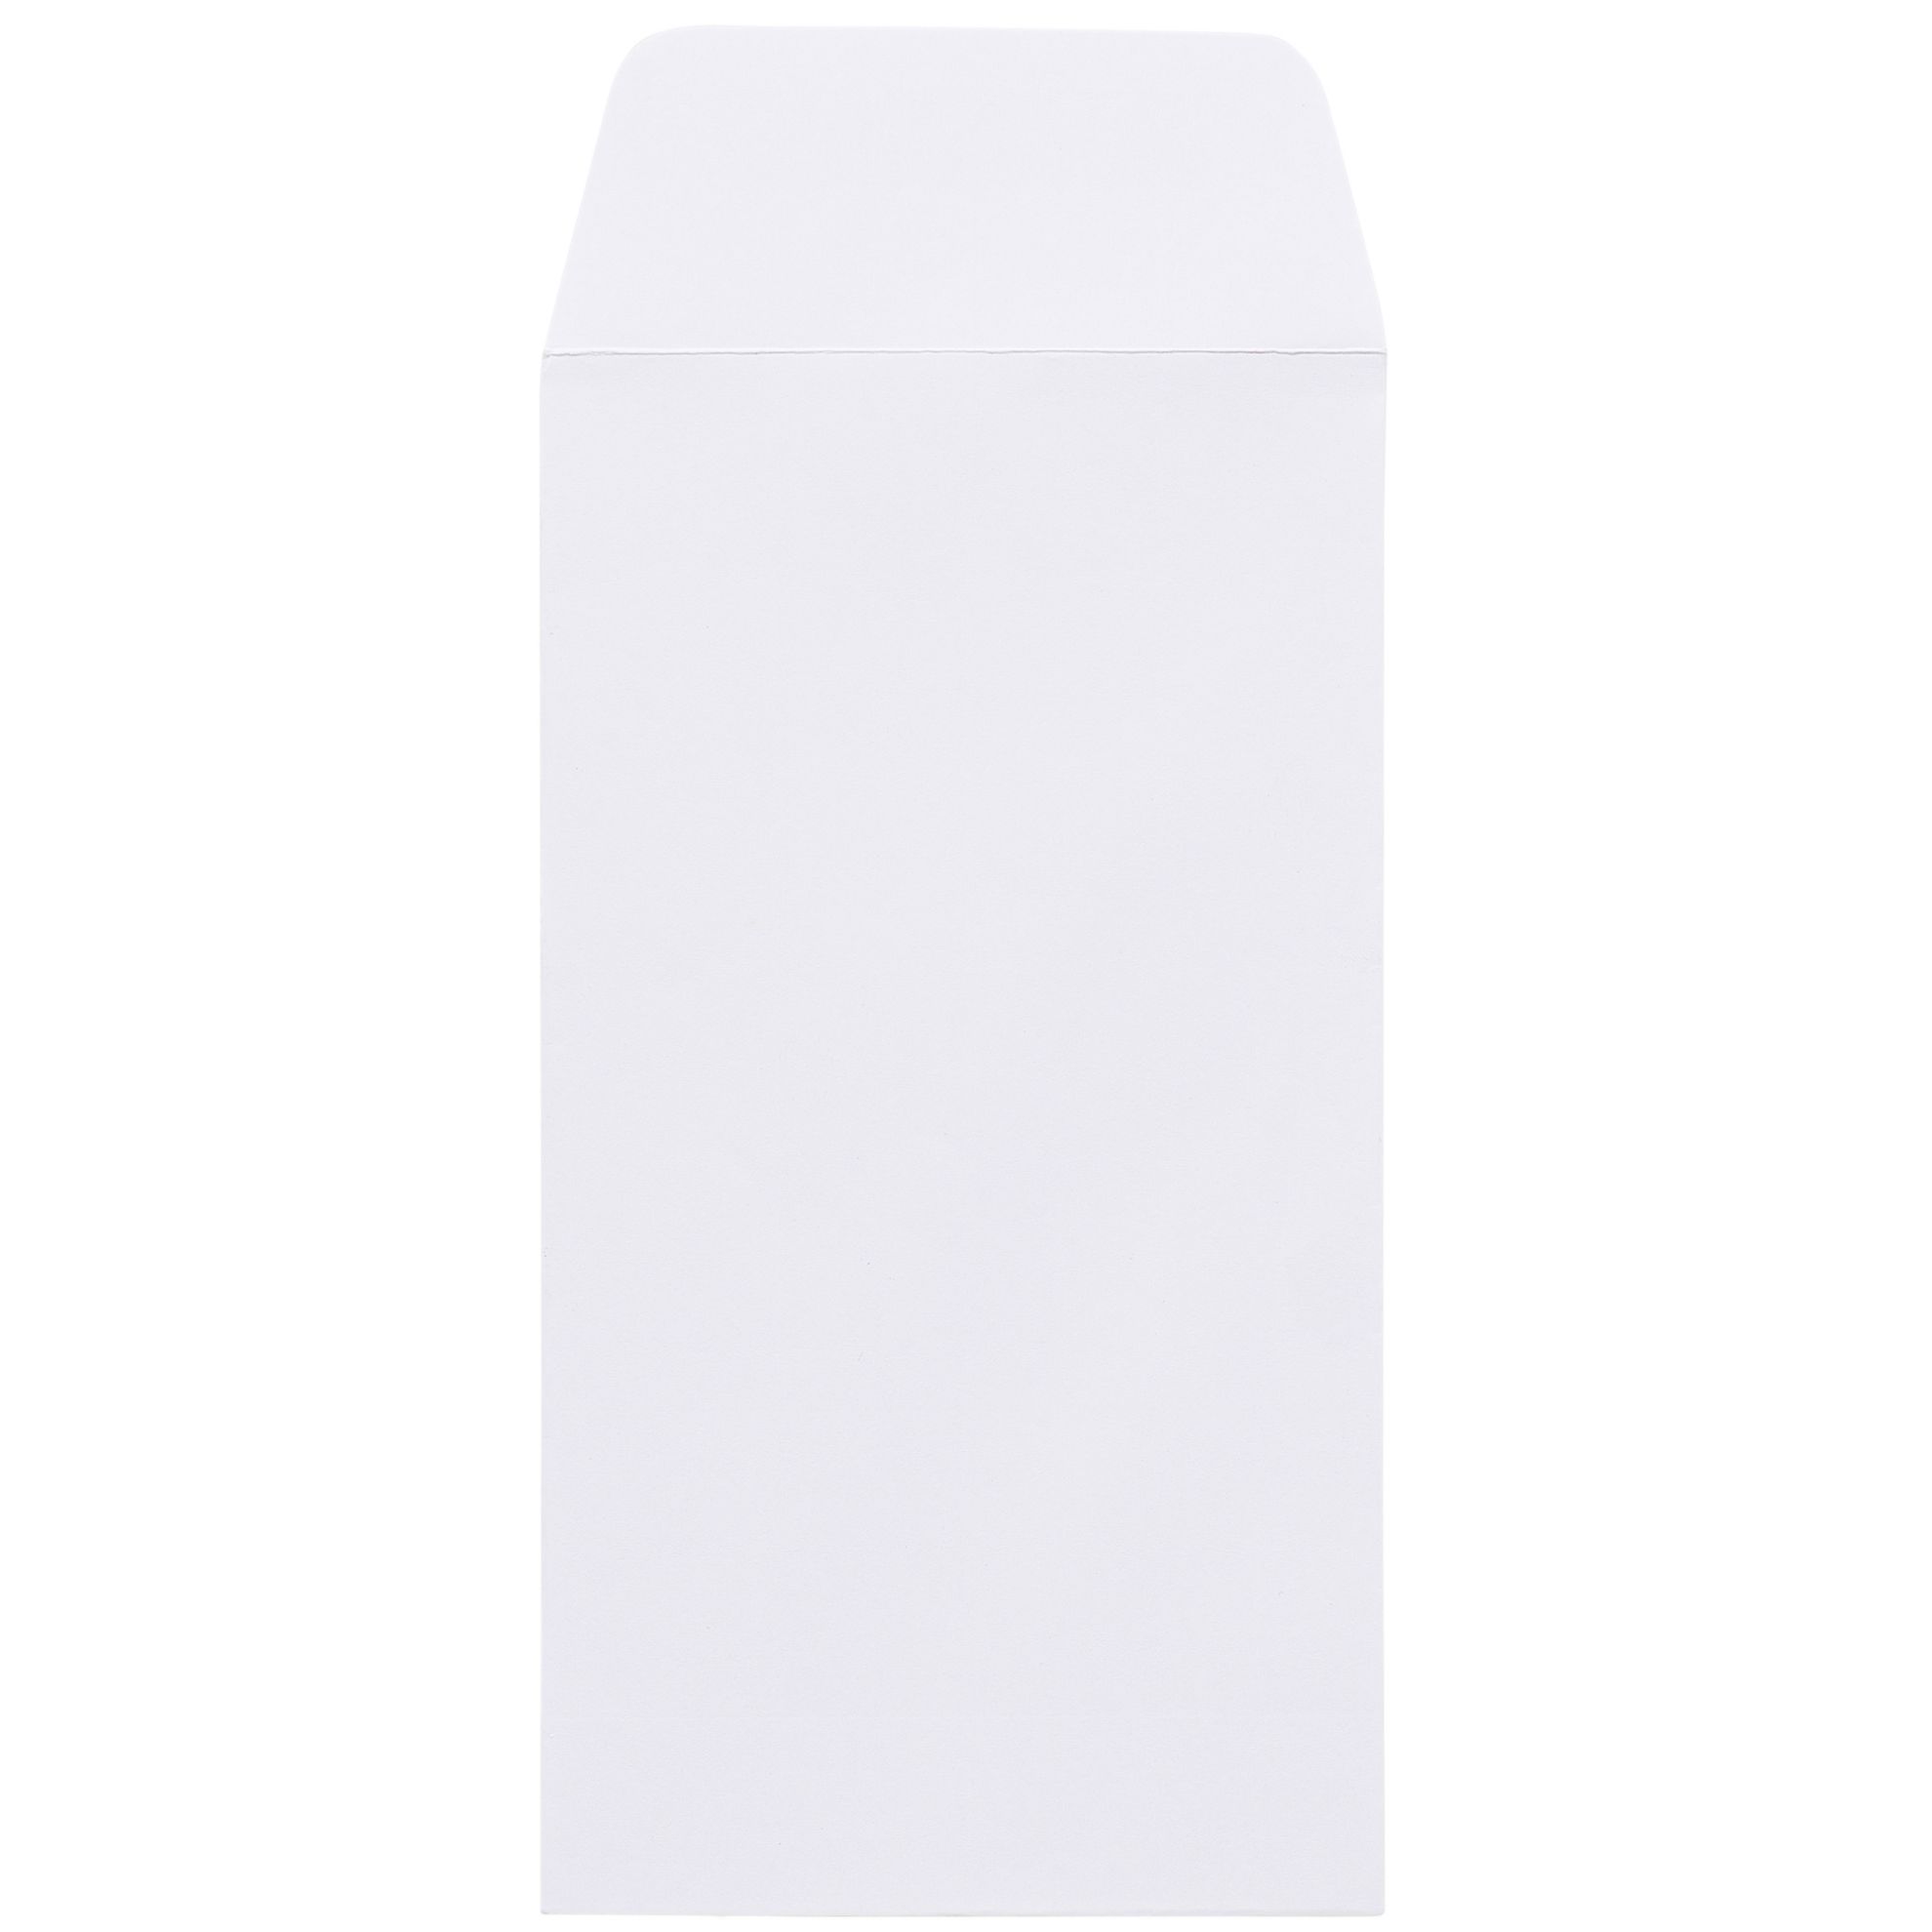
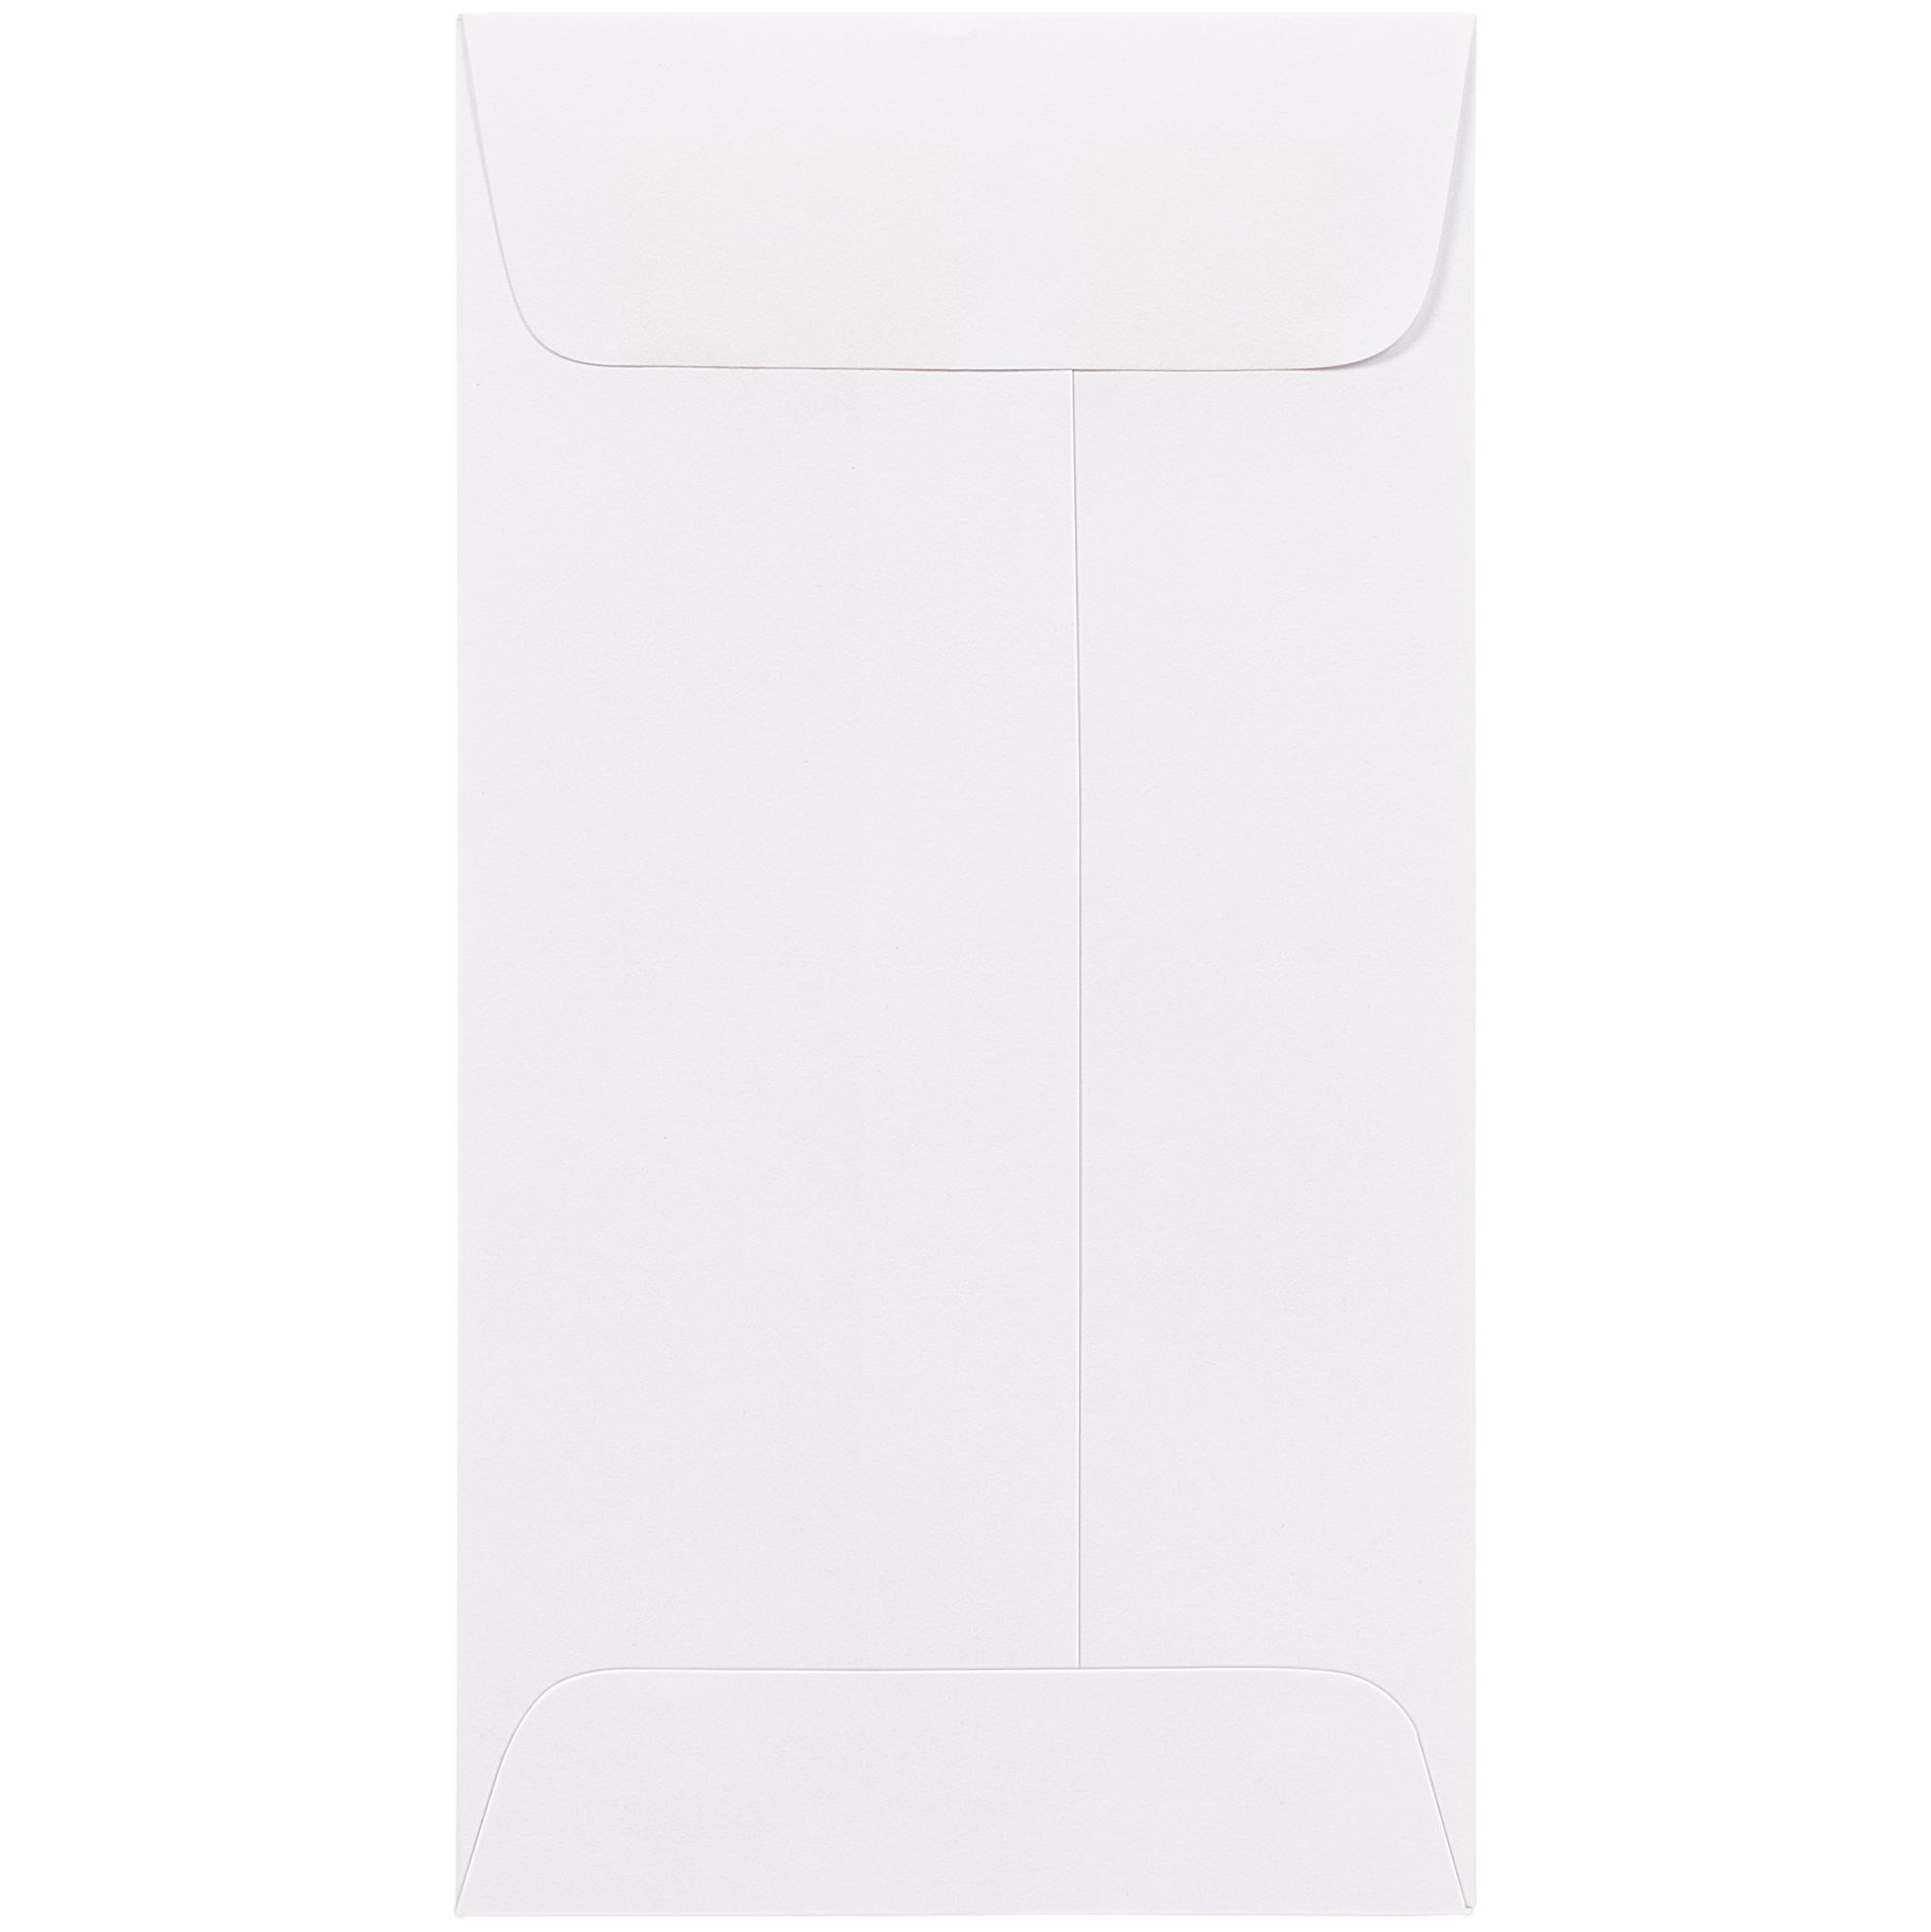
The coin envelope template question is different from the window envelope template question. For coin envelopes, there are no address windows and no software alignment considerations. The coin envelope template is simply about selecting the right size for the item being stored or mailed, and if printing on the face, setting the correct page dimensions in your word processor. Coin envelopes are small-format envelopes designed for seeds, coins, small parts, jewelry, keys, gift cards, and any item too small for a standard commercial envelope.
| Size | Outer Dimensions | Interior Clearance | Common Use |
|---|---|---|---|
| #1 | 2.25 x 3.5 in | 2 x 3.25 in | Coins, small seeds, tiny parts |
| #3 | 2.5 x 4.25 in | 2.25 x 4 in | Standard seeds, small jewelry |
| #4 | 3 x 4.5 in | 2.75 x 4.25 in | Larger seeds, multiple coins, keys |
| #5 | 2.875 x 5.25 in | 2.625 x 5 in | Longer small items, card keys |
| #6 | 3.375 x 6 in | 3.125 x 5.75 in | Small gift cards, petty cash |
| #7 | 3.5 x 6.5 in | 3.25 x 6.25 in | Business cards, gift vouchers, and small cash |
Coin envelopes in the smaller sizes fall below the USPS minimum mailing dimensions of 3.5 inches tall by 5 inches long. A #1 coin envelope at 2.25 by 3.5 inches cannot be mailed as a standalone mailpiece. A #7 at 3.5 by 6.5 inches clears both the minimum height and minimum length requirements and can be mailed at standard First-Class letter-rate postage with appropriate contents.
For any coin envelope you intend to mail: verify the closed sealed dimensions against the USPS minimums before mailing. Items smaller than 3.5 by 5 inches must be enclosed inside a larger outer envelope that meets the minimum dimensions.
To set up a coin envelope print template in Microsoft Word: go to Layout, then Size, then More Paper Sizes. Enter the coin envelope outer dimensions as the page width and height. Set margins to at least 0.25 inches on all sides to keep text away from edges where envelope seams create uneven surfaces that catch on laser printer rollers. Print a test sheet on plain paper, cut to size, and verify the content positions are correct before feeding actual envelopes through the printer.
Available in white and kraft stock across the standard size range in coin envelopes. No minimum order. Blank stock ships the same or next business day.
Address misalignment: The address block lands too high, too low, or off-center in the window. Fix is in the document template, not the envelope. Adjust the position of the address block on the printed page rather than changing printer settings.
Envelope jams during printing: Most common causes are feeding too many envelopes at once, feeding them in the wrong orientation, or using a printer tray not designed for envelope thickness. Load envelopes one at a time using the manual feed slot. Set the paper thickness guide to the envelope setting. Check whether the flap should face up or down for your specific printer model before loading. Running a test envelope through on its own before loading a stack identifies paper path issues without wasting a full batch.
Toner not adhering to envelope surface: For envelopes that will be printed on a laser printer, use peel-and-seal or flip-and-stick formats rather than a gum flap to avoid adhesive pre-activation during the fuser stage.
Address visible through envelope body when not expected: Tinting is insufficient for the print density of your specific document. Run the front-panel light test. If contents are readable through the front face of the sealed envelope, upgrade to a security-tinted format. Available at check envelopes.
Business Envelopes has supplied check envelopes, window envelopes, and coin envelopes to US billing operations, payroll departments, accounting firms, and offices since 1997. Here is what matters for template-dependent envelope programs.
Confirmed compatibility with all major US accounting platforms. The double window check envelopes at Business Envelopes are sized and positioned for QuickBooks, Quicken, Sage, ADP, Xero, and all standard US check formats. Compatible with all QuickBooks versions, including Desktop and Online.
Full security tinting on front and back panels for all check formats. Not back-panel-only. Every tinted format in the Business Envelopes catalogue carries full-coverage tinting that makes the front-panel light test pass from any angle.
Every closure type is in stock. Gummed flap for inserter machines. Peel-and-seal for hand batches. Flip-and-stick for high-volume AP runs. The same double window security-tinted check envelope is available in all three closure types from one supplier.
No minimum order. Free shipping. Order a small test quantity against your specific check format and print setup before committing to a larger purchase. Blank stock ships the same or next business day. Free shipping to the contiguous 48 states on every order.
Getting the double window envelope template, the #10 window envelope template, or the coin envelope template right is a dimensional problem, not a printer problem. Matching the document template to the exact window position on the physical envelope eliminates misalignment issues. These are the issues that send batches to manual sorting or reveal account numbers through a window that was not sized correctly for the document inside. Use the exact specifications above for each format, run the 10-sample alignment test before any production batch, and verify front-panel tinting coverage on any check envelope before committing to security-sensitive programs.
Clasp envelopes are one of the most misunderstood products in any office supply catalogue. People order them for mailing and are surprised when the post office adds a surcharge. People reach for them because the clasp feels more secure, without knowing that the same clasp changes how USPS classifies the piece. And people overlook them for interoffice routing, which is the one use case where a clasp envelope is irreplaceable.
This guide covers how the metal clasp mechanism works, all five sizes and what fits in each, and the USPS non-machinable surcharge that applies to every piece in every mail class. It also covers the dual closure system that makes this format the right choice for documents that circulate before mailing, how to mail and address a clasp envelope correctly, and which industries rely on it as their default rather than a specialty item.
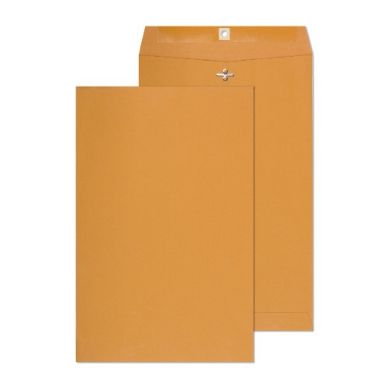
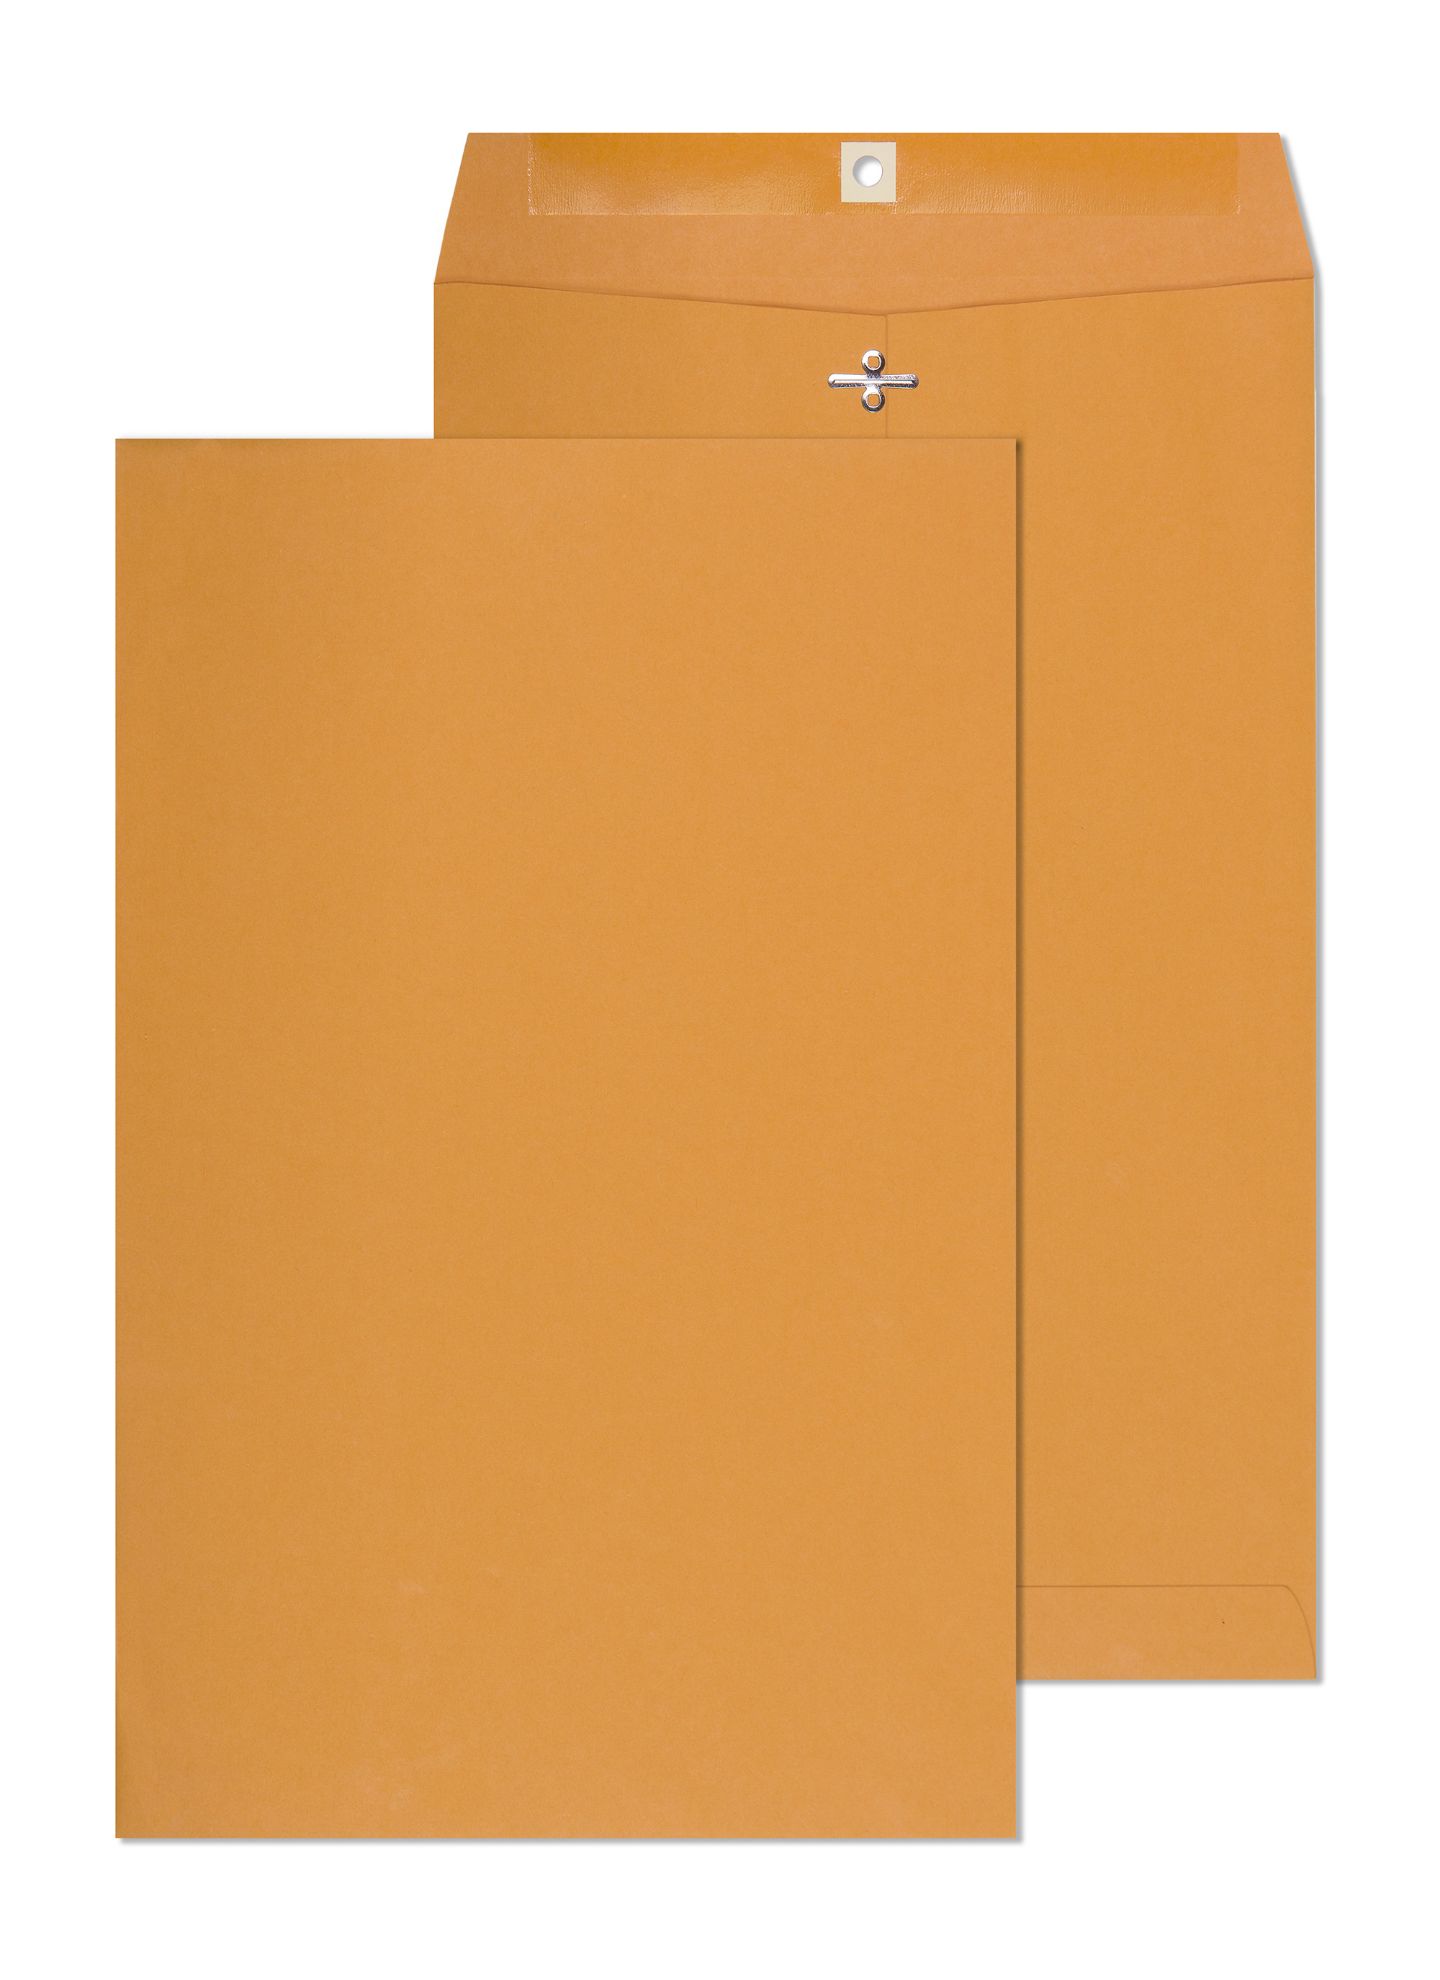
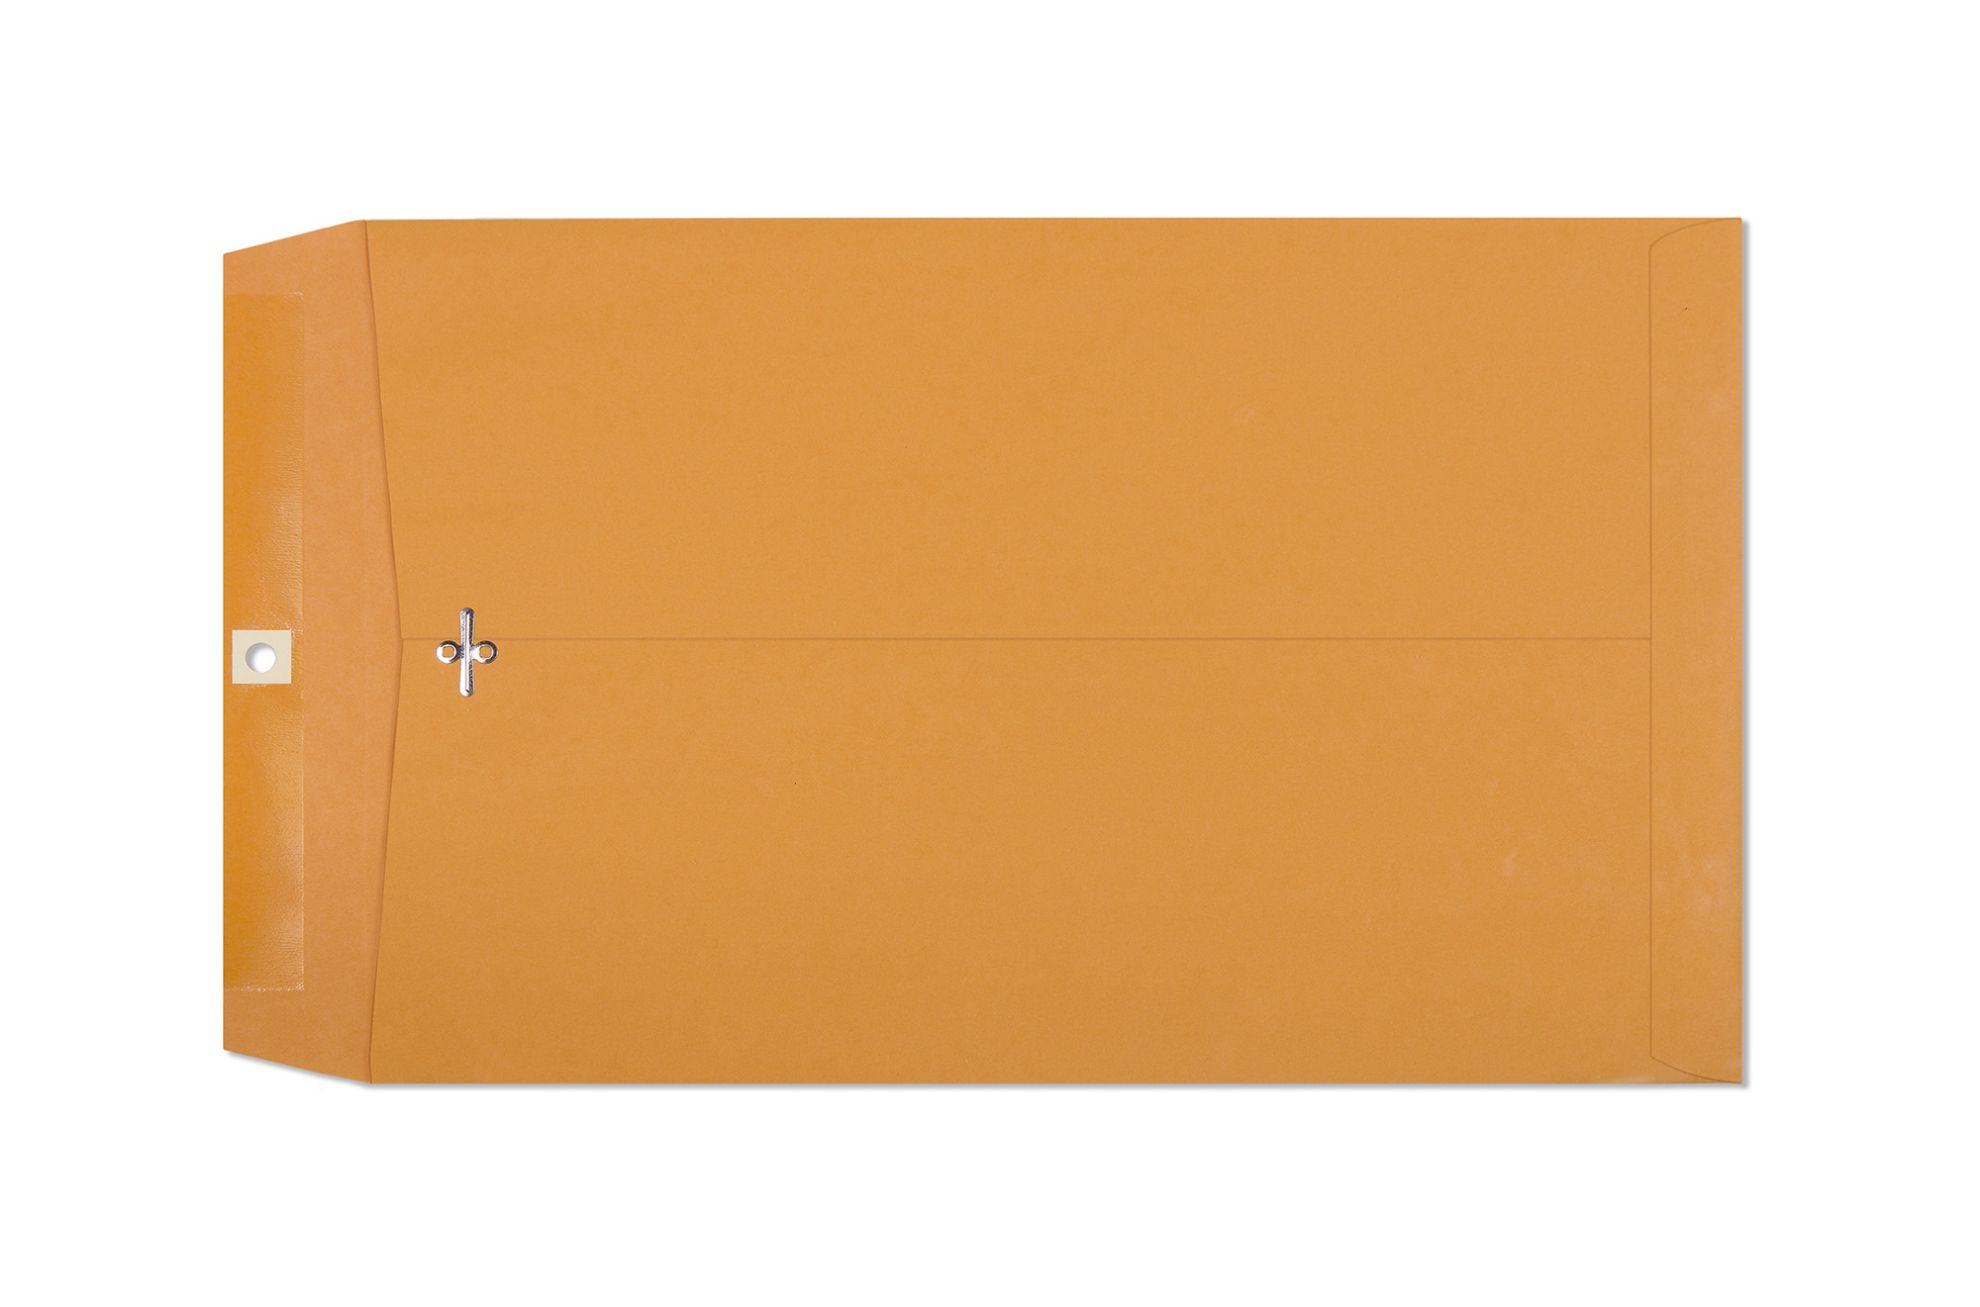
A clasp envelope is a heavy-duty kraft paper envelope with two closure mechanisms built into the same flap: a metal two-pronged clasp and a gummed adhesive strip. The clasp provides a mechanical, reopenable closure. The gum strip provides a permanent adhesive seal for final mailing. The two work independently, which is the entire point.
The metal clasp is a flat, two-pronged brad fastener, identical in concept to the brass fasteners used in school folders and three-hole report covers. The prongs pass through a reinforced hole in the envelope body. You bend the prongs outward to lock the flap down, and you straighten them again to reopen. This mechanism can be cycled 20 to 30 times before the metal fatigues, which makes this envelope type the standard for any document that passes through multiple hands before final mailing or filing.
The gum strip is the moistenable adhesive on the inside edge of the flap, identical to the closure on a standard brown kraft catalogue envelope. When you are ready to mail permanently, you moisten the gum strip and press the flap down alongside the clasp. The result is a piece with both mechanical and adhesive closure, which is stronger than either alone.
Most offices use the clasp for routing and storage, then activate the gum strip when the document is ready for final mailing. Some operations use the clasp only, which works for internal routing but does not produce a sealed mailpiece as USPS defines it.
Understanding the named parts makes it easier to specify the right format and diagnose problems when closures fail. The envelope body is the main paper structure, manufactured from 28 lb brown kraft in the formats Business Envelopes carries. The flap is the top section that folds over the opening to seal it. The flap can be closed using the metal clasp, the gum strip, or both.
The metal clasp is the two-pronged fastener positioned near the opening edge of the flap. It consists of a metal brad with two flat prongs. The prongs pass through the eyelet hole in the envelope body and bend outward to lock the flap closed. Straightening the prongs releases the flap.
The reinforced eyelet is the hole in the envelope body through which the clasp prongs pass. Quality clasp envelopes reinforce this eyelet with a metal grommet that prevents tearing under repeated opening and closing cycles. Lower-quality envelopes use a plain punched paper hole that can tear under sustained use or heavy contents.
The gum strip is the moistenable adhesive on the inside edge of the flap for permanent sealing.
These envelopes go by several names depending on the industry and context. A prong envelope refers specifically to the two-pronged brad mechanism that locks the flap. Expansion envelope is used when referring to formats with gusset sides, though most standard versions do not have gussets. Manila envelope is a broader term for any large brown kraft flat-document envelope, with or without a clasp. Catalogue envelope refers to the open-end or open-side large format without a clasp. Knowing these alternative names helps when searching supplier catalogues or specifying formats to vendors who may use different terminology.
This sequence applies to any clasp envelope, regardless of size.
Step one: Insert the contents. Place documents inside the envelope. Ensure the contents fit without the stack pushing against the flap when it closes. If the contents push the flap away from the body, size up before proceeding.
Step two: Fold the flap over the envelope body. Align the flap cleanly with the body surface so it lies flat.
Step three: Secure the clasp. Insert the two metal prongs through the eyelet hole in the envelope body. Bend each prong outward in opposite directions until they lie flat against the back of the envelope body.
Step four: Address the envelope correctly. The delivery address goes in the center of the envelope face. Use all capital letters, no punctuation, and black or blue ink only. Red ink is not acceptable for USPS automated scanning. A correctly formatted address looks like this:
JANE SMITH ACCOUNTING DEPARTMENT 123 MAIN ST APT 4B NEW YORK NY 10001-1234 Include the recipient's name on the first line, the company or department name on the second line if applicable, the street address with the apartment or unit number on the same line, and the city, state, and ZIP code on the final line. Use the ZIP+4 code when available, since it speeds processing and reduces the chance of misdelivery. If you are mailing to a specific person at a company, add ATTN: PERSON NAME on the first line above the company name.
Your return address goes in the upper-left corner in the same all-capitals format. If the piece cannot be delivered and has no return address, USPS sends it to the Mail Recovery Center rather than back to you. Include it on every piece. Keep the bottom 0.625 inches of the envelope face completely clear. USPS automated equipment prints a Delivery Point Barcode in that zone after reading the delivery address.
Step five: Apply postage and mail. A clasp envelope requires the $0.49 non-machinable surcharge in addition to standard postage because the metal clasp is classified as a protrusion under USPS DMM 201.3.8. To mail without the surcharge, remove the clasp before mailing and seal with the gum strip only.
How to mail a clasp envelope correctly involves more than applying a stamp. Several decisions at the mailing stage determine whether your piece reaches its destination at the expected cost.
First, decide whether the clasp will stay or go. Mailing a clasp envelope with the clasp still engaged triggers the $0.49 non-machinable surcharge automatically. The USPS classifies any piece with a clasp, string, or button closure as non-machinable and requires hand cancellation. You have three options.
Option one: Remove the clasp before mailing. Straighten the prongs fully, pull them back through the eyelet, and discard. Seal with the gum strip. The piece mails at the standard flat rate without the surcharge.
Option two: Place the clasp envelope inside a larger plain envelope. If the clasp envelope must stay intact for reuse or routing markings, slide it inside a larger gum-seal or peel-and-seal catalogue envelope of the next size up. The outer envelope carries no clasp, mails cleanly at flat rate, and the clasp envelope inside is protected on arrival.
Option three: Pay the surcharge. If removing the clasp is not practical, budget $0.49 additional per piece and mail as non-machinable.
Second, weigh the sealed piece before buying postage. A common mistake when learning how to send a manila envelope in the mail is measuring the envelope while the flap is open or before the contents are inserted. Always weigh with the flap sealed and all contents inside.
Third, understand what happens with insufficient postage. If a clasp envelope goes out with too little postage, USPS returns it to the sender marked postage due. Alternatively, it is delivered to the recipient who must pay the shortfall plus a handling fee before receiving the piece. Weigh before you seal and calculate correctly before mailing.
Fourth, check size classification. The 6x9 clasp envelope can sometimes qualify for the lower First-Class letter rate rather than the flat rate if contents are flexible and thin. A 6x9 measures 6 inches tall, within the 6.125-inch letter-rate height maximum. If the sealed piece is under 0.25 inches thick and the contents are flexible, it may qualify as a letter. The 9x12 and larger sizes are always classified as flats.
Standard gummed envelopes are one-way instruments. Once sealed, opening them destroys the flap. That is appropriate for outgoing mail, but impractical for any document that needs review, signature, or additional materials before it goes out.
This format breaks that one-way constraint. A purchase order that needs three approvals before mailing travels in a clasp envelope. Reviewer one opens the clasp, signs, refastens the clasp, and passes it to reviewer two. Reviewer two does the same. When the process is complete, the final person activates the gum seal for mailing. Nobody has used tape. Nobody has used a new envelope. The clasp envelope has performed three distinct functions: carrier, document holder, and final mailpiece.
This is why legal offices, school administration offices, government agencies, and healthcare facilities standardize on these envelopes for document routing and mailpiece functions, rather than rubber banding loose documents together or using file folders that cannot be mailed.
USPS Domestic Mail Manual Section 201.3.8 explicitly states that letter-size pieces with clasps, strings, buttons, or similar closure devices are classified as non-machinable. USPS Quick Service Guide 201a confirms it directly: clasps, strings, staples, buttons, or protrusions that might impede or damage mail processing equipment are prohibited from automation-compatible processing. USPS hand-cancels these pieces and processes them separately from automated mail.
What this means in practice: every piece you mail through USPS with the clasp attached, at any size, at any weight, is subject to the non-machinable surcharge. The surcharge is currently $0.49 per piece and applies regardless of whether the envelope falls within letter dimensions, flat dimensions, or anything in between.
A 9x12 clasp envelope already mails as a flat at the first-class flat rate of $1.63. The non-machinable surcharge adds $0.49 on top. The total minimum postage for a 9x12 clasp envelope at one ounce is $2.12 rather than $1.63. On a batch of 100 pieces, that is $49 in additional postage compared to a gum-seal-only 9x12 envelope of the same size.
String-and-button envelopes use a different closure mechanism. Two small circular discs are mounted on the envelope, one on the flap and one on the body. A string wrapped around both discs in a figure-eight pattern holds the flap closed. Unlike a metal clasp, string-and-button closures create no protrusion above the paper surface, which means they do not automatically trigger the USPS non-machinable surcharge. A loosely wound string can unwind under vibration or jostling in a mail tray, making the clasp more secure for repeated routing use.
Business Envelopes carries clasp envelopes in five standard sizes, all in heavy-duty 28 lb brown kraft with a metal clasp and a gum flap dual closure.
6 x 9 inches: The compact format. Holds a half-folded 8.5 x 11 sheet, small multi-page packets, 5x7 photographs, and report cards. Can qualify for letter rate if contents are flexible and under 0.25 inches thick.
9 x 12 inches: The most widely ordered size. Holds a standard 8.5 x 11 sheet completely flat, multi-page reports, certificates, and diplomas. Always mails as a flat.
9.5 x 12.5 inches: The half-inch additional clearance accommodates tabbed dividers, report covers, and plastic sleeves that push against 9x12 walls.
10 x 13 inches: For thicker document packets, legal-size 8.5 x 14 sheets mailed flat, and content stacks that create seam stress in a 9x12.
10 x 15 inches: The largest format. For oversized documents, multi-page bound reports, large certificates, and folded posters.Clasp vs gum-seal-only catalogue envelopes: how to choose
Use clasp envelopes when the document travels through multiple people, requires sequential review, may need additional inserts before mailing, or functions as a reusable interoffice routing container.
Most clasp envelopes support 20 to 30 open-and-close cycles before the metal shows visible fatigue. When the clasp fatigues before the envelope body, remove the spent clasp and use the envelope with a gum-seal closure only for the remaining life of the paper body.
Custom printing is available on clasp formats for organizations that want their logo, return address, and brand elements on the outer face. Business Envelopes offers custom printing with a PDF proof process and no minimum order. Available in printed envelopes.
Legal offices: Contracts, disclosure documents, and court filing packages move through multiple reviewers. The clasp handles routing. Many legal offices maintain dedicated clasp envelope stock for internal circulation entirely separate from their outgoing mailing stock.
School administration: Report cards and permission slip bundles go home and return in clasp envelopes. Elementary schools are among the highest-volume buyers because this workflow is a daily routine.
Healthcare administration: Patient charts, referral packets, and medical records releases require a container that can be opened and resealed at each stage of the process.
Government and public agencies: Permit applications, regulatory filings, and licensing documents involve multi-step review workflows.
Accounting and financial services: Monthly receipt collection, expense report routing, and client document submissions. One Business Envelopes customer uses 10x13 clasp envelopes for weekly receipt scanning across an employee team, noting they have never ripped or broken.
The gum strip degrades before the clasp in humid storage.
The clasp still functions perfectly, but the gum adhesive weakens. Test the gum strip on a sample before relying on it for final mailing in humid conditions.
The reinforced eyelet matters more than buyers realize. Lower-quality envelopes use a plain punched paper hole that tears under sustained use or heavy contents. Business Envelopes uses reinforced eyelet construction throughout.
These envelopes work as file folders. The clasp mechanism is identical to brad fasteners in hanging file folders. Offices use them in file cabinet drawers with the added benefit of a closeable flap.
The size-up logic is more urgent with clasp envelopes than gum-seal. An overstuffed clasp cannot close the prongs fully because the document stack prevents the flap from seating flat. Size up before overstuffing rather than after.
Rigid contents can push the piece toward parcel pricing. Very thick or rigid stacks inside a clasp envelope may be reclassified by USPS from flat to parcel, which carries significantly higher postage rates. When contents are thick and rigid, weigh and present the sealed piece at a USPS counter before mailing a large batch.
Clasp vs Tyvek: when to use each
Use clasp envelopes when the document needs to circulate before mailing and routing access matters more than moisture protection. Use Tyvek envelopes when the document cannot arrive torn or wet, and routing access is not required. For documents needing both, use the clasp format for routing, then transfer into Tyvek for final mailing.
Postage and mailing checklist for clasp envelopes
Check one: Decide whether the clasp stays or goes before sealing.
Check two: Insert all contents before sealing. Weigh the sealed envelope on a postal scale.
Check three: Calculate postage from the sealed weight. For flat-rate pieces: $1.63 for the first ounce, $0.29 per additional ounce, plus $0.49 if the clasp is present.
Check four: Confirm delivery and return addresses are in black or blue ink, all-capital letters, no punctuation.
Check five: Keep the bottom 0.625 inches of the face clear of all labels.
Check six: For 6x9 clasp envelopes, verify whether the sealed piece qualifies for letter rate. If under 6.125 inches tall, under 11.5 inches long, and under 0.25 inches thick, it may qualify for letter postage rather than flat rate.
Business Envelopes has supplied clasp envelope stock to US offices, legal practices, schools, healthcare facilities, and government agencies since 1997. All five sizes from one catalogue in 28 lb heavy-duty brown kraft with dual gum-and-clasp closure. Reinforced eyelet construction. Custom printing available with PDF proof before production. Free shipping, no minimums. Blank stock ships the same or next business day.
Clasp envelopes exist because documents sometimes need to travel through multiple hands before going into the mail. The clasp handles routing. The gum strip handles the final seal. Know the $0.49 USPS non-machinable surcharge before budgeting postage. Remove the clasp before mailing to eliminate it. Size up before overstuffing. And always address in all-caps with black or blue ink, no punctuation, keeping the bottom 0.625 inches clear for USPS barcode printing.
Coin envelopes are small paper envelopes with the flap on the short edge rather than the long edge. That single design decision is what makes them work for the hundreds of applications that standard letter envelopes handle badly: individual coin storage, jewelry ticketing, seed archiving, small hardware kitting, SD card organization, lab specimen labeling, pharmacy component separation, and any other situation where a small valuable item needs to be contained, labeled, and retrievable without the contents shifting or spilling.
The short-side flap keeps small items against the closed bottom of the envelope during handling. The large writable face stays completely unobstructed. In a sorted tray, every label is readable without picking anything up or opening anything. These are engineering decisions with real practical consequences in the daily workflows where coin envelopes are used. This guide covers the three sizes we carry, what each holds, every industry that depends on them, the USPS surcharge issue most buyers discover too late, and when custom printing on a coin envelope changes what the format can do for you.
A standard letter envelope opens on the long edge because a document slides in from that direction most efficiently. A coin envelope opens on the short edge for the opposite reason. Small, dense items drop in from the top and rest against the closed bottom of the envelope. The narrow opening means a coin, gemstone, or hardware component cannot roll or slide out during handling. With the opening across the narrow dimension, the entire long face of the envelope is available for writing, printing, or labeling without the flap interfering.
This face-up orientation is the core functional advantage. Stack 100 labeled coin envelopes in a tray, and every label faces up and is readable without touching any of them. Turn one slightly and it stays readable. This is why numismatists, jewelers, bank tellers, and watchmakers have used this format for over a century. The design has not changed because there is nothing to improve.
The smallest format. Interior workspace approximately 2-1/8 x 3-1/4 inches. This envelope holds single items in the smallest size category: individual coins, single postage stamps, small gemstones cut or rough, watchmaking escapement components (balance wheels, pallet forks, escape wheels), pharmaceutical compound components weighed for a formula, seed samples of a single variety, and the smallest single-piece hardware fasteners. Available in white wove and brown kraft, both with gum flap closure.
The #1 is the watchmaker's format. When a watch movement is disassembled for service, individual components go into labeled #1 coin envelopes with the watch serial number and component name written on the face. This keeps a 25-piece movement organized across a repair cycle without any component touching another component. The paper breathes correctly for most watchmaking environments, and the small size means the components cannot shift enough to cause contact damage.
The most widely ordered coin envelope size by a significant margin. Interior workspace approximately 2-3/4 x 4-5/8 inches. The #7 holds: coin sets, two or three individual coins stacked flat, jewelry items including rings, pendants, and loose stones too large for a #1, small keys, SD cards, SIM cards, USB drives, small electronic components and connectors, spare parts for equipment maintenance, and any item that is too small for a standard business envelope but too valuable or important to leave loose.
The #7 is the standard in bank teller operations. Individual denomination counts go into labeled #7s during end-of-day reconciliation. The envelope weight is negligible, the label space is sufficient for denomination, count, and teller ID, and the format stacks cleanly in a vault drawer. For jewelry retail counters, the #7 holds a stone or piece for repair with the work order written on the face when the job is done, the envelope is the ticket and the container simultaneously.
The #7 is also what evidence processing uses in law enforcement and forensic labs for small physical evidence items: projectiles, small pharmaceutical items, electronic components recovered from a scene. The chain of custody is written on the face. The item is sealed inside. The face documentation and the physical evidence stay together through the entire evidence chain without a separate tag or container. Available in white wove (gum flap and peel-and-seal) and brown kraft. Custom printing available on white wove.
The largest format in the small-envelope category, bridging the gap between the coin envelope range and standard flat-document mailers. This envelope opens on the end (open-end orientation) rather than the short side, making it a catalog-style format rather than a true coin envelope in construction. Holds gift cards, small photo prints (4x6 fits cleanly), small booklets, folded correspondence, packaging inserts, and any item that does not fit in a #7 but does not need a full 6x9 or 9x12 envelope. Peel-and-seal closure in white and brown kraft. Used in retail packaging, gift card presentation, photo mailing, and any application where the item is slightly too large for a standard coin envelope but the large-envelope formats are unnecessary overkill.
| Size | Dimensions | Colors | Closures | Contents |
|---|---|---|---|---|
| #1 Coin | 2-1/4 x 3-1/2" | White, Brown Kraft | Gum flap | Single coins, single stamps, small gems, watch parts, seeds, tiny fasteners |
| #7 Coin | 2-7/8 x 4-7/8" | White, Brown Kraft | Gum flap; peel-and-seal (white) | Coin sets, jewelry, keys, SD cards, USB drives, small electronics, evidence items |
| 4-5/8 x 6-3/4 | 4-5/8 x 6-3/4" | White, Brown Kraft | Peel-and-seal (open end) | Gift cards, 4x6 photos, small booklets, folded correspondence |
Bank teller drawers, coin counting operations, and cash vault management all use coin envelopes for denomination separation, end-of-day reconciliation, and identified cash storage during transit between counting stations and vaults. The labeled face lets supervisors and auditors verify contents during reconciliation without opening. The #7 is the standard banking size for this application.
Individual item storage through the full repair or sales cycle. A stone arrives for setting, goes into a #7 with the ticket number and stone description on the face. A ring comes in for sizing, goes into a #7 with the customer name and ring dimensions. When the work is complete, the envelope is the receipt. For display cases, small loose stones on offer go into #1 coin envelopes with the weight, cut, and price marked on the face for sales floor rotation management.
Individual coin storage with all identifying information on the face: denomination, date, mint mark, metal composition, grade, and provenance notes. Estate organization, collection cataloging, and coin show preparation. The #1 for single circulated coins and small-denomination pieces; the #7 for mint-state coins in protective flips or small sets. The paper construction is important for numismatic use: paper breathes and does not trap condensation the way polyethylene coin flips can in unstable temperature environments.
Specimen labeling, small part storage, compounding ingredient organization, and prescription item separation. Pharmacists use coin envelopes to organize compounding components weighed for individual prescriptions, label specimen samples submitted for analysis, and separate small-quantity medications within a batch. Medical device technicians use them for implant serial number documentation and small hardware component storage during device assembly or maintenance.
Component kitting, small parts inventory management, and device-specific parts tracking through a repair cycle. A technician removes screws from a device, puts them in a #7 with the device serial number and model written on the face, and that envelope travels with the device through the entire repair and return-to-customer cycle. No mixed parts. No lost components. No confusion about which size or type of screw goes back in which position.
Seed libraries and botanical archives store seed samples in coin envelopes because paper breathes. Seeds stored in sealed plastic bags accumulate moisture from their own respiration, which promotes mold and reduces germination viability. Paper coin envelopes allow the controlled moisture exchange that keeps seeds viable in dry, cool storage conditions. The face of the envelope carries the full botanical identification: species, variety, harvest year, harvest location, and germination notes. This is a use case that no plastic or polyethylene container handles as well as a paper coin envelope.
Watchmakers keep escapement parts in #1 coin envelopes through service cycles. Jewelers store small diamond melee and calibrated stones in labeled #7s for stone inventory management. Stamp collectors use coin envelopes to store single stamps and first-day covers. Artists store small mixed media elements by project or color group. The common thread: small items of specific identity that need to be contained, labeled, and accessible without damage or confusion.
This is the most important operational note about coin envelopes that no competitor addresses directly. A coin envelope containing an actual coin or any other rigid item will almost certainly trigger the USPS nonmachinable surcharge of $0.49, even if the total piece weight is well under one ounce.
The USPS nonmachinable surcharge applies to pieces that cannot be processed through automated postal sorting equipment. A rigid, dense item inside an envelope creates an uneven thickness that prevents the piece from flexing through sorting machine rollers. A coin in a coin envelope is the textbook example of this. If you mail coin envelopes containing rigid contents through the postal service, budget for the surcharge or hand-deliver pieces to the postal counter and confirm the classification before any bulk mailing.
Coin envelopes are primarily storage and organization tools, not outbound mailing formats. Their postal use case is light, occasional, and ideally confirmed at the counter before a batch run. The primary application is entirely non-postal: sorting, labeling, filing, and organizing small items in drawers, trays, and storage systems. Browse all formats at businessenvelopes.com/coin-envelopes.
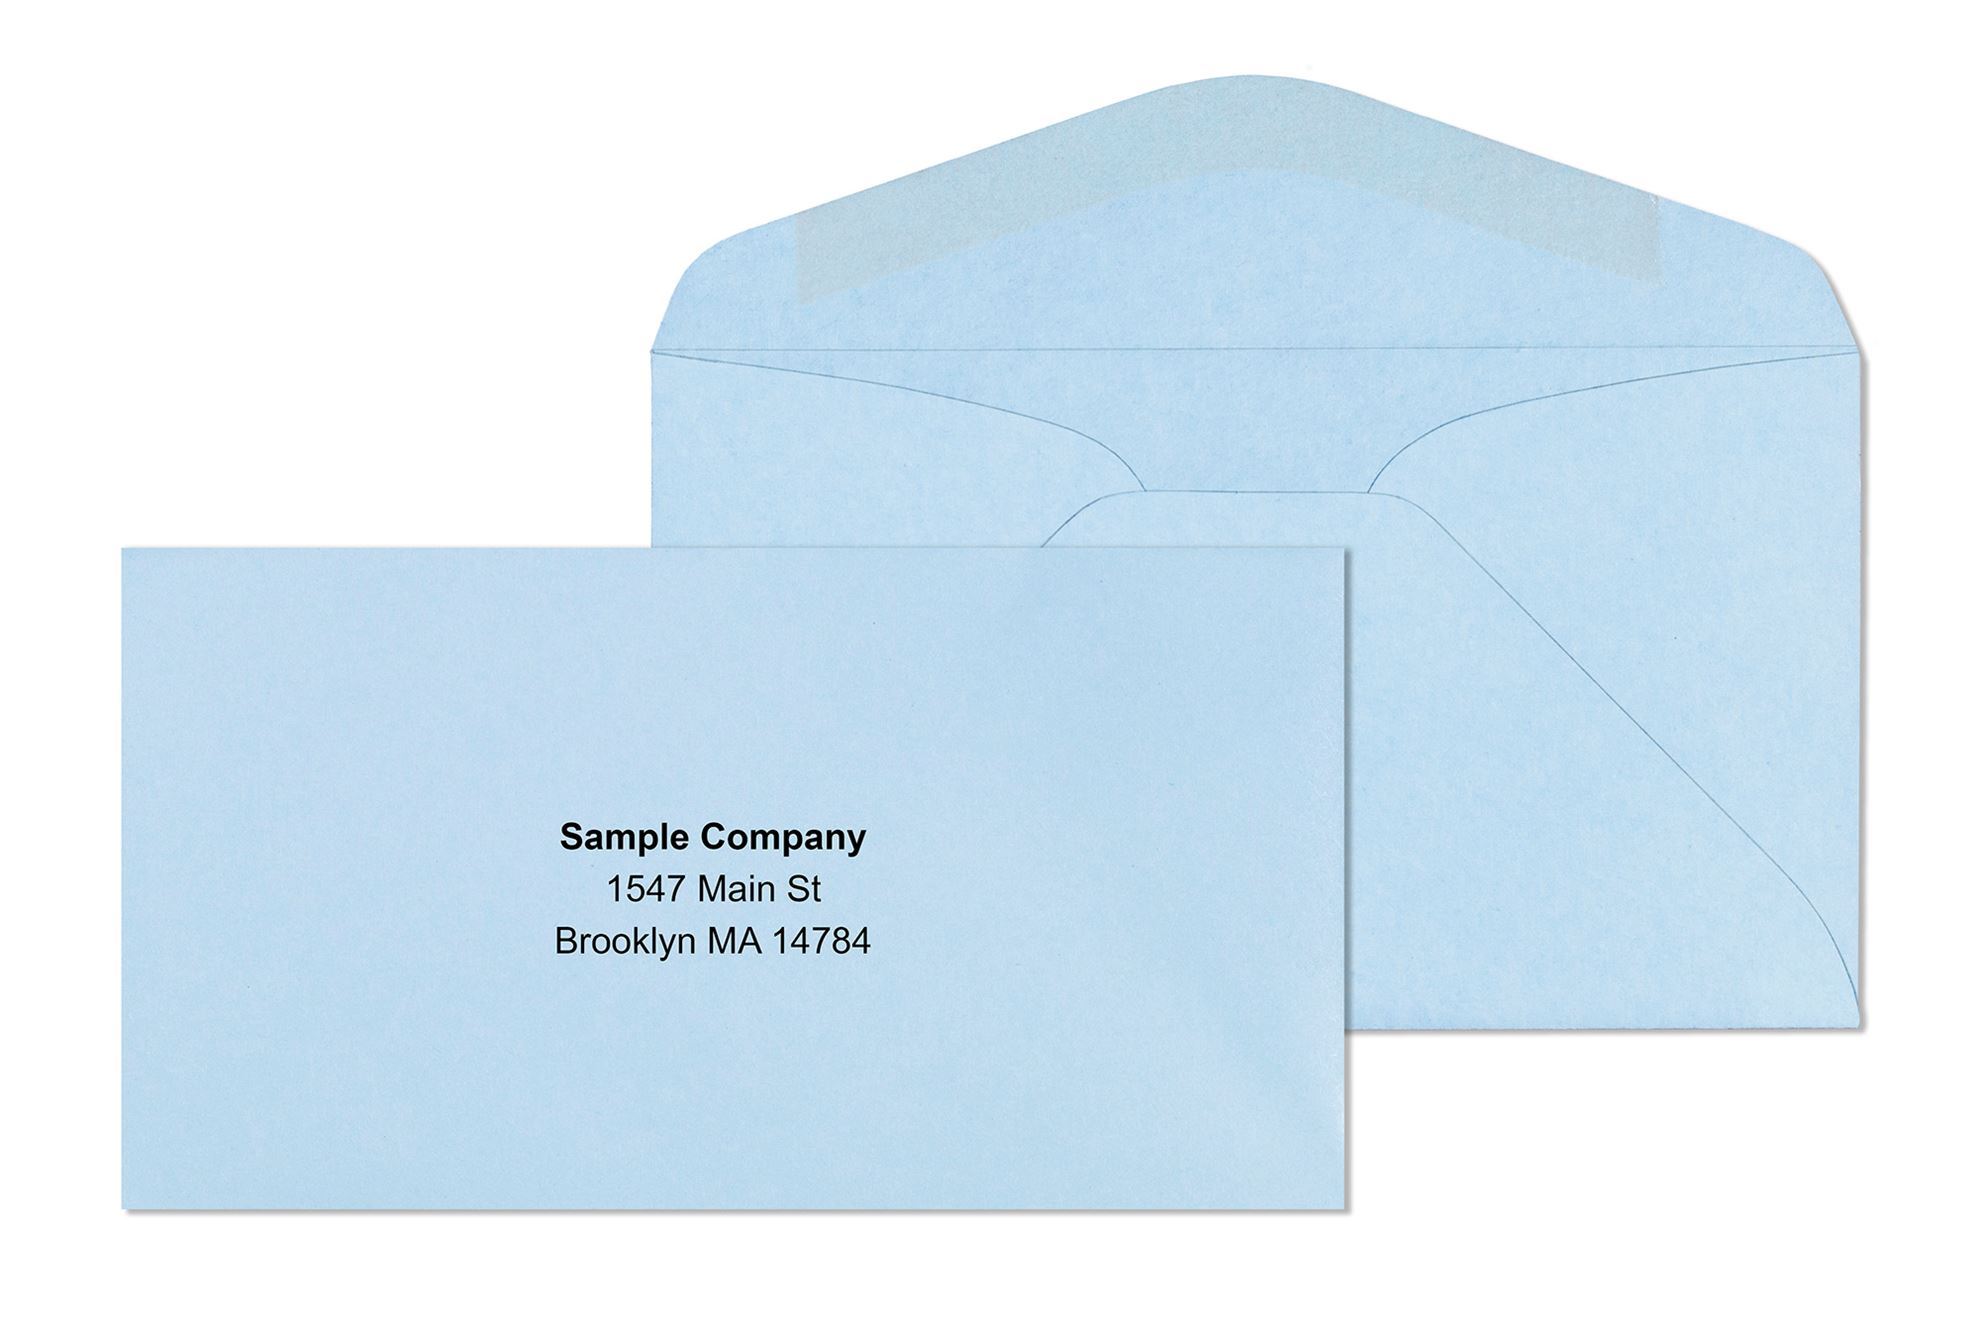
White wove and brown kraft coin envelopes are entirely paper and recyclable with standard paper recycling. There are no metal closures, plastic liners, or laminated coatings on any coin envelope format we carry. The peel-and-seal format on the #7 and the 4-5/8 x 6-3/4 uses a water-based pressure-sensitive adhesive on paper backing compatible with paper recycling in most municipal systems. Unlike clasp envelopes, which require metal fastener removal before paper recycling, coin envelopes go directly into the paper recycling stream.
The #7 white coin envelope supports custom printing: company name, department identifier, logo, and any fixed labeling that applies to every envelope in a batch. For bank teller operations that label hundreds of denomination envelopes per day, custom-printed #7s with the bank name and denomination line pre-printed save the step of writing the bank identification on each envelope. For jewelry counters, a custom #7 with the store logo converts a commodity container into branded packaging the customer takes home with a repaired or purchased item. For electronics repair operations, a pre-printed #7 with the company name and a "device parts" identifier maintains professional presentation through the entire customer cycle.
Custom printing on the #7 follows the same proof and production process as any other Business Envelopes custom order: PDF proof before production, artwork stored on file for reorders, 7 to 10 business day production from proof approval, free ground shipping, no minimums. See all custom printing options at custom printed envelopes.
This is a specialist detail that separates paper coin envelopes from every plastic alternative for seed storage. Seeds undergo cellular respiration continuously, producing trace amounts of moisture as a byproduct. In a sealed plastic container, this moisture accumulates and creates a microenvironment with elevated relative humidity, which promotes mold growth and dramatically reduces germination rates over time. Paper breathes: moisture vapor passes through the paper wall, equalizing the humidity inside the envelope with the ambient storage environment. In a cool, dry storage location (a standard guideline for seed library storage is below 50 degrees Fahrenheit and below 50 percent relative humidity), paper coin envelopes maintain seeds in a stable, breathable environment that plastic alternatives cannot replicate. Botanical gardens, agricultural extension seed libraries, and backyard seed-saving operations all use paper coin envelopes for this reason.
Business Envelopes has supplied commercial envelope formats including coin envelopes to US businesses, banks, jewelers, schools, and organizations since 1997. We carry all three sizes in white and brown kraft, with the full range of closure types: gum flap on #1 and #7 kraft, peel-and-seal on white #7 and the 4-5/8 x 6-3/4 format. Custom printing is available on white #7 stock with no minimums and free ground shipping on every order.
Our white wove coin envelopes are 24 lb commercial-grade stock, not the lighter-weight paper that lower-price suppliers use to hit a cheaper price point. The difference shows in the label-writing experience: 24 lb wove provides a firm, non-absorbent writing surface. Ink from a pen stays on the surface cleanly rather than bleeding into the paper. For operations writing identifying information on hundreds of coin envelopes per day, this quality distinction matters in practice. Browse all sizes at businessenvelopes.com/coin-envelopes. For other small-format envelope programs, see self seal envelopes and custom printed envelopes. For the full catalog, see all items.
Storage and organization of small items: coins, stamps, jewelry, keys, seeds, hardware fasteners, SD cards, electronic components, pharmaceutical specimens, and evidence items. Used daily in banking, jewelry retail, pharmacy, numismatics, electronics repair, watchmaking, and agricultural seed libraries. Primary application is non-postal storage and organization, not outbound mailing.
The #1 (2-1/4 x 3-1/2 inches) holds individual coins, single stamps, small gemstones, watch parts, and tiny items. The #7 (2-7/8 x 4-7/8 inches) holds coin sets, jewelry items, small keys, SD cards, USB drives, and small electronic or evidence items. The #7 is the most widely ordered size by a significant margin.
The short-side flap keeps small contents from sliding out during handling, makes items easy to insert and remove, and leaves the full long face of the envelope available for writing, printing, and labeling without any flap interference. In storage trays, every label is readable from above without touching or opening any envelope.
Yes, almost certainly, if the envelope contains a rigid item such as an actual coin. The rigid, dense content creates uneven envelope thickness that prevents processing through automated postal sorting equipment, triggering the $0.49 nonmachinable surcharge. Confirm the classification at your postal counter before any bulk mailing of coin envelopes containing rigid items.
Paper breathes: moisture vapor from seed respiration passes through the paper wall, preventing accumulation and maintaining stable humidity inside the envelope. Sealed plastic traps respiration moisture, raising internal humidity and promoting mold that reduces germination viability. Paper coin envelopes are the standard storage format in botanical gardens, agricultural seed banks, and seed library programs for this reason.
Yes. The #7 white coin envelope supports custom printing: company name, logo, department identifier, and any fixed labeling. PDF proof before production. Ships in 7 to 10 business days from proof approval. Free ground shipping, no minimums.
Gift cards, small 4x6 photo prints, small booklets, folded correspondence, and any item too large for a #7 but not large enough to justify a 6x9 envelope. Open-end construction with peel-and-seal closure in white and brown kraft. Used in retail packaging, gift card presentation, and photo mailing programs.
Hold a standard white business envelope up to a bright window with a check inside. You will see the routing number, the account number, the payee name, and the dollar amount through the paper. Every person who handles that piece of mail between your office and the recipient's mailbox can see the same thing. A security tinted envelope solves this with an interior pattern that makes those details completely unreadable without opening the envelope. From the outside, the envelope looks identical to a plain white one. From the inside, it is a privacy layer that protects every sensitive document your organization sends.
This guide covers how security tinting works and what the different patterns do. It also covers which formats are available at Business Envelopes and how to test whether your tinting is adequate. The HIPAA and financial compliance context is explained in full, along with the mistakes organizations make when switching from plain white stock.
To understand why tinting matters, start with what happens without it. A standard 24 lb white wove envelope held up to a bright window is essentially transparent. The text from any printed document inside is legible, particularly dark laser-printed content on light paper. Account numbers, check amounts, patient names, and diagnosis codes all resolve clearly enough to be read by anyone who handles the piece between your office and the recipient's mailbox. Security tinting is the practical response to this specific vulnerability.
Security tinting is a pattern printed on the interior surface of an envelope. The pattern is applied to the inside of the paper during manufacturing, not added as a separate liner or insert. When the sealed envelope is held up to a light source, the pattern breaks up any text from the document inside, making it completely unreadable without opening the envelope.
The most common pattern types are cross-hatch patterns, geometric patterns, and randomized patterns. Cross-hatch patterns use overlapping diagonal lines that create a dense grid. The crossing lines disrupt text in both directions simultaneously and are the most widely used security tint configuration.
Geometric patterns use repeating shapes such as diamonds, hexagons, or interlocking elements. Slightly more decorative than cross-hatch but equally effective at blocking text transmission. Randomized patterns use irregular shapes and marks that vary across the surface. Harder to look past than repeating patterns because the eye cannot find a consistent visual rhythm to filter out.
The most common tint color is reflex blue, the deep bright blue seen on most commercial security envelopes. Black patterns offer slightly higher opacity because black ink has greater light absorption, but reflex blue is the industry standard. Business Envelopes uses the reflex blue cross-hatch interior pattern across the security tinted product line.
Some lower-quality security envelopes apply tinting only to the back panel of the envelope. A sealed envelope is typically held front-panel forward when handled. Under a light source, the contents are read through the front panel. Tinting only the back panel provides almost no practical privacy protection because the reading angle comes from the front.
Every tinted envelope at Business Envelopes carries full interior tinting coverage across all panels, front and back, including the side seams. To verify your current envelopes: hold a sealed stuffed envelope up to a bright light with the front panel facing you. If you can read any content from the document inside, the front panel tinting is inadequate regardless of what the back panel shows.
Security tinting is one of three distinct features that compose a fully private mailing piece. They are not interchangeable. Opaque paper stock determines how much light passes through the envelope wall independent of any tinting. The 28 lb brown kraft construction on clasp and catalog envelopes provides baseline opacity through material density alone. Security tinting on #10 and smaller formats compensate for the inherently lighter paper weights used in commercial correspondence envelopes. At Business Envelopes, the 24 lb white wove stock across the standard range provides the base opacity on which the interior tinting builds. Security tint pattern is the interior print pattern as described above. Most effective on smaller letter-format envelopes where lighter paper stock would otherwise allow light transmission. Tamper-evident seals are a feature distinct from tinting that reveals if the envelope was opened after sealing. Most commercial peel-and-seal formats include security slits cut into the flap. If someone attempts to open the sealed envelope before delivery, the flap tears visibly along these slits. All peel-and-seal formats at Business Envelopes include the tamper-evident slit configuration on the flap.
Window placement on security tinted window envelopes follows USPS-standard dimensions used across all commercial window envelopes. On a #10 security tinted window envelopes, the window measures 1.125 by 4.5 inches and is positioned 0.75 inches from the left edge and 0.75 inches from the bottom edge. This is the specification that QuickBooks, Sage, Xero, and all standard US billing platforms default to when printing address blocks. On a #9 security tinted window envelopes, the window measures approximately 1 by 3.5 inches at the same 0.75-inch offset from the left edge and bottom. On a #6 3/4 security tinted window envelope, the window measures approximately 1 by 3 inches at 0.5 inches from the left edge and bottom.
These specifications are the reason the 10-sample alignment test matters before any large production run. Print 10 documents at your normal settings, fold and insert all 10, and check every piece. Variance in fold depth and paper handling affects each piece differently. A single-sample test catches the average case. Ten samples catch the full range of variance your actual production run will produce.
Two windows: upper for the payer return address, lower for the payee delivery address. Both come from the printed check inside. Security tinted interior keeps the routing number, account number, check amount, and authorized signature completely invisible through the envelope wall while both address windows remain clear. Compatible with QuickBooks, Quicken, Sage, ADP, and all standard laser check formats. Available in gummed flap, peel-and-seal, and flip-and-stick closures at check envelopes.
For check mailing programs specifically, security tinted envelopes work as one layer in a broader payment protection chain. The chain of custody for a physical check runs from your printer, through the sealed tinted envelope, through postal handling, and into the payee's hands. Each stage is a potential exposure point. Security tinting covers the transit stage. Positive Pay, a bank service that matches issued checks against a file of authorized payments before clearing, covers the deposit stage. Neither replaces the other. Organizations running high check volumes use both.
The USPS Postal Inspection Service, which investigates mail theft and fraud, specifically recommends using security envelopes for any mail carrying negotiable instruments or sensitive personal information. A tinted envelope does not guarantee that a sophisticated attacker cannot eventually access the contents, but it eliminates the casual opportunity that a plain white envelope creates for anyone who handles mail in the transit chain.
For any mailing where the sender wants to signal the contents are confidential, mark the envelope face with "Confidential" or "Personal and Confidential" alongside the custom printed return address. This signals that the contents should not be opened by anyone other than the named recipient. This is standard practice in legal correspondence, HR communications, and any mailing where the recipient and the eventual opener may not be the same person.
Most organizations using plain white envelopes for billing and statement programs are not making a deliberate decision. They are using whatever was already in the supply closet without examining whether that choice is appropriate for the content being mailed. HIPAA compliance for healthcare organizations: HIPAA requires covered entities to implement reasonable safeguards to protect protected health information during transit. A patient receiving a billing statement in a plain white envelope where the statement amount, diagnosis code, procedure description, or patient identification number is potentially visible through the paper is not a reasonable safeguard. Tinted envelopes for patient billing correspondence are the practical implementation of the HIPAA transit protection requirement for physical mail.
Financial services and banking: The Federal Trade Commission Safeguards Rule requires financial institutions to implement information security programs to protect customer financial data. Physical mail carrying account statements, loan documents, tax forms, and check-related documents falls within scope. Tinted security envelopes are the standard physical mail implementation for financial institutions, insurance companies, and accounting firms.
Check fraud context: Research from the Association for Financial Professionals found that 79 percent of organizations reported attempted or actual payment fraud in recent years, with checks being the top fraud target at 63 percent of cases. A check visible through a plain white envelope in a mail tray is a specific, identifiable fraud opportunity. Security tinting removes the envelope as an information source for anyone handling the mail.
The standardization argument: Many organizations solve the plain-white-versus-tinted management problem by standardizing on security tinted envelopes across all #10 outgoing correspondence rather than maintaining two separate inventories. The per-unit cost difference at commercial quantities is minimal. Eliminating the risk of a sensitive document accidentally going out in a plain white envelope is worth the consistent overhead.
A window envelope is designed to show exactly one thing through the window: the recipient delivery address. The tinted interior protects everything else. But the protection only works if sensitive data on the document is not positioned immediately adjacent to the address block.
When a document is inserted and the address block sits in the window zone, any text immediately above or below the address block sits outside the window boundary. Under certain lighting conditions, and with insert shifting during transit, this adjacent text can move partially into the visible zone. Account balances printed immediately above the address line, patient record numbers printed below the address, and policy numbers adjacent to the address block all represent data in the zone most at risk of partial exposure.
The professional standard for any document mailed in a window envelope is to keep all sensitive data at least one inch away from the address block in all directions. This creates a buffer zone that insert shifting cannot breach. If your current billing template places an account number directly above or below the address line, that is a design issue worth correcting before the next cycle.
Most organizations assume the tinting works and never verify it against their specific document. The correct approach takes five minutes.
Step one: Assemble a sealed test piece. Print your most sensitive standard document at your normal print density. Fold and insert it as it would be in a production run. Seal the envelope.
Step two: Run the front-panel light test. Hold the sealed envelope with the front face toward a bright light source, not an office overhead light. Use a bright window on a sunny day or a direct lamp held close.
Step three: Check coverage across all panels. If any text is legible through the front panel, the tinting is inadequate for this content. Rotate the envelope and check the back panel and side seams.
Step four: Test with a window envelope if applicable. Look at what is visible through the window. Only the address should be readable. Nothing immediately adjacent to the address block should be visible through the paper around the window opening.
Step five: Test after simulating transit movement. Gently tap the sealed envelope on all four sides as if it were being sorted in postal equipment. Recheck the window alignment. An address that passes the static test but shifts into the window frame boundary during tapping indicates an insert that moves too freely inside the envelope.
Security tinting prevents casual visual access to the contents from outside. It is not designed to defeat a determined attacker with tools.
A steam kettle, warm water, or certain solvents can soften the gum on a standard gummed flap and allow the envelope to be opened and resealed without visible damage. Security tinting does nothing against this method because the tinting protects against light transmission through the closed paper, not against physical opening.
Peel-and-seal tamper-evident closures address this directly. The security slits in the flap tear visibly if anyone tries to open a sealed peel-and-seal envelope by any method. The damage cannot be concealed. Combined with security tinting, peel-and-seal provides both transit privacy and opening tamper evidence, which is the correct combination for any program where both matters.
Custom printing on security tinted envelopes at Business Envelopes covers three configurations. Return address only prints your organization name and mailing address in the upper-left corner in standard black or a single spot color. Spot color printing adds a one or two-color logo alongside the return address, which is the most common configuration for professional billing correspondence. Full-color printing renders logos and brand elements in full process color and is available for organizations with complex visual identities or campaign-specific artwork. All three options are available across the full security tinted product range. The exterior of every security tinted envelope is fully printable regardless of the interior tint pattern because the tinting is applied only to the interior surface.
Business Envelopes has supplied tinted envelopes to US billing operations, healthcare practices, accounting firms, payroll departments, and financial institutions since 1997. Here is what matters specifically for tinted envelope programs.
Full interior coverage on every format. Front panel, back panel, side seams. Not back-panel-only. Every tinted format in the Business Envelopes catalog carries the full-coverage reflex blue cross-hatch pattern that makes the light test pass from any angle.
Every format in one catalog. Check envelopes in double-window security tinted for payroll and accounts payable. Window envelopes in single-window security tinted for billing and invoice programs. Regular envelopes in #6 3/4 and #9 tinted for return reply and remittance programs. All from one supplier, one order, free ground shipping.
All three closure types available. Gummed flap for inserter machine compatibility. Peel-and-seal with tamper-evident slits for hand-sealed batches. Flip-and-stick for continuous high-volume runs. The closure type is a workflow decision, not a security trade-off.
Custom printing on all tinted formats. Logo, return address, and brand colors printed on the exterior. The tinting is on the interior surface; the exterior is fully printable. PDF proof before production, artwork on file for reorders, 7 to 10 business day turnaround. Available at printed envelopes.
The bottom line A plain white envelope carrying a check, billing statement, or patient notice is a security exposure. Any document with account numbers, financial figures, or personal identifiers inside that exposure costs almost nothing to eliminate. The per-unit difference between plain white and security tinted at commercial quantities is negligible. The protection is immediate and complete.
Use security tinting across all #10 outgoing correspondence for any program handling financial or personal data. Standardize on tinted stock to eliminate the risk of an accidental plain-white mailing. Test the tinting on your specific document with the front-panel light test before relying on any new stock. Verify front-panel coverage, not back-panel coverage. Combine tinted stock with peel-and-seal tamper-evident closure for any program where opening integrity on arrival is part of the professional standard.
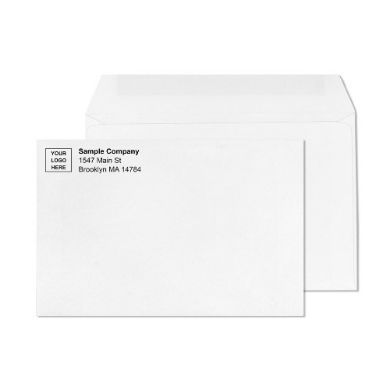
Every envelope that leaves your office makes a decision on behalf of your organization before anyone opens it. A plain white envelope with a printed label says: we have an address. A custom printed envelope with your logo, your return address in your brand typography, and your company name in position says: we run a professional operation, and we made a deliberate choice about how our outgoing correspondence looks.
That distinction happens before the recipient reads a single word of what is inside. And the per-unit cost difference between a labeled plain envelope and a custom printed envelope is, for most volume programs, smaller than the value of the impression difference on every piece that goes out. This guide covers what can be printed on a business envelope, the file format requirements that prevent costly production delays, the bleed and safe zone rules that determine whether your design prints as intended, ink options, the proof process, turnaround times, and every size that supports custom printing.
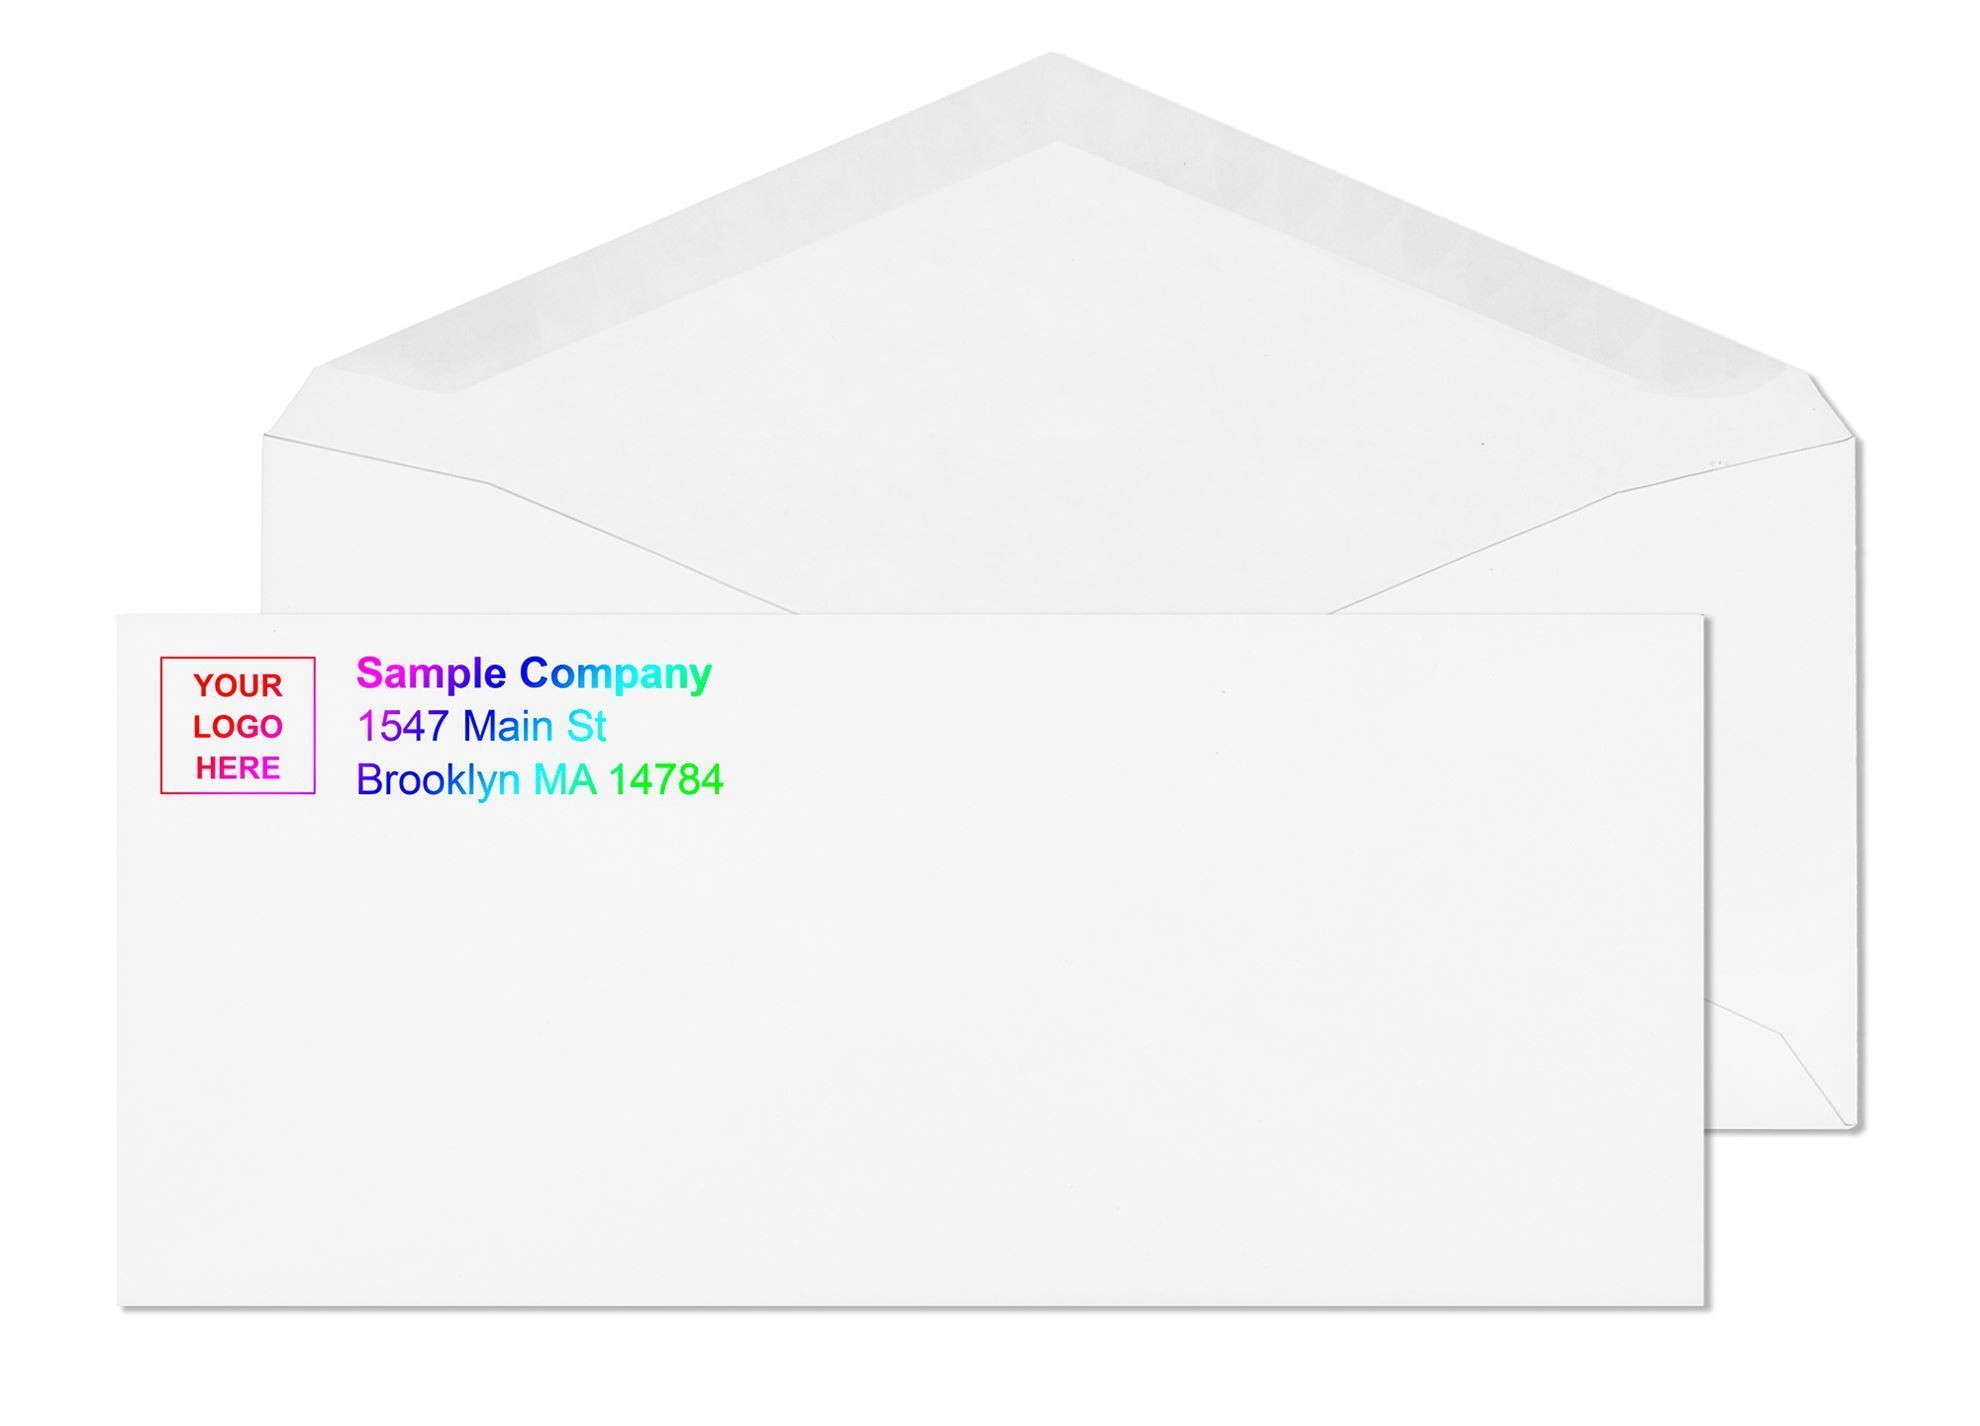
The functional minimum. Company name, street address, city, state, and ZIP code positioned in the upper-left area of the envelope face the USPS-recognized return address zone. This ensures every outgoing piece identifies the sender and provides a valid return address for undeliverable mail. USPS requires a return address on Bulk Mail and Nonprofit mail. For any business sending outgoing mail regularly, having the return address printed on the stock eliminates the label application step and produces a result that looks designed rather than assembled.
Positioned above or alongside the return address text in the upper-left zone. Single-color logo printing is the most common and most cost-effective option. Two-color printing accommodates logos with a secondary brand color. Full-color (CMYK) printing is available for logos with gradients or photographic elements. The right choice depends on your logo's complexity and how closely color accuracy matters for brand standards compliance. A simple two-color logo in exact brand colors often reads better on an envelope than a full-color version at small scale.
Brief copy printed below the return address. Used for marketing correspondence, direct mail programs, annual appeal letters, and event invitations where a short message on the face frames the content before the recipient opens the piece. "Membership renewal enclosed," "Your annual statement is inside," and "Important tax information enclosed" are functional examples. Campaign-specific taglines for fundraiser appeals create a sense of season and urgency before the envelope is opened.
For organizations using USPS Permit Mail, First-Class presort, or Nonprofit postage indicia, the indicia can be printed directly on the envelope face in the standard upper-right position. Printing the indicia on the envelope stock eliminates the separate permit stamp application step at the mailing house and creates a cleaner, more professional appearance on the finished piece. Provide the correct permit number, post office name, and indicia format to your envelope supplier at the time of artwork submission.
For donation envelopes and payment reply envelopes, the flap interior can carry printed content. Donation amount boxes, payment fields, organization membership number space, and written instructions for returning the payment piece. This format converts the envelope itself into a functional response mechanism, eliminating the need for a separate reply card insert in the mailing package. Standard for church offering envelopes, nonprofit pledge envelopes, and utility remittance programs.
Supplying the correct file format is the most preventable source of production delays. Here are the standards for envelope printing submissions:
PDF is the preferred format. Export as PDF/X-1a or PDF/X-4 with all fonts embedded and images at minimum 300 dpi at final size. Outline all text (convert to paths/curves) to prevent font substitution if the exact font is not installed on the production system. If your logo uses a proprietary font that is not outlined, the production system may substitute a system default outlined text eliminates this risk entirely.
Vector formats (AI, EPS, SVG) are acceptable for logos and text-only designs. All linked images must be embedded in the file. Raster images embedded in vector files must be 300 dpi at final print size.
Avoid submitting: Word documents, PowerPoint files, JPEG or PNG logos at screen resolution (72-96 dpi), or designs built in Google Docs. These either cannot be used directly in production or require significant pre-press reconstruction that delays the proof stage.
Most envelope printing does not include a bleed the printed area stops within the envelope face rather than extending to the edge. This is different from commercial print jobs where full-bleed printing runs to the cut edge. For envelope printing, artwork should be kept within the printable area, which on a standard #10 envelope is approximately 3-3/4 x 8-3/4 inches on the upper-left zone.
The safe zone is the inset from all edges within which text and critical design elements must stay to avoid being cut off or distorted at fold lines. Keep all text and logo elements at least 1/4 inch from any envelope edge and at least 3/8 inch from the fold lines where the gum flap meets the body. Window zone on window envelopes: maintain at least 1/8 inch clearance between any printed element and the edge of the window opening. The proof will show the printable area as a boundary do not push critical content to the edge of this boundary unless you have confirmed the tolerance with the production team.
Single-color (1-color) printing uses one ink, typically black or a dark PMS spot color. The most cost-effective option. Appropriate for simple logos, return address only, and any design where all elements can be rendered in a single ink. Black ink on white stock is the most legible combination for USPS OCR scanning of any address elements printed on the envelope face.
Two-color (2-color) printing uses two inks, typically a dark primary color plus black, or two specific PMS spot colors for brand accuracy. Covers the majority of corporate logo programs where the logo uses a primary brand color alongside black text. More expensive per unit than single-color but significantly less than full-color for most volume programs.
Full-color (CMYK) printing reproduces photographic images, gradients, and complex multi-color logos. Most expensive per unit option. Used when the logo or design element cannot be adequately rendered in one or two spot colors. If your brand standard requires PMS color accuracy, discuss with the production team whether CMYK or PMS spot color will produce closer results for your specific logo on your specific stock color CMYK and PMS can produce slightly different color on wove stock compared to coated paper, and the difference is visible in highly saturated colors.
| Size | Dimensions | Custom Print Available | Common Print Program |
|---|---|---|---|
| #6 3/4 | 3-5/8 x 6-1/2" | Yes | Nonprofit reply/donation envelopes with remittance content |
| #9 | 3-7/8 x 8-7/8" | Yes | Return reply envelopes with pre-printed company address |
| #10 (plain, tinted, window) | 4-1/8 x 9-1/2" | Yes | Standard business correspondence, billing, and direct mail |
| #11 | 4-1/2 x 10-3/8" | Yes | Larger business correspondence |
| 6 x 9 booklet and open-end | 6 x 9" | Yes | Small flat document programs and direct mail |
| 9 x 12 booklet and open-end | 9 x 12" | Yes | Flat document mailing, contracts, certificates |
| 10 x 13 | 10 x 13" | Yes | Legal and large-format document mailing |
| #7 coin envelope | 2-7/8 x 4-7/8" | Yes | Branded small-item packaging for retail and banking |
| Colored wove (#6 3/4, #9, #10) | Various | Yes | Nonprofit fundraiser programs with branded colored stock |
Every custom order goes through a PDF proof before any production begins. The proof shows your logo, return address text, and any additional copy at the exact position, scale, and orientation that will be used in production. Font rendering, color relationships, margin positioning, and window clearance (on window envelopes) are all visible in the proof.
Review the proof for: correct company name spelling and address format; logo at the intended scale and position; sufficient margin from envelope edges and fold lines; on window envelopes, sufficient clearance between printed elements and the window opening; correct indicia format and permit number if applicable.
After you approve the proof, the artwork file is locked and stored on file for all future reorders. Reorders do not require re-proofing the stored file is used directly. If proof revisions are needed, each revision cycle adds one to two business days to the schedule. The most common revision causes: text that needs reformatting after seeing it at envelope scale; logo that needs repositioning; address that has a formatting error that was not apparent until proof review. Sending clean, correct artwork the first time is worth the effort it eliminates revision delays.
Blank stock on the most popular sizes ships same or next business day. Custom printed orders ship in 7 to 10 business days from proof approval. If proof revisions are needed, add one to two business days per revision cycle. For organizations planning seasonal mailing programs (year-end fundraiser appeals, annual statement runs, quarterly marketing campaigns), order custom printed envelopes three to four weeks before the first mailing date to allow comfortable lead time with room for one revision cycle and no schedule pressure.
The functional argument: labels peel. In transit, in a mail tray, in temperature extremes, labels can lift from the envelope stock and partially block the address, interfere with USPS OCR scanning, or fall off entirely. Printing directly on the stock produces a return address that is as permanent as the envelope itself.
The presentation argument: a label is visually distinct from the envelope it is applied to. The label stock is different, the adhesive edge is visible, and the label sits slightly raised above the envelope surface. These differences signal that the piece was assembled rather than designed. Custom printing integrates the return address and logo with the envelope as a unified object.
The efficiency argument: applying a label to every outgoing envelope is a per-piece manual step that self-sealing eliminates from the workflow when combined with custom printing. For any program doing recurring mailings, eliminating the label application step on every piece compounds into meaningful labor savings across a year.
Business Envelopes has provided custom envelope printing to US businesses, nonprofits, law firms, healthcare organizations, and accounting practices since 1997. We handle the full range from simple black ink return address printing to two-color logo programs across multiple formats in a coordinated order. Artwork stays on file indefinitely for reorders, which means your next order requires only a quantity specification not a repeat of the proof and approval process.
No minimums apply to custom printed orders. Free ground shipping on every order. PDF proof before production begins on every job. The custom printing option covers every format we carry: from #10 envelopes and window envelopes through 9x12 envelopes, colored envelopes, and coin envelopes. Browse all printable formats at businessenvelopes.com/custom-printed-envelopes.
Company name, return address, logo, tagline, and mailing indicia in the upper-left zone are standard. Remittance content (donation fields, payment instructions) can be printed on the flap interior for reply and donation envelopes. Full custom designs are available on the envelope face within the printable zone.
PDF/X-1a or PDF/X-4 with all fonts outlined (converted to paths) and images at 300 dpi minimum. Vector formats (AI, EPS) with embedded images are also accepted. Avoid Word documents, PowerPoint, or low-resolution JPEGs and PNGs.
The safe zone is the inset from edges within which all text and critical design elements must stay to avoid being cut off or affected by fold lines. Keep all content at least 1/4 inch from envelope edges and 3/8 inch from fold lines. On window envelopes, maintain at least 1/8 inch clearance between printed elements and the window edge.
Custom printed orders ship in 7 to 10 business days from proof approval. Proof review and revisions take one to two business days per cycle. Order three to four weeks before your first mailing date for programs with seasonal deadlines.
No minimums. Order any quantity. Free ground shipping on every order across the contiguous 48 states. Bulk pricing reduces per-unit cost automatically as quantities increase.
Yes. After your first order is approved and produced, artwork is stored on file. Reorders use the same file automatically no re-uploading or re-proofing required. Only a quantity specification is needed for repeat orders of the same format.
1-color uses a single ink (typically black or a dark PMS spot color) the most cost-effective option for simple logos and return address only. 2-color uses two inks for logos with a primary brand color alongside black. Full-color (CMYK) reproduces photographic images and multi-color gradients used when the logo cannot be rendered in one or two spot colors.
Every outgoing piece of business mail needs two addresses on the outer envelope. The delivery address tells the postal system where the piece is going. The return address tells it where to send the piece back if it cannot be delivered. Most businesses think carefully about the delivery address and treat the return address as an afterthought. That is the wrong priority order, because the return address has real operational consequences that the delivery address does not.
A missing return address is not just an etiquette issue. When a piece of First-Class Mail cannot be delivered, USPS sends it to the Mail Recovery Center in Atlanta rather than back to the sender. Without a return address, you have no way of knowing the piece failed to deliver, no way to correct the address, and no way to resend. For a single personal letter, that is a minor inconvenience. For a batch of 200 invoices sent to a partially outdated mailing list, undeliverable pieces with no business envelope return address represent a billing gap that compounds every month.
USPS does not technically require a return address on all mail classes, but the practical case for including one on every outgoing piece of business mail is clear. The cost of omitting it, in lost payments, missed deadlines, and gaps in your own mailing list data, is far higher than the effort of making sure it appears on every piece.
Not all methods are equal. Each one has a different cost structure, a different effect on the first impression, and a different failure mode worth understanding before you commit to any volume program.
The most basic option. Suitable for very low volume personal correspondence, but not appropriate for any professional business mailing. Handwritten return addresses look inconsistent, cannot scale, and communicate to recipients that the organization does not have basic mailing infrastructure. For any business sending recurring outgoing mail, this is where the comparison starts, not where it ends.
The most common workaround for business envelopes is with a return address. A label sheet with your organization's name and address printed on small adhesive labels, applied to the upper-left corner of each envelope before mailing. Labels are faster than handwriting and can carry a small logo alongside the address text. However, labels introduce the most operational failure modes of any method. Labels shift during application and can end up crooked. Adhesive releases in warm storage environments, leaving labels that peel in transit before the envelope reaches its destination. On premium or colored envelope stock with a non-standard surface finish, adhesive compatibility can be a real issue. At any meaningful volume, applying a label to each piece adds time to every mailing run without adding anything the recipient values.
A self-inking return address stamp sits between labels and custom printing in effort and consistency. You press it to the upper-left corner of each envelope, and it delivers a crisp impression of your organization's name and address, typically in a format around 7/8 by 2-3/8 inches. A replacement ink pad comes with most stamp units, giving useful life across tens of thousands of impressions. The practical case for a self-inking stamp is organizations that mail at low to moderate volume across a variety of envelope types that do not justify a dedicated custom print run. The return address stamp applies equally to a number 10, a 9x12 kraft mailer, or a clasp envelope without a separate production order for each. The limitation is that a stamp impression is text only. It does not carry a logo. For any program where brand identity on the outer envelope matters as much as the address itself, custom printing on the envelope stock remains the correct end state.
The professional standard for business envelopes with a return address at any recurring mailing volume. Your organization name, street address, city, state, and ZIP code, along with your logo if the program calls for it, are printed directly on the envelope face during production. The print is part of the envelope itself rather than something added separately. It does not shift, peel, or vary between mailing runs.
The term corner card refers specifically to the combination of company name, logo, and return address pre-printed in the upper-left zone of the envelope face. It is the industry-standard name for this element and what print buyers use when specifying this feature with envelope suppliers. Every piece that leaves your building carries an identical, legible, permanently applied corner card without anyone applying anything by hand.
Custom printed envelopes at Business Envelopes apply the corner card to the upper-left zone of the envelope face across every size and format in the catalogue. PDF proof before production, artwork on file for reorders, no minimum order on any format.
USPS specifies that the return address should occupy the upper-left corner of the envelope face. The standard position is at least one-half inch from the left edge and one-half inch from the top edge. The address block extends downward from there. It should not drift toward the center of the face. The full address block should also stay at least one half inch from the right edge to maintain adequate clearance across the face.
USPS automated sorting equipment reads the delivery address in the OCR read area, which runs roughly one-half inch up from the bottom edge across most of the face. A return address drifting into that zone can interfere with automated scanning. There is also a barcode clear zone at the bottom of the face where USPS equipment prints a Delivery Point Barcode after reading the delivery address. Nothing, no labels, no printed content, no design elements, should occupy the bottom two and three-quarters inches of the envelope face. Keeping the return address cleanly in the upper-left corner satisfies both requirements simultaneously.
The return address on business envelopes needs to be legible to both automated equipment and human sorters. USPS optical character recognition scans the envelope face at high speed. A return address in a decorative script font, a very small point size, or low-contrast ink on a colored envelope stock can register poorly or fail.
The practical standard: use a clean sans-serif or serif font at no smaller than 8 points, in high-contrast dark ink on light envelope stock. Standard black or dark blue ink on white wove is universally legible. On colored envelope stock, confirm the ink colour provides clear contrast against the specific stock colour before ordering a full custom print run. A navy logo on a royal blue envelope is a real production problem that a PDF proof on screen does not always catch, since screen colours do not precisely reproduce print output.
Many organizations treat the return address as the only element on the outer envelope face. The face of a standard number 10 envelope offers meaningful surface area, and businesses that think more carefully about their outgoing mail use that space with intention.
A tagline or campaign message positioned below the corner card turns every outgoing piece into a branded touchpoint before the recipient opens it. A short phrase, a value statement, or a campaign identifier printed beneath the return address adds zero mailing cost and is present on every single piece the organization sends.
A website URL alongside or beneath the return address gives recipients a direct reference point for follow-up. A QR code printed in the corner card area bridges the physical envelope to a digital landing page or payment portal. This is increasingly common in direct mail programs where response tracking matters.
For organizations running recurring billing, invoice, or statement programs, the return address question has a more efficient answer than labels or custom printing alone. A custom-printed window envelope handles both addresses from a single envelope. The window in the lower-left of the face displays the recipient's delivery address from the document inside. The custom-printed corner card occupies the upper-left zone permanently. Both functions operate on the same face in separate, non-overlapping zones.
The result is an envelope that arrives fully addressed and fully branded without anyone writing, printing, or applying anything to the outer envelope. For monthly billing cycles of any meaningful size, this combination eliminates the two most repetitive manual steps in the entire mailing workflow at once. The delivery address comes from the document. The return address is part of the envelope. Nothing is added by hand.
For programs that include a reply envelope inside the outgoing piece, a number 9 envelope with a pre-printed return address creates the complete return path. The recipient does not need to address anything themselves. They insert their payment, form, or response, seal it, and mail it back.
Custom printing on a number 9 is available at Business Envelopes with no minimum order, across plain, tinted, and window variants. The same artwork file used for the outgoing number 10 adapts to the number 9 format. Visual consistency stays intact across both the outgoing and return pieces.
For under 20 pieces per month, return address labels or a self-inking stamp applied to regular envelopes are both practical options. The volume does not justify a custom-printed production run. For 50 to 200 pieces per month, custom-printed envelopes with the corner card applied during production become worth the setup. The label or stamp application step alone adds meaningful time at this volume, and the professional appearance improvement persists on every piece for every mailing cycle going forward.
At 200 pieces per month and above, the conversation shifts from whether to use custom printed envelopes to which format makes the workflow most efficient. Window formats for billing and invoice programs. Pre-printed corner card formats for correspondence programs. Self-seal closures for any format where sealing speed matters. At Business Envelopes, no minimum order applies to any format, which means custom printing is accessible at any volume, not just at the quantities where a commercial print run becomes economical.
Ordering envelopes in volume without testing a sample first is one of those decisions that feels efficient until it isn't. The window position doesn't align with your invoice template. The paper weight is lighter than expected, and the security tinting doesn't block the check amounts from showing through properly. The peel-and-seal strip activates before you've finished inserting the contents. None of these problems is obvious from a product description or a photograph. They show up when you hold the actual envelope and run it through your actual workflow.
This guide covers what a business envelope sample should tell you, the specific properties worth checking before you commit to any volume order, and the mistakes that consistently catch buyers who skipped the sample step.
A sample is a physical example of the specific envelope you're considering ordering, in the exact size, weight, closure type, and configuration you plan to buy, before the full order is placed. Not a photograph. Not a specification sheet. The actual envelope.
The purpose is verification, not preview. You already know what you want from the product description. The sample confirms whether the physical reality matches that description and whether the envelope performs correctly in your specific use case, which the description cannot tell you on its own.
Envelopes interact with more variables than almost any other supply category in a mailing operation. The paper weight determines whether your printer feeds it cleanly. The window position determines whether your document's address block lands behind the window correctly. The adhesive formulation determines whether the gum flap activates with the moisture application method your team uses. The security tinting determines whether it actually blocks your specific document's content from showing through under your office lighting conditions. The peel-and-seal liner determines whether it holds during storage when envelopes are pre-stuffed before sealing.
Every one of those properties is specific to your situation. The same envelope that works perfectly for one billing operation might have a window position that sits 0.25 inches too low for a different organization's invoice template. That 0.25-inch difference is invisible in a product listing and immediately obvious the moment you fold a live document and hold the envelope up to the light.
Paper weight and feel
Hold the sample in your hand and compare it to a piece of your standard 24 lb letterhead stock. The envelope should feel comparable, not noticeably flimsier. For any regular envelope used in client-facing correspondence, 24 lb white wove is the professional standard. For heavier document packages, 28 lb provides additional structural rigidity. If the sample feels thin relative to the contents it's meant to carry, the mismatch will communicate itself to the recipient before they open the envelope.
Window position alignment
If you're ordering any window envelope format, print a live copy of the document it will carry, fold it exactly as it will be folded in production, insert it into the sample envelope, and hold the sealed envelope up to a light source. The complete delivery address must show through the window with clear margins on all four sides. The address must not be cut off by the window frame on any edge. If any part of the address is obscured, either the window position doesn't match your document template or the fold depth needs adjustment before a full run.
This test takes under two minutes and it's the single most important check for any window format because USPS requires the full address to be visible through the window for automated processing. A misaligned window means your batch goes to manual sorting, which slows delivery and can generate non-compliance notices on high-volume presort programs.
Security tinting coverage
For check envelopes and security tinted formats, insert the most sensitive document type you'll be mailing through this program, a live check with account numbers or a statement with financial account data. Seal the envelope. Hold it against a bright light source at an angle. No content from the document should be readable through the envelope wall. If numbers, names, or account references show through the tinting, the tinting pattern on that specific envelope is insufficient for the sensitivity level of your contents. This test matters because tinting quality varies between manufacturers and the standard that protects a generic form letter is not always the standard that protects a payroll check.
Closure function and feel
For gum flap closures, moisten the flap using the same method your team will use in production and press firmly. Hold the sealed envelope for 30 seconds and then try to open the flap. A properly activated gum flap should not release without tearing. For self-seal peel and seal closures, peel the liner strip and press the flap down. The adhesive should bond immediately and hold against a firm tug without releasing. For flip and stick variants, flip the flap over and press. Bond should be immediate and consistent. Any closure that feels weak on a sample will fail at a measurably higher rate in production, particularly on high-speed runs where pressure application is less consistent than careful hand-testing.
Printer compatibility
If your operation prints addresses directly on the envelope face rather than using labels or window formats, feed the sample through your specific office laser or inkjet printer at your current envelope print settings. Confirm that the feed is clean with no jamming or misalignment, that the printed address sits in the correct position relative to the envelope face, and that the toner adheres cleanly without smearing when you run your thumb across it 30 seconds after printing. Standard 24 lb white wove envelopes feed through most laser printers reliably, but paper path differences between printer models mean that compatibility is always worth confirming on the actual unit that will handle production runs rather than assuming based on the weight specification alone.
Interior capacity and insertion feel
For any envelope where contents will be inserted by hand or by insertion equipment, fold your actual intended contents to the production fold, insert them into the sample, and assess the fit. Contents should slide in cleanly without forcing or catching on the flap seam. For stuffed pieces with multiple inserts, such as a cover letter plus a response card plus a pre-stamped return envelope, insert the complete package and confirm that the outer flap seats and seals cleanly. A sample that's comfortable with a single folded sheet but binds up with a full multi-insert suite will cause consistent jams and sealing failures in production.
The most common mistake that sample testing prevents
The mistake that shows up most often in volume envelope orders that go wrong is a window position mismatch on invoice and billing programs. An organization switches from a plain envelope plus label workflow to a window envelope workflow, places a volume order based on a manufacturer's standard window position spec, and discovers during the first billing run that their accounting software's invoice template puts the delivery address approximately half an inch higher than where the window sits. The entire batch of envelopes is unusable for the intended program until the invoice template is adjusted or a different window position is sourced.
Catching this with a sample before placing a volume order takes five minutes. Catching it after the order has arrived and the billing cycle is already running is an operational disruption of a different scale entirely.
What Business Envelopes offers before you commit
Business Envelopes carries every standard commercial envelope format across its full size and configuration range, with no minimum order on any product. This means the sample question has a practical answer that not every supplier can offer: rather than committing to a minimum quantity to test a format, you can order a small quantity of the exact product you want to evaluate before scaling to the volume your program requires.
For custom printed programs with your logo and return address, the PDF proof process serves a parallel function to a physical sample for the print side of the decision. A PDF proof shows exactly how your artwork will be positioned on the envelope face, in the correct proportions, before production begins. Nothing goes to press without your approval.
For blank stock across every size and format, including window envelopes, check envelopes, Tyvek envelopes, clasp envelopes, and self-seal formats, same or next-day production applies. Artwork on file for custom printed reorders means the production-to-delivery cycle for recurring programs is as short as the shipping transit time.
The gum flap on a standard envelope requires moisture to activate. That requirement is not a problem for sealing one envelope. It becomes a bottleneck, a consistency problem, and a quality control issue on any mailing run over 50 pieces. Someone has to moisten every flap, ensure the adhesive activates fully, hold each flap in contact until the bond forms, and not stack pieces prematurely before the gum has set. Inconsistent moisture produces inconsistent seals and the result is envelopes arriving partially open, or pieces that need to be resealed before they can go into the mail.
Self seal envelopes remove moisture from the equation. The adhesive is already active. Two formats deliver this differently: peel-and-seal, where a protected liner covers the adhesive until you intentionally remove it, and flip-and-stick, where a short tab folds onto an already-exposed adhesive panel. This guide explains how each works, which one is right for which situation, the mailing machine compatibility question that most buyers get wrong, and the honest labor cost math that explains why high-volume operations standardize on self-seal.
A peel-and-seal envelope has a pressure-sensitive adhesive strip on the flap, covered by a paper release liner until the moment of use. Peel away the liner to expose the adhesive, press the flap against the envelope body, and the adhesive bonds on contact under firm pressure. No moisture required. The bond forms through mechanical compression.
The release liner is what makes peel-and-seal the technically superior choice for pre-stocked inventory. The liner protects the adhesive strip from ambient humidity, heat, and accidental contact for the full shelf life of the stock. Envelopes stored in a supply room through summer months, stacked under other supplies, or left in a closed box for weeks or months will have identical adhesive performance when used as when they were manufactured. The liner maintains this.
Flip-and-stick does not have a release liner. The adhesive panel on the envelope body is exposed. In normal office conditions this is fine. In high-humidity environments, in envelopes stored loosely rather than boxed, or when the adhesive panel contacts other surfaces during handling, there is a meaningfully higher risk of partial pre-activation compared to a liner-protected strip. If your operation stocks envelopes for more than a few weeks before use, peel-and-seal is the safer inventory choice.
One thing no supplier explains: peel-and-seal closures are tamper-evident. When a sealed peel-and-seal envelope is reopened after the adhesive has fully bonded, the flap does not release cleanly it tears along the bond line. The result is visible physical damage to the flap that a recipient can identify before opening. For any mailing where envelope integrity on arrival is part of the professional standard (legal correspondence, financial documents, confidential HR communications), the tamper-evident property of peel-and-seal closures provides a basic chain-of-custody signal that gum flap envelopes do not.
Flip-and-stick closures do not have this tamper-evident property to the same degree. The bonded flap on a flip-and-stick envelope can sometimes be carefully opened and reclosed, depending on bond strength and how long since sealing. For correspondence where tamper evidence matters, peel-and-seal is the correct closure specification.
Standard commercial mailing machine inserters the mechanical systems that automatically fold, stuff, and seal envelopes in high-volume mailing operations are designed around moistenable gum flap envelopes. The inserter applies water to activate the gum adhesive during the automated sealing cycle. Peel-and-seal and flip-and-stick closures cannot be processed by standard mailing machine inserters.
This is not a minor technical note. If your operation uses a mailing machine inserter (Pitney Bowes, Hasler, Francotyp-Postalia, Neopost, or similar), you need gum flap envelopes, not self-seal. If you switch to self-seal format without checking equipment compatibility, the inserter will not seal the envelopes, and you will have 500 stuffed but unsealed pieces to process by hand. Check your inserter's specifications before ordering.
Self-seal closures are for hand-sealing operations. That covers the majority of small to mid-sized businesses and many billing departments that process mailings by hand. But it does not cover high-volume operations running mechanical insertion lines. Know which category your operation falls into before specifying a closure type.
Peel-and-seal and flip-and-stick envelopes cost slightly more per unit than gum flap. Here is why the premium is almost always justified for hand-sealing operations above a threshold volume.
Sealing 500 gum flap envelopes by hand with a sponge or bottle moistener takes approximately 2.0 to 2.5 hours at a consistent quality-conscious pace. At $18 per hour for mailroom labor, that is $36 to $45 in labor cost for the sealing step alone.
Sealing 500 self-seal envelopes (peel-and-seal or flip-and-stick) with a consistent one-step motion takes approximately 1.0 to 1.25 hours. The labor cost drops to $18 to $22.50.
Labor savings per 500-piece run: $18 to $22. Per-unit premium for self-seal over gum flap: typically $0.02 to $0.04 per envelope, or $10 to $20 per 500. The labor savings meet or exceed the per-unit premium within one to two runs. For any operation doing monthly billing runs of 200 or more pieces, self-seal total cost of ownership is lower than gum flap when labor is included in the calculation.
| Factor | Peel-and-Seal | Flip-and-Stick |
|---|---|---|
| Storage stability | Better liner protects adhesive from humidity and heat | Good exposed panel can partially pre-activate in high humidity |
| Per-piece sealing speed | Good peel then press | Slightly faster fold and press, no liner step |
| Tamper evidence | Yes flap tears visibly if reopened after bonding | Less reliable may reopen without clear damage |
| Mailing machine compatible | No | No |
| Best for | Envelopes stocked in advance, sensitive correspondence | Immediate-process high-volume hand-sealing runs |
Even protected peel-and-seal adhesive has limits. Store self-seal envelopes flat in a cool, dry environment. The recommended storage conditions are 65 to 75 degrees Fahrenheit and 40 to 55 percent relative humidity. High temperature and high humidity are the two conditions that reduce adhesive performance even through a release liner.
Do not store self-seal envelopes near heating vents, in direct sun exposure, or in attic or basement environments with temperature extremes. Do not compress large stacks of envelopes under heavy weight sustained compression can partially pre-activate the adhesive strip even through the liner. Store in original packaging, which is designed for the correct flat storage orientation, until the day of use.
The most ordered format in the self-seal category at Business Envelopes is the #10 window tinted self-seal. This format provides three efficiency improvements simultaneously: the window eliminates the addressing step by showing the recipient's address from the document inside, the security tint interior blocks sensitive document contents from transmitted light, and the self-seal closure removes the moisture activation step. For a billing department processing monthly statements, this single format eliminates the three most time-consuming per-piece manual steps: label application, envelope addressing, and moisture sealing. Browse all window options at window envelopes.
Self-seal formats are available across the full commercial range: #6 3/4 peel-and-seal for reply and donation response pieces; #9 peel-and-seal (plain, tinted, window, double window) for return mail nested inside #10 outgoing pieces; #10 peel-and-seal and flip-and-stick (plain, tinted, window, double window) for all standard business correspondence and billing; 6x9 peel-and-seal for flat-document mailing at letter rate; 9x12 peel-and-seal for flat-document programs; and Tyvek peel-and-seal in 6x9, 9x12, 10x13, and 10x15 through Tyvek envelopes. Browse the full self-seal range at businessenvelopes.com/self-seal-envelopes.
Business Envelopes carries peel-and-seal and flip-and-stick formats across every commercial envelope size, in plain, security tinted, window, and double window configurations all in one place with no minimums and free ground shipping. Our self-seal adhesive is calibrated for consistent bonding across the humidity and temperature range of normal US office environments. We have supplied self-seal envelopes to billing departments, accounting firms, healthcare offices, and direct mail operations since 1997. Custom printing is available on all self-seal styles. Blank stock ships same or next business day. For the complete range, see #10 envelopes, custom printed envelopes, and the full catalog.
Peel-and-seal has a release liner protecting the adhesive on the flap until you peel it away. Better for stocked inventory and sensitive correspondence (tamper-evident). Flip-and-stick has an exposed adhesive panel that the flap tab presses onto. Slightly faster for immediate-process high-volume sealing. Both seal without moisture.
No. Standard commercial mailing machine inserters are designed for moistenable gum flap envelopes and apply water during the automated sealing cycle. Peel-and-seal and flip-and-stick closures are incompatible with inserting equipment. If you run a mechanical inserter, you need gum flap envelopes.
Yes. Once a peel-and-seal envelope is sealed and the adhesive has fully bonded, reopening the flap tears it visibly along the bond line. This physical damage is apparent to the recipient before opening, providing a basic tamper-evident indicator. Flip-and-stick does not reliably provide the same tamper-evident property.
Peel-and-seal envelopes are unlikely to pre-seal because the release liner protects the adhesive from ambient contact until intentionally removed. Flip-and-stick envelopes have exposed adhesive panels and carry a higher risk of partial pre-activation in high-humidity or high-temperature storage environments. Store all self-seal envelopes flat, cool (65-75°F), and dry (40-55% RH) in original packaging.
Business Envelopes carries self-seal formats in #6 3/4, #9, #10, 6x9, 9x12, 10x13, and 10x15. Plus double window check and invoice formats. Tyvek peel-and-seal in 6x9, 9x12, 10x13, and 10x15.
At approximately 200 or more pieces per mailing session. The labor savings from self-seal sealing speed (roughly half the time of gum flap for the same volume) offset the per-unit premium within one to two mailing runs. At 500 pieces per month, self-seal saves approximately $18 to $22 in labor per run while costing $10 to $20 more per run in envelope premium.
Yes. All self-seal envelope styles support custom printing: logo, return address, and tagline. PDF proof before production. Ships in 7 to 10 business days from proof approval. Free shipping, no minimums.
A single window envelope eliminates the delivery address step by showing the recipient's address from the document inside. Your return address still needs to be printed, labeled, or pre-printed on the envelope face. A double window envelope eliminates both address steps simultaneously. Two precisely positioned poly-film panels display both the return address and the delivery address directly from the printed document inside. The envelope face carries no printing at all no labels, no addresses, no manual preparation of any kind.
For operations running recurring check mailing, payroll distribution, vendor payments, or monthly invoice programs, eliminating both addressing steps on every piece is a real operational improvement. This guide covers exactly how double window envelopes work, the critical format difference between check-style and invoice-style configurations, compatibility with every major US accounting platform, the security tinting requirement that is not optional for check mailing, and the test that prevents a batch run from producing 500 misaligned pieces.
The two windows are positioned on the envelope face to align with two specific zones on a standard printed document: the sender's return address in the upper portion and the recipient's delivery address in the lower portion. When the document is folded correctly and inserted, both address fields land directly behind the corresponding windows. Both display from the outside. Neither requires any additional printing or labeling on the envelope.
For check mailing specifically, the lower window is positioned to show the payee address from the check's payee line. The check amount, routing number, account number, MICR line, and memo field are all behind the opaque envelope body visible to no one before the envelope is opened. The upper window shows the payer's company name and return address from the check's header zone. Both addresses display through the windows; all financial data is hidden. This is a deliberate security architecture.
This is where most buyers make their first and most costly mistake. Check-format double window envelopes and invoice-format double window envelopes look nearly identical from the outside. They are not interchangeable.
Check-format double window envelopes are sized for the physical dimensions of a printed business check. The standard check size is 8-7/8 x 3-7/8 inches (the standard check strip on a voucher check page). The lower window on a check-format envelope is positioned to show the payee address from the check face while the upper window shows the payer return address from the check header. For voucher checks (where the check occupies the top third or bottom third of an 8.5 x 11 sheet with stubs above or below), the window positions on the double window envelope are calibrated to the specific voucher format. The check-format double window in the double window configuration (8-7/8 x 3-7/8") is a different physical size than a standard #10 invoice envelope.
Invoice-format double window envelopes use the standard #10 size (4-1/8 x 9-1/2 inches) and are windowed to align with the address block positions on standard invoice and statement layouts output by billing software. The upper window shows the company name and address from the invoice header. The lower window shows the customer's address from the invoice address block. This is the format for billing programs, not check programs.
Using an invoice-format envelope for check mailing: the windows will not align with the check's address fields. One window will show a portion of the check face that is not the address. Using a check-format envelope for invoices: similar misalignment. Verify the document type you are mailing before ordering. If you are unsure which format you need, order a small quantity of each and run the 10-sample test described below before committing to volume quantities.
Standard double window check envelopes align with the default check layout in QuickBooks Desktop, QuickBooks Online, Quicken, ADP, Intuit Full Service Payroll, and Sage 50. When checks are printed from these platforms on standard pre-printed check stock and inserted correctly into the envelope, both address fields land in the corresponding windows without any formatting adjustment. This compatibility is not accidental the double window check envelope format was specifically calibrated to the address block positions that US accounting software standardized around.
For invoice and statement mailing from QuickBooks, Xero, Sage, or similar platforms, the #10 invoice double window format aligns with the default invoice address block positions used by these platforms. When the invoice is printed and tri-folded, both company address (upper window) and customer address (lower window) land correctly.
Software updates can occasionally shift address block positions, and custom invoice templates may not match the standard positions. Always confirm compatibility when software is updated or when a new template is introduced. See all formats at double window envelopes and window envelopes.
Before any batch run with double window envelopes, run this test with ten fully assembled pieces. Print ten documents exactly as they will appear in production. Insert each one using the same fold method. Seal each one. Hold each to a bright light source and check all of the following: Is the complete delivery address visible through the lower window, with no characters cut off? Is the complete return address visible through the upper window? Is there at least 1/8-inch clearance between any address text and all four sides of each window? Is any financial data visible through either window or through the envelope body?
Ten samples catches variance that one sample misses. Slight differences in how the check is folded, minor paper curl from the printer, or a template that is marginally off all show up inconsistently across a small sample. If any of the ten samples shows a misalignment or visible financial data, fix the issue before the full run. A 500-piece batch of misaligned check envelopes is a full day's work to correct and a potential check security incident to manage.
All check-format double window envelopes carry security tint as a standard feature, not an optional upgrade, because the document inside a check mailing envelope contains routing numbers, account numbers, and check amounts. Any of these visible through the envelope body in postal transit creates a fraud risk that no organization should accept.
The security tint pattern is printed on the interior of the envelope body. The pattern blocks transmitted light through the paper, making the document contents unreadable when the envelope is held to a light source. The two window panels remain completely clear. The tinted body hides everything except what is deliberately positioned in a window panel.
For invoice double window envelopes, security tinting is strongly recommended when the invoice displays account balances, payment history, or personally identifiable information on the face. The same privacy principle applies: what a window displays is visible by design; what the envelope body hides should stay hidden.
Note that security tint is not standardized across the industry in pattern density or fold-zone coverage. Cheap security-tinted envelopes leave gaps in the tint pattern at the fold zones where the paper overlaps the exact zones where a light source can most easily transmit through multiple layers. Our security-tinted double window envelopes provide full interior coverage including fold zones.
Gum flap (moistenable) is required for mailing machine inserters. If your operation uses a mechanical inserter, gum flap is the only compatible format. For hand-sealing at any volume, choose peel-and-seal or flip-and-stick.
Peel-and-seal bonds on contact after the release liner is removed. Better when envelopes are stocked in advance, because the liner protects the adhesive from humidity during storage. Tamper-evident: if a sealed peel-and-seal envelope is reopened, the flap tears visibly.
Flip-and-stick folds a short tab onto an adhesive panel. No liner to remove, slightly faster per piece when processing immediately. Not compatible with mailing machine inserters. Browse all self-seal formats at self seal envelopes.
The #9 double window envelope (3-7/8 x 8-7/8 inches) is designed as a return piece nested inside an outgoing #10 invoice mailing. Used in billing programs where the customer's payment return envelope needs to carry both address fields (the customer's address showing through one window, the company's remittance address through the other) from the enclosed coupon or return document. The result: every piece in the mailing outgoing envelope, invoice, and return envelope is fully addressed from printed documents with no labels or manual addressing anywhere in the stack.
Business Envelopes has supplied double window check and invoice envelopes to US accounting departments, payroll operations, accounts payable teams, and billing departments since 1997. Our check-format double window envelopes are window-positioned to the industry standard calibrated to QuickBooks, Quicken, ADP, and Intuit formats. Our security tint provides full interior coverage including fold zones. Our invoice-format #10 double window envelopes align to the default address block positions of every major US billing platform.
No minimums, free ground shipping, same or next day on blank stock, 7 to 10 business days on custom printed orders. For the complete range of commercial envelopes for billing and accounts payable programs, see #10 envelopes, window envelopes, and custom printed envelopes.
A double window envelope has two clear poly-film panels on the front face. The upper panel shows the sender's return address and the lower panel shows the recipient's delivery address, both from the printed document inside. No labels or addressing needed on the envelope face.
Check-format double window envelopes are sized for printed business checks, with windows positioned to show the payee address while keeping all financial data hidden behind the opaque body. Invoice-format double window envelopes are standard #10 size with windows aligned to billing software address block positions. They are not interchangeable.
Yes. Both check and invoice double window formats are calibrated to the default check and invoice address block positions in QuickBooks, Quicken, ADP, and Sage. Always run the 10-sample test before any batch run to confirm alignment with your specific template and paper stock.
Checks contain routing numbers, account numbers, and dollar amounts. Security tinting blocks these from showing through the envelope body when held to light. The windows remain clear; the tinted body protects everything not deliberately positioned in a window panel. Full fold-zone coverage matters cheaper security patterns leave gaps at fold overlaps.
Print ten documents as they will appear in production, insert them, seal them, and hold each to a bright light. Confirm that both address fields display fully in their respective windows with 1/8-inch clearance on all sides, and that no financial data is visible through either window or the envelope body. Fix any alignment issues before the full batch run.
Yes. All double window styles support custom printing on the envelope face. PDF proof before production. Ships in 7 to 10 business days from proof approval. Free shipping, no minimums.
The #9 double window (3-7/8 x 8-7/8 inches) is used as a return reply piece nested inside a #10 outgoing mailing. It shows both the customer's address and the company's remittance address from the enclosed return document fully addressed with no labels anywhere in the mailing package.
Most envelopes fail the same ways. A corner tears under pressure from postal sorting equipment. Paper softens in humidity and loses structural integrity. An edge punctures under compression in a mail tray. Standard paper envelopes are strong enough for everyday domestic mail under normal conditions. They are not strong enough for every document, every route, or every environment and when they fail, the document they were carrying fails with them.
Tyvek envelopes are built from DuPont high-density polyethylene fiber, and the failure modes that affect paper do not apply to polyethylene. This guide explains why at the material level, covers every size available, provides the quantified postage savings math against kraft, addresses the DuPont recycling program that most suppliers do not mention, and identifies which documents and industries use Tyvek as their default rather than as a specialty upgrade.
Tyvek is manufactured by DuPont using a proprietary process called flash spinning. High-density polyethylene is dissolved in a solvent and then flash-spun extruded at high pressure and temperature through a spinneret, causing the solvent to instantly vaporize and the polyethylene to solidify into very fine fibers. These fibers are deposited randomly in all directions onto a moving belt and bonded together by heat and pressure into a continuous sheet structure. No adhesives. No additional binders. The sheet is purely polyethylene fiber.
The random fiber deposition is the key to Tyvek's tear resistance. Paper is made from cellulose fibers that align in a dominant direction during wet-sheet manufacturing. That alignment creates a grain direction, and paper tears most easily parallel to that grain. Every paper envelope has a structural weak axis. Tyvek's flash-spun fiber deposition is omnidirectional there is no dominant fiber alignment, therefore no preferred tear direction. Industry testing places Tyvek at approximately 10 times the tear strength of standard paper in the same weight range.
Polyethylene is a hydrophobic polymer water molecules cannot bond to the polyethylene molecular chain the way they bond to cellulose in paper. This is structural, not a surface treatment. A paper envelope exposed to rain, high humidity, or a wet sorting conveyor absorbs moisture, which softens the cellulose fibers, reduces tear strength, and can cause the gum seal to partially release. Tyvek does not absorb moisture in any of these conditions. The structural integrity is identical whether the envelope is dry or rain-soaked.
| Property | Tyvek (14 lb) | Brown Kraft (28 lb) |
|---|---|---|
| Tear resistance | Approximately 10x stronger than paper; no grain direction | Adequate for normal domestic mail; tears at corners under sustained pressure |
| Moisture resistance | Structural polyethylene does not absorb water | Softens and weakens when wet or in sustained humidity |
| Puncture resistance | High fibers flex and distribute force laterally | Moderate punctures at sharp-impact concentration points |
| Envelope weight (9x12) | ~0.3 oz | ~0.6 oz |
| Postage impact | 0.3 oz lighter per piece; meaningful at volume bracket margins | Heavier envelope contributes to total piece weight |
| Laser printer compatible | No polyethylene softens at laser print temperatures | Yes |
| Custom printing | Inkjet-compatible labels applied to face; not direct printing | Direct custom printing available |
| Recyclability | DuPont Tyvek recycling program; single-material polyethylene | Standard paper recycling |
| Post-industrial recycled content | Average 10% post-industrial waste content | Varies by manufacturer |
The compact Tyvek format. Holds a half-folded 8.5 x 11 sheet, 5x7 photos, small booklets, and multi-page packets. At exactly 6 inches tall, this format qualifies for USPS letter-rate postage on contents under 3.5 oz and under 1/4 inch thick the same letter-rate advantage as the paper 6x9, combined with Tyvek's tear and moisture resistance. For organizations mailing small documents that must arrive intact regardless of weather conditions.
The most widely ordered Tyvek format. Holds a standard 8.5 x 11 sheet completely flat with approximately 1/4-inch clearance on each side. Used by law offices for executed agreements, healthcare facilities for patient records, financial advisors for client account summaries, government agencies for benefit and identification correspondence, and tax preparers mailing completed returns. The 9x12 Tyvek at 14 lb runs approximately 0.3 oz lighter per piece than a 28 lb kraft 9x12 at 500 pieces, that is 150 oz or about 9.4 lbs of envelope weight saved, which translates to postage bracket savings on any pieces sitting at an ounce threshold.
For thicker document packets, legal-size 8.5 x 14 sheets mailed flat, and any content stack that would create seam stress in a 9x12. Architecture firms routing drawings at reduced scale, accounting firms sending audit packages, legal practices handling multi-document client submissions. The extra inch on each dimension reduces seam stress on thick stacks and makes reliable sealing easier on heavy packets the same logic that makes 10x13 correct for thick content in kraft applies equally in Tyvek.
The largest Tyvek size. For oversized documents, multi-page bound reports, large certificates, and folded posters laid flat. Design studios, marketing agencies sending printed materials, and organizations delivering awards where presentation on arrival is part of the communication. When 10x13 Tyvek is not quite large enough, this is the correct format.
Every mailing piece has a total weight: envelope plus contents. USPS charges postage on total piece weight. A Tyvek 9x12 envelope weighs approximately 0.3 oz. A brown kraft 9x12 weighs approximately 0.6 oz. On a document mailing where the contents weigh 0.7 oz, the total piece weight is 1.0 oz in Tyvek (one-ounce bracket) and 1.3 oz in kraft (second-ounce bracket, adding $0.24 in postage).
If 30 percent of your monthly mailing volume sits in this zone contents that land in the second ounce bracket because of the kraft envelope weight but would land in the first with Tyvek switching to Tyvek saves $0.24 per affected piece. At 200 affected pieces per month, that is $48/month or $576/year in postage savings from one material change that also improves document protection. Weigh your standard assembled mailing in both envelope formats before making the decision. The savings are only real if your pieces actually cross a bracket boundary.
Every Tyvek envelope we carry uses the Kwik-Tak closure system. The peel-and-seal format is the correct closure for Tyvek for a structural reason that most suppliers do not explain: standard moistenable gum adhesives are water-activated, and polyethylene's moisture resistance means that water-activated adhesive applied to a Tyvek surface does not bond with the same reliability as on paper. Kwik-Tak is a pressure-sensitive adhesive that bonds on contact through mechanical compression rather than moisture chemistry. No water required, consistent bond strength on the polyethylene surface, calibrated to match the tear resistance of the Tyvek material so the seal does not fail before the envelope does.
If sealing failures occur on Tyvek envelopes, the cause is almost always overstuffing. When the envelope contents are pushing against the seam from the inside, the Kwik-Tak adhesive is under constant tension from the moment it closes. The seal holds the contents rather than the flap, and eventually the tension exceeds the bond strength. The solution is to size up use 10x13 instead of 9x12 for the thick packets not to change the closure type.
Tyvek cannot be run through a standard laser printer. Laser printers operate at fusing temperatures of 150 to 200 degrees Celsius, which is sufficient to soften polyethylene and cause the material to deform, jam the printer, or bond to the fuser roller. For addressing Tyvek envelopes, use inkjet-compatible adhesive address labels printed on a standard inkjet printer and applied to the envelope face.
Before any volume labeling run on Tyvek, test for ink smearing and drying time. Tyvek's non-absorbent surface means inkjet ink sits on the surface rather than absorbing into the fibers as it would on paper. Some inkjet inks take longer to dry on Tyvek and smear if stacked immediately after printing. Run a small test batch (10 to 15 pieces), allow standard drying time, then test for smearing before committing to a full production run.
Tyvek is a single-material polyethylene product with no mixed materials, laminates, or adhesive layers which makes it technically straightforward to recycle compared to multi-layer packaging materials. DuPont operates a Tyvek recycling program that collects used Tyvek envelopes and mailers for reprocessing into new polyethylene products. The average Tyvek envelope contains approximately 10 percent post-industrial recycled content. For organizations tracking sustainability metrics, the DuPont recycling program provides a disposal pathway that standard curbside paper recycling does not cover (Tyvek is not accepted in paper recycling streams because it is not paper).
Business Envelopes carries Tyvek mailing envelopes in 6x9, 9x12, 10x13, and 10x15 inches. All are bright white with Kwik-Tak peel-and-seal closure. Free ground shipping on every order, no minimums, serving US businesses since 1997. Browse all at businessenvelopes.com/tyvek-envelopes. For flat-document mailing where Tyvek durability is not required, see 9x12 envelopes and clasp envelopes. For the full size catalog, see all items.
Business Envelopes has supplied Tyvek envelopes to US law offices, healthcare facilities, financial services firms, government agencies, and document-critical mailing programs since 1997. We carry genuine DuPont Tyvek in all four standard sizes with Kwik-Tak peel-and-seal closure not a substitute polyethylene material marketed under a generic "synthetic" label. The material specification matters because knock-off synthetic envelopes vary significantly in fiber bonding density, tear resistance, and closure adhesive compatibility. With Business Envelopes, you get the material that US postal and legal standards are written around.
No minimums, free shipping, same or next business day on all stock. For related document-mailing formats, see self seal envelopes and for organizations needing custom printed flat-document envelopes, see custom printed envelopes.
DuPont high-density polyethylene fiber, flash-spun into a continuous omnidirectional bonded sheet structure. No adhesives, no laminates, purely polyethylene. The process produces a material approximately 10 times stronger in tear resistance than standard paper.
Yes, structurally. Polyethylene does not absorb moisture the resistance is built into the molecular structure of the material, not applied as a coating. Rain exposure, sustained humidity, and wet handling conditions that weaken paper do not affect Tyvek.
6x9, 9x12, 10x13, and 10x15 inches. All are bright white with Kwik-Tak peel-and-seal closure. The 9x12 is the most widely ordered size for standard 8.5 x 11 flat-document mailing.
No. Laser printer fusing temperatures (150 to 200 degrees Celsius) soften polyethylene and can damage the printer. Use inkjet-compatible adhesive address labels applied to the face. Test for ink drying time on Tyvek before a volume run ink sits on the surface rather than absorbing.
A Tyvek 9x12 weighs approximately 0.3 oz vs 0.6 oz for kraft. On pieces where the kraft envelope weight pushes total piece weight over an ounce threshold, switching to Tyvek saves the additional-ounce postage charge ($0.24 at current rates) on every affected piece. Measure your assembled pieces in both envelope formats to determine if your program crosses a bracket boundary.
Yes, through the DuPont Tyvek recycling program. Tyvek is single-material polyethylene with approximately 10% post-industrial recycled content. It is not accepted in standard paper recycling streams because it is not paper.
Law offices (executed contracts, title documents), healthcare facilities (patient records, lab reports), financial services firms (audit packages, signed agreements), government agencies (benefit correspondence), tax preparers, and any organization where document arrival condition is legally or operationally non-negotiable.